2. Assembly
2−12
Festo P.BE−CPX−SYS−EN en 0902e
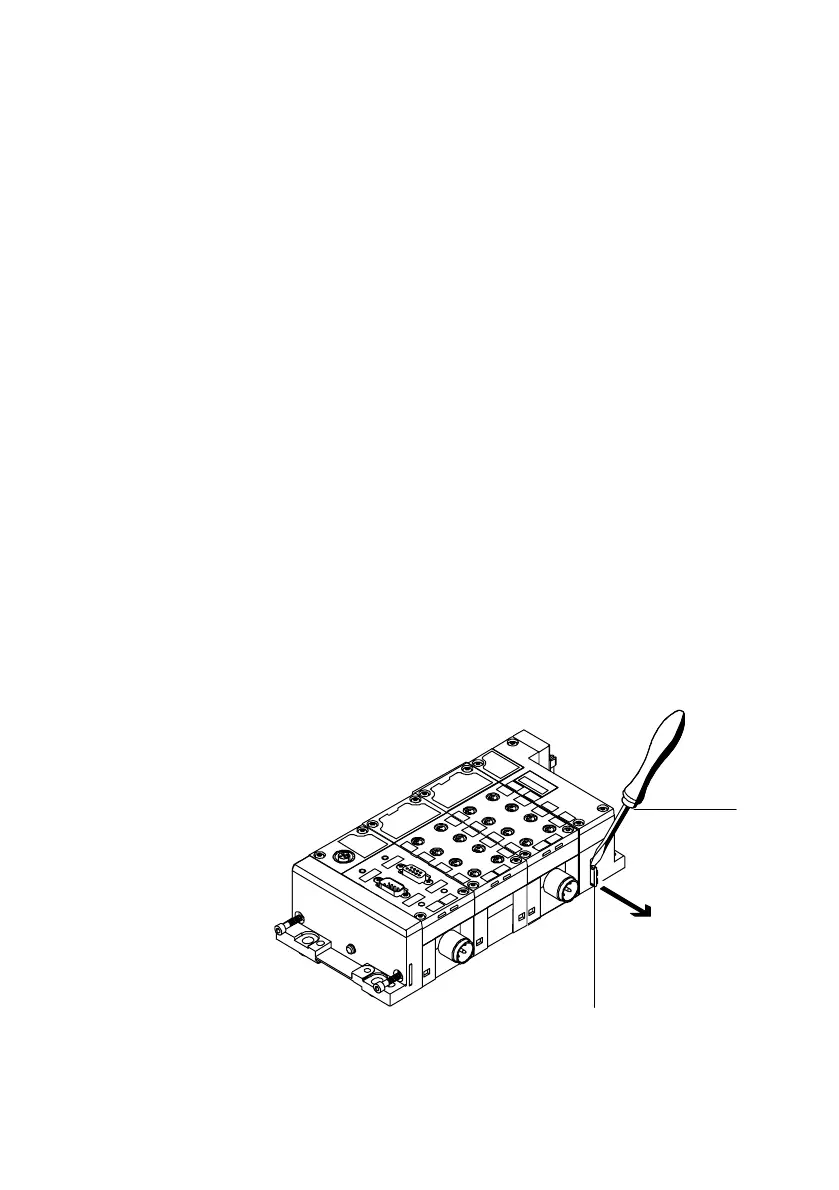
Dismantling Remove the electric modules or interlinking blocks as follows
(see also following Fig.2/5):
1. Unscrew and remove completely the tie rod screws in the
left−hand end plate (see Fig.2/2). The interlinking blocks
are now held together only by the electrical plug con
nectors.
2. Remove the left−hand end plate from the tie rods.
3. To remove the
interlinking blocks:
Loosen the electrical plug connectors on the relevant in
terlinking block by taking the interlinking block apart
carefully and without tilting it.
4. Pull the loosened interlinking blocks away from the tie
rod.
5. To remove a tie rod:
With the aid of a suitable tool, e.g. a screwdriver, remove
the appropriate fastening and locking
plate in the pneu
matic interface or in the right−hand end plate (see
Fig.2/5).
1 Screwdriver
2 Fastening plate
and locking plate
in the pneumatic
interface or the
right−hand end
plate
1
2
Fig.2/5: Fastening plate and locking plate in the pneumatic interface