2. Assembly
2−19
Festo P.BE−CPX−SYS−EN en 0902e
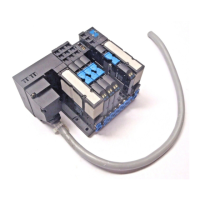
3. Carefully pull apart the two halves of the CPX terminal
without tilting them.
4. Repeat steps 1 to 3 on the left−hand side of the interlink
ing block you wish to remove.
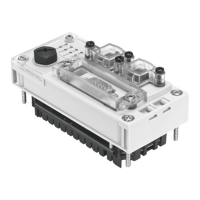
Assembly To insert a module or interlinking block, proceed as follows:
1. Separate the CPX terminal at the place where you wish to
insert the
new component by loosening the two connector
screws (see Fig.2/10), if you have not already done so.
Caution
When interlinking blocks are arranged in series:
Make sure that the electric plug connectors of the interlink
ing blocks are not bent.
2. Align the CPX terminal on a flat surface so that the compo
nents are not offset. The bolts attached to the left−hand
side of the interlinking block help you with the
alignment.
3. Slide the interlinking blocks together carefully and with
out tilting.
4. Screw the connector screws a few turns into the adjacent
interlinking block.
5. Then tighten the screws equally with a sizeSW4 internal
hexagon socket with 3Nm ±0.3Nm.
6. Before fitting the connection blocks, make sure that the
NBR seal is seated in the corresponding groove
on the
interlinking block without twisting (see Fig.2/10).
7. Assemble the CPX terminal (see section2.4).