AF0N0089m
fig. 192
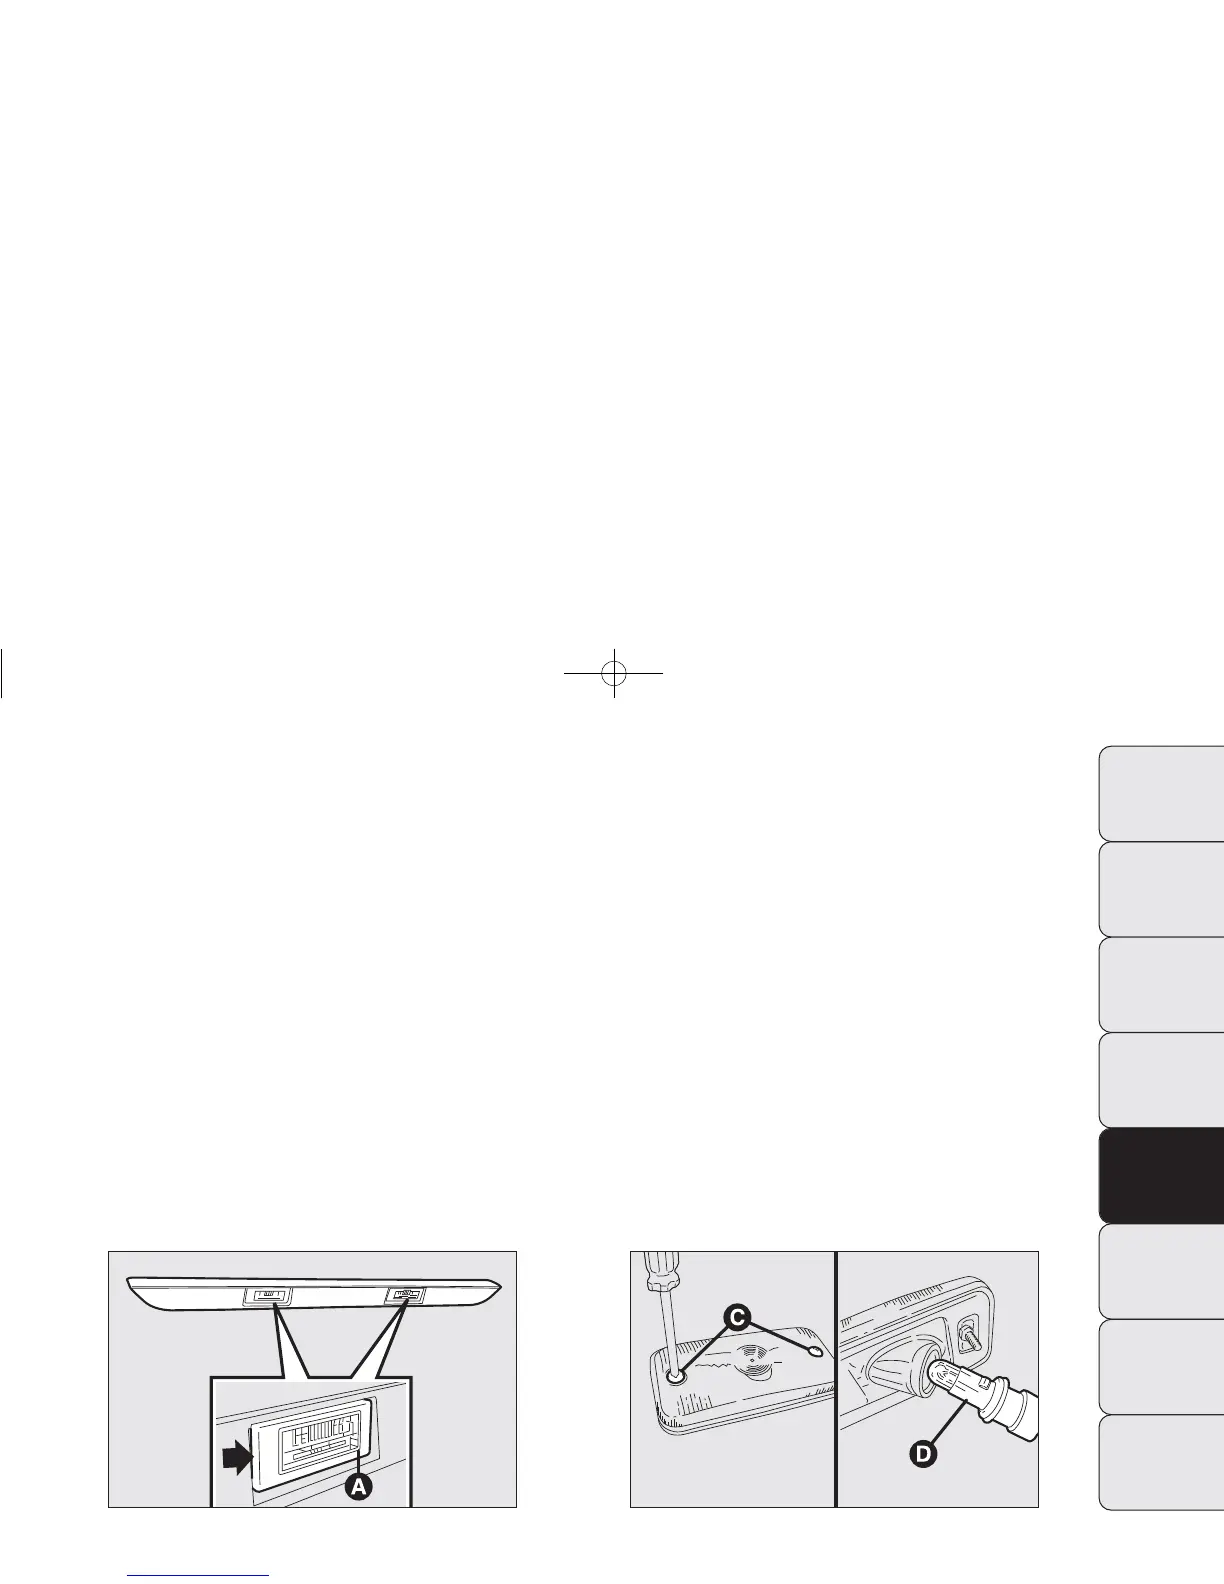
F0N0244m
fig. 193
REPLACING AN INTERIOR BULB
For the type of bulb and power rating, see “When need-
ing to change a bulb”.
FRONT CEILING LIGHT
Proceed as follows to replace the bulbs:
❒
work in the points shown by the arrows and remove
the ceiling light A-fig. 194;
❒
open the protection door B-fig. 195;
❒
replace bulbs C-fig. 195 releasing them from the side
contacts; make sure that new bulbs are correctly
clamped between contacts;
❒
close the door B-fig. 195 and secure the ceiling light
A-fig. 194 in its housing locking it properly.
SIDE MARKER LIGHTS (where provided)
To change the bulb proceed as follows:
❒
for extra-long van:
– undo both fastening screws C-fig. 193 and remove
the light;
– remove the bulb-holder D on the rear of the light,
turning through 1/4 turn;
– remove the snap-fitted bulb and replace.
❒
for chassis cabs with platform:
– remove bulb-holder on the rear of the light, turning
through 1/4 turn;
– remove the snap-fitted bulb and replace.
187
DASHBOARD
AND CONTROLS
SAFETY
STARTING
AND DRIVING
WARNING LIGHTS
AND MESSAGES
IN AN EMERGENCY
MAINTENANCE
AND CARE
TECHNICAL
SPECIFICATIONS
INDEX
165-198 DUCATO LUM EN 12-02-2010 8:44 Pagina 187