GE Healthcare Senographe DS
Revision 1 Service Information and Procedures Class A 2385072-16-8EN
Job Card D/R A222 - Clutch and Cable
Page no. 1229 Chapter 9
JC-DR-A-222.fm
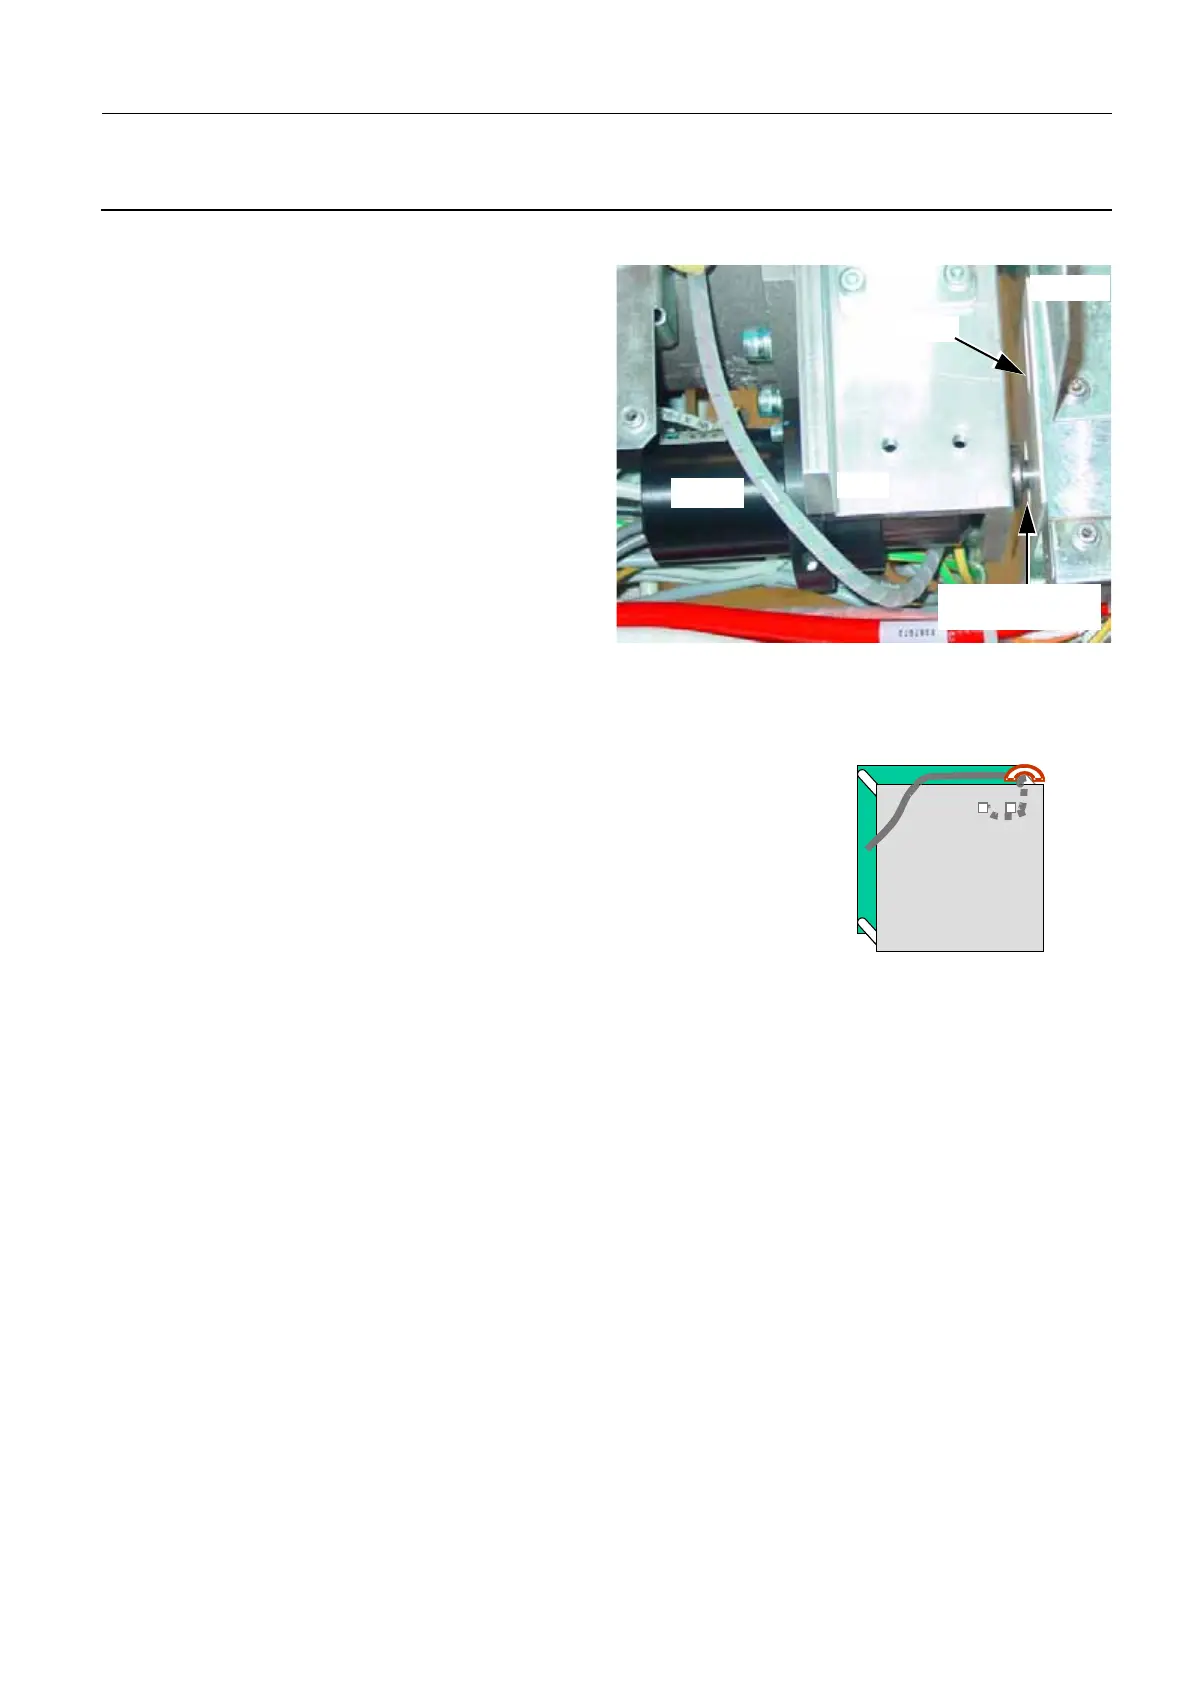
6-2 Reassembly of the Clutch
1. Attach the supporting ring to the new clutch (one
screw - 5 mm allen wrench).
2. Position the new clutch so that the gap between
the plastic on the side of the detector and the
clutch is 2 mm. Refer to illustration opposite.
Use a 2 mm gauge (2 mm allen wrench or suit-
able feeler gauge) to ensure that the gap
2 mm(-0 mm, +0.3 mm).
3. Apply blue Loctite 243 on the threads of the two
screws that secure the clutch. Then tighten the
two screws (2) to secure the clutch to the Arm
(4 mm allen wrench).
4. Reconnect the clutch cables of the new clutch to
the Rotation Board connectors, as follows:
• W218 cable to J8 connector
• W221 cable to J7 connector
6-3 Check Cable Positioning
Ensure that the clutch cables are correctly positioned, and secured to the
spacer of Rotation Board PL202 by a cable tie as shown:.
Clutch
Detector
Allen key or gauge
Plastic
Arm
2 mm gap required

 Loading...


