Chapter 9 Page no. 1380
JC-DR-A-287.fm
GE Healthcare Senographe DS
Revision 1 Service Information and Procedures Class A 2385072-16-8EN
Job Card D/R A287 - Collimator DC-DC Board
6. PROCEDURE
6-1 Disassembly of the Collimator Control Board
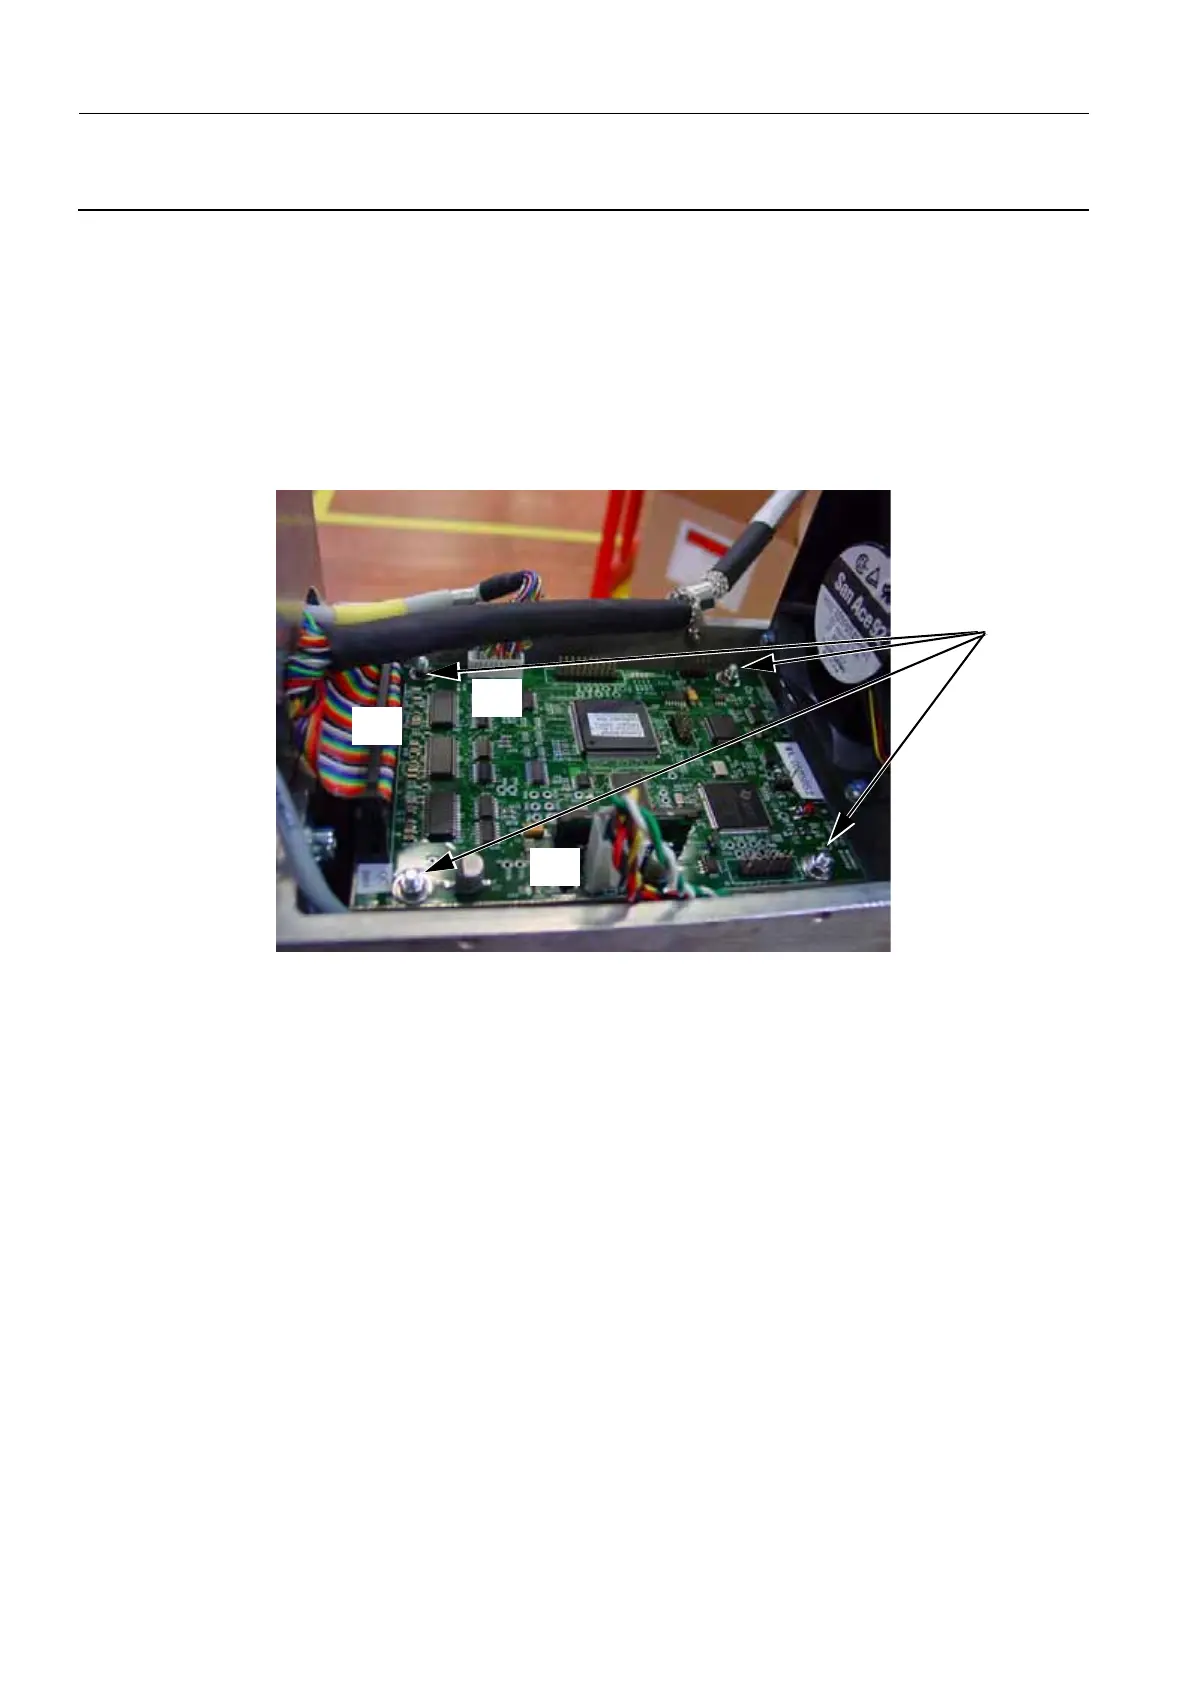
1. Disconnect all three cables:
- Collimator cable (connector J8).
- Power cable (connector J9).
- CAN cable (connector J10).
Do not move the cables too much so that it is easier to reconnect them when you reinstall the Colli-
mator Control Board.
2. Release and remove the four nuts and washers securing the Collimator Control Board (4) (5.5 mm
open-ended wrench).
3. Remove the Collimator Control Board to expose the Collimator DC-DC board.
6-2. Change the Collimator DC-DC Board
1. Unplug all connectors from the Collimator DC-DC Board.
2. Remove the four nuts securing the Collimator DC-DC Board (5.5 mm Open-ended wrench).
3. Remove the faulty Collimator DC-DC Board.
4. Carefully put the new Collimator DC-DC Board in place, and secure it to the framework with the four
nuts (5.5 mm Open-ended wrench).
5. Reconnect cables to the Collimator DC-DC Board.
1
J8
J9
J10

 Loading...


