Chapter 9 Page no. 1428
JC-DR-A-313.fm
GE Healthcare Senographe DS
Revision 1 Service Information and Procedures Class A 2385072-16-8EN
Job Card D/R A313 - Trackball
6 PROCEDURE FOR ERGOTRON A ARMS
6-1 Disassembly of Trackball on Ergotron A Arms
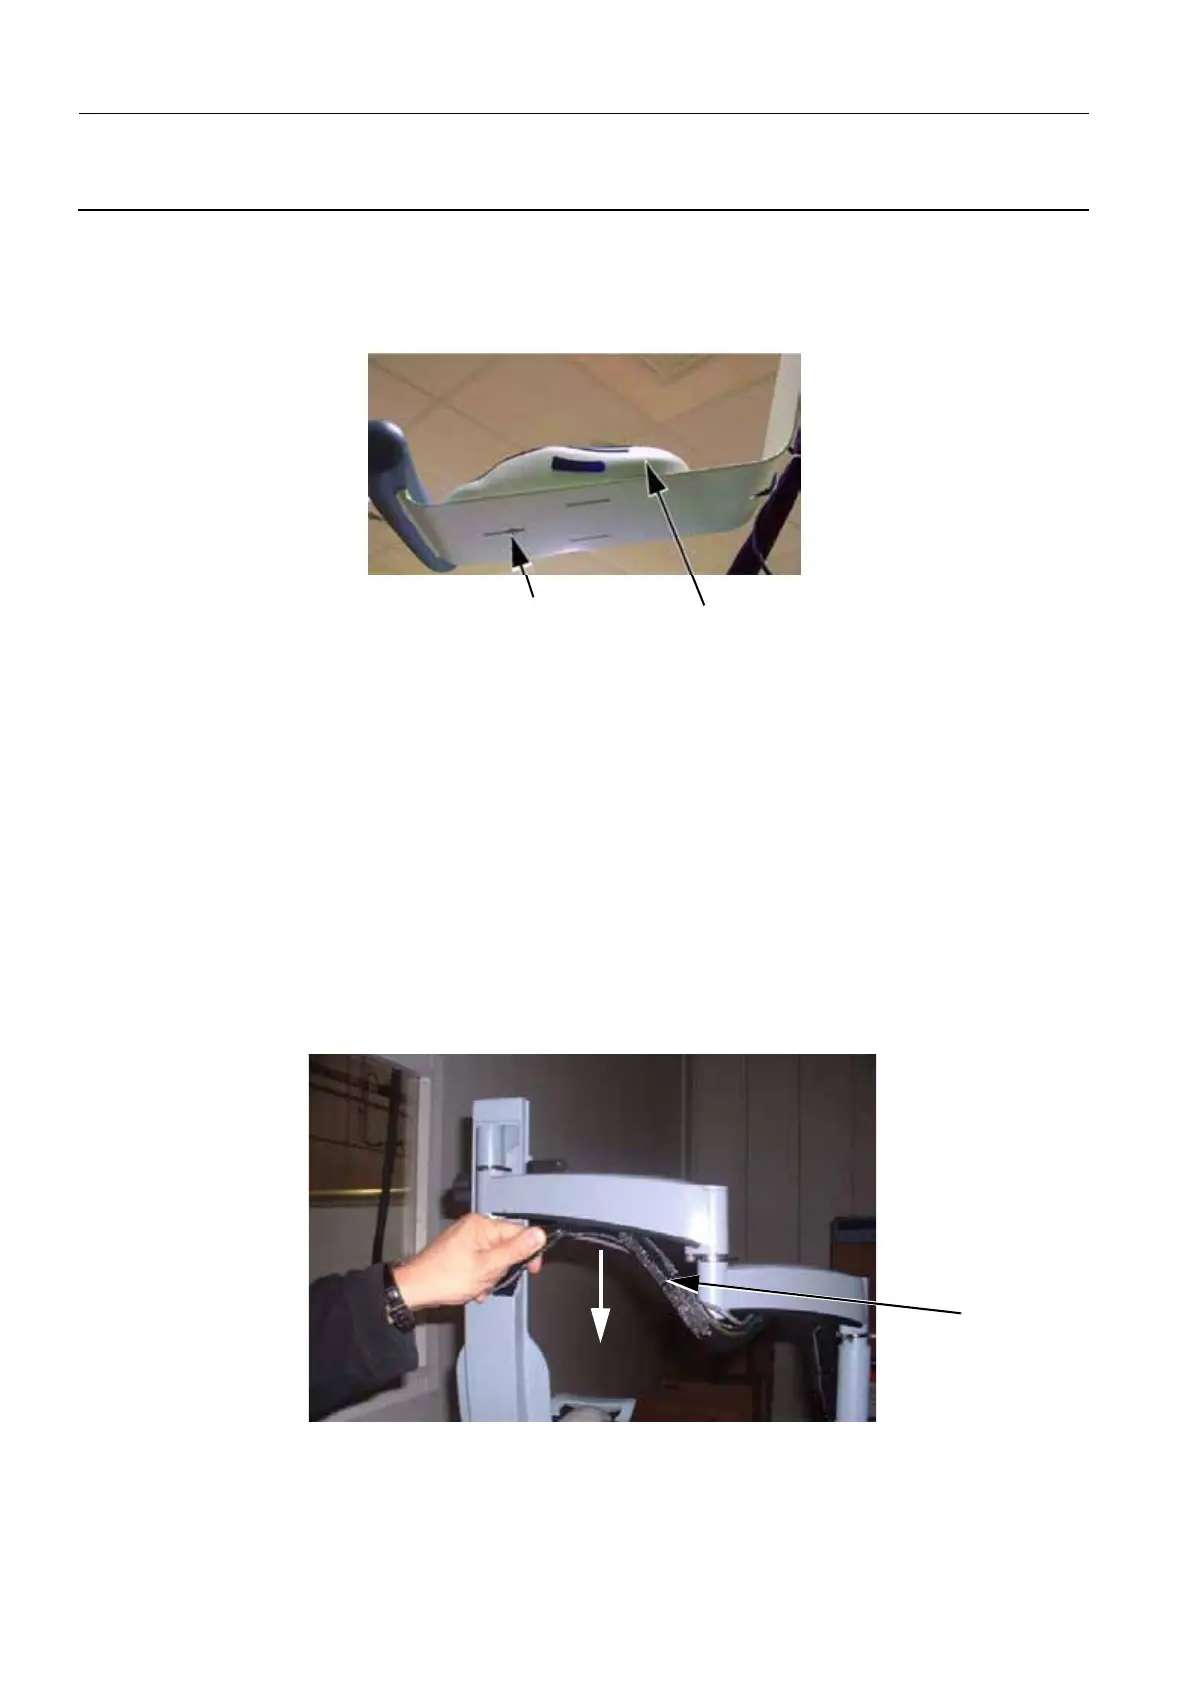
1. Locate the Control Station Trackball (1).
2. Release and remove the trackball securing screw (2) (cross-head screwdriver).
3. Unplug the trackball USB cable from the AWS workstation rear panel.
6-2 Reassembly of New Trackball on Ergotron A Arms
Reverse the disassembly procedure.
7 PROCEDURE FOR ERGOTRON B ARMS
7-1 Disassembly of Trackball on Ergotron B Arm
1. Unplug and remove the X-ray Console.
2. Remove Control Station Top Cover. See Job Card PHY A040 - Remove/Reinstall Control Station
Covers on page 503.
3. Remove Control Station Omega Cover. See Job Card PHY A040 - Remove/Reinstall Control Station
Covers on page 503.
4. Carefully extract the harness (1) from the rotative arm.
5. Cut the cable ties from the monitor harness to free the trackball cable.
6. Disconnect the trackball cable from the USB extension cable.
7. Extract the trackball cable from the opening of the rotative arm support (2) and from the trackball and
2
1
1

 Loading...


