Chapter 9 Page no. 1440
JC-DR-A-314.fm
GE Healthcare Senographe DS
Revision 1 Service Information and Procedures Class A 2385072-16-8EN
Job Card D/R A314 - External CD-RW Unit
7-2 Install and connect the new CD-RW unit
1. Power OFF the system.
2. Remove the Control Station top cover (see Job Card PHY A040 - Remove/Reinstall Control Station
Covers on page 503).
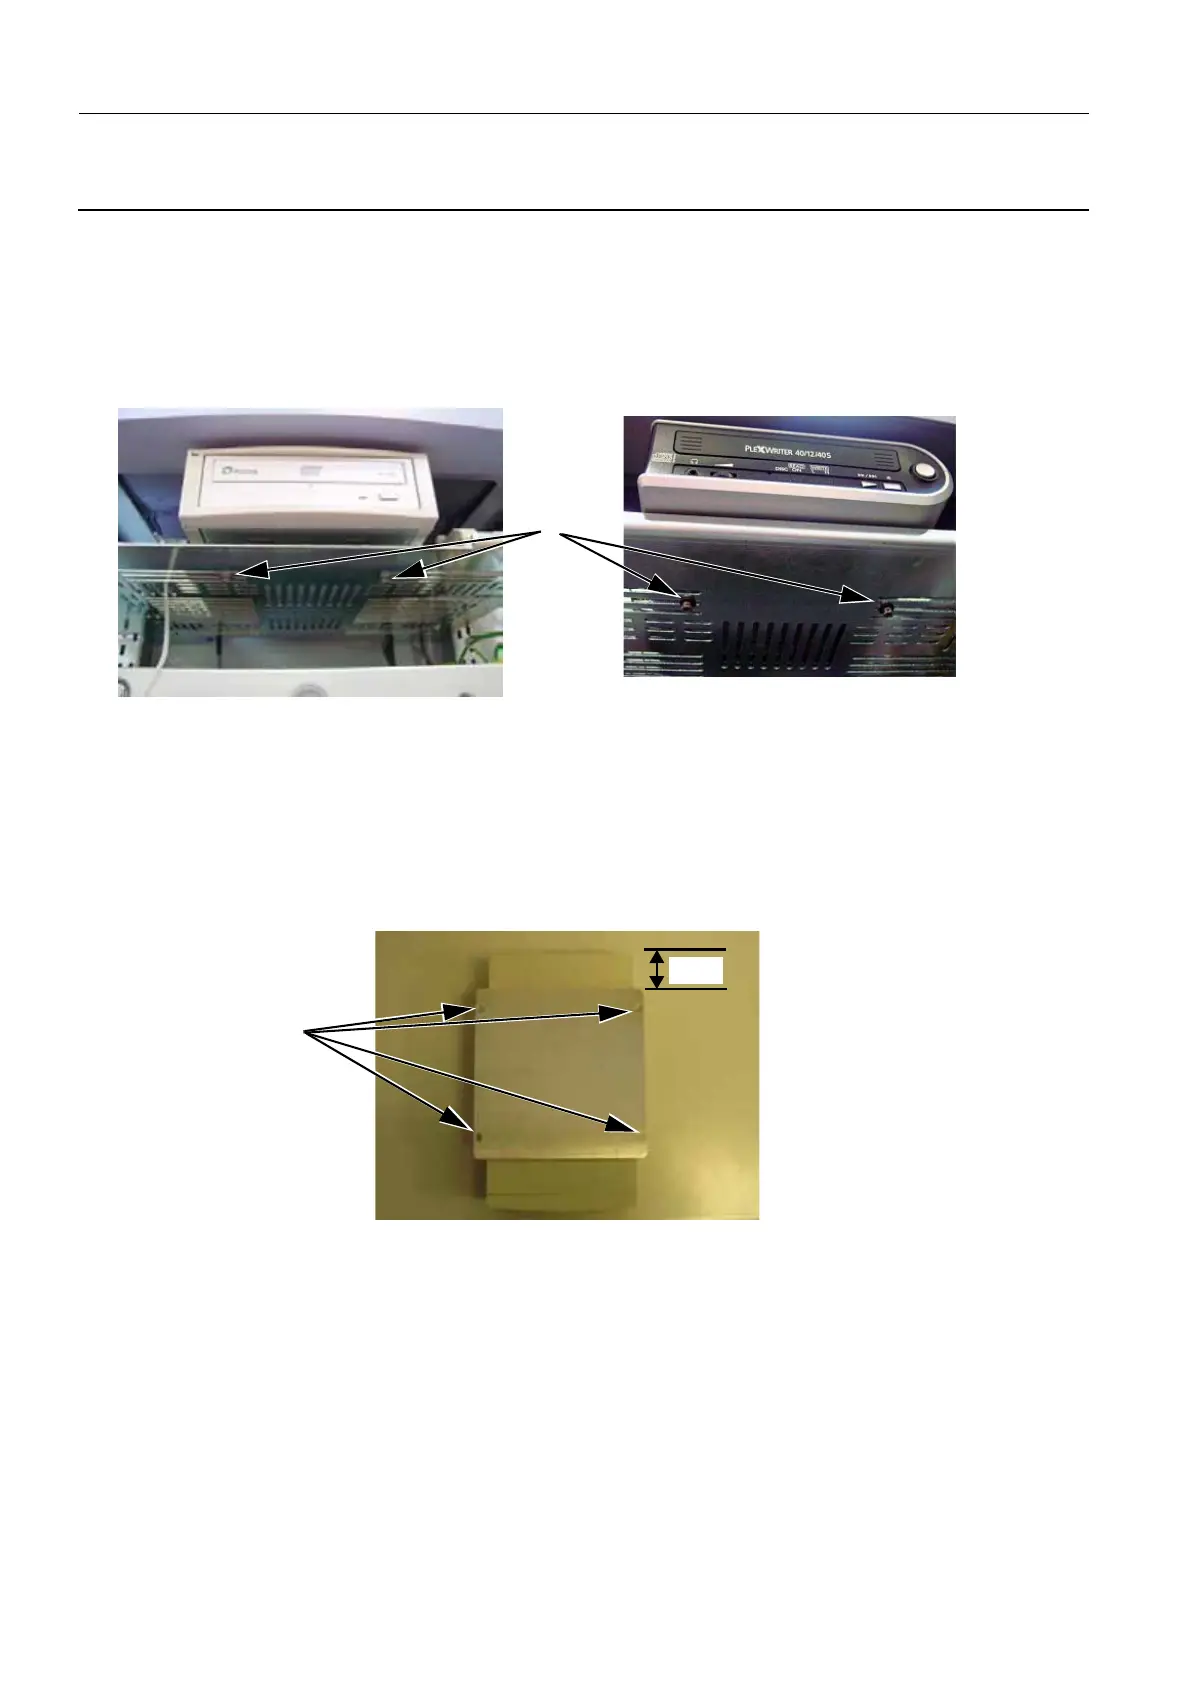
3. Untighten and remove the two screws and washers (1) (3 mm allen wrench) that secure the old CD-
RW unit to the Control Station.
Note:
Older CD-RW units that exist in some systems are not mounted in a housing unit. Whereas newer
CD-RW units that exist in systems are mounted in a housing unit.
4. Carefully slide the old CD-RW unit from the Control Station, remove the power and SCSI cable from
the back panel of the old CD-RW unit and remove it from the Control Station. Leave the power and
SCSI cable in a convenient place so that they can be attached to the new CD-RW unit.
5. For newer CD-RW units that need replacing, untighten the four screws (2) that clamp the old CD-RW
unit to the housing unit. Slide out the old CD-RW unit from the housing unit.
6. Slide the new CD-RW unit into the housing unit. Make sure that the distance between the back of the
CD-RW unit and the back of the housing unit is 4 cm.
7. Tighten the four screws (2) so that the new CD-RW unit is securely clamped in the housing unit.
1
2
4cm

 Loading...


