GE Healthcare Senographe DS
Revision 1 Service Information and Procedures Class A 2385072-16-8EN
Job Card PHY A001 - Unpacking the Gantry and Generator Cabinet
Page no. 395 Chapter 6
JC-PHY-A-001.fm
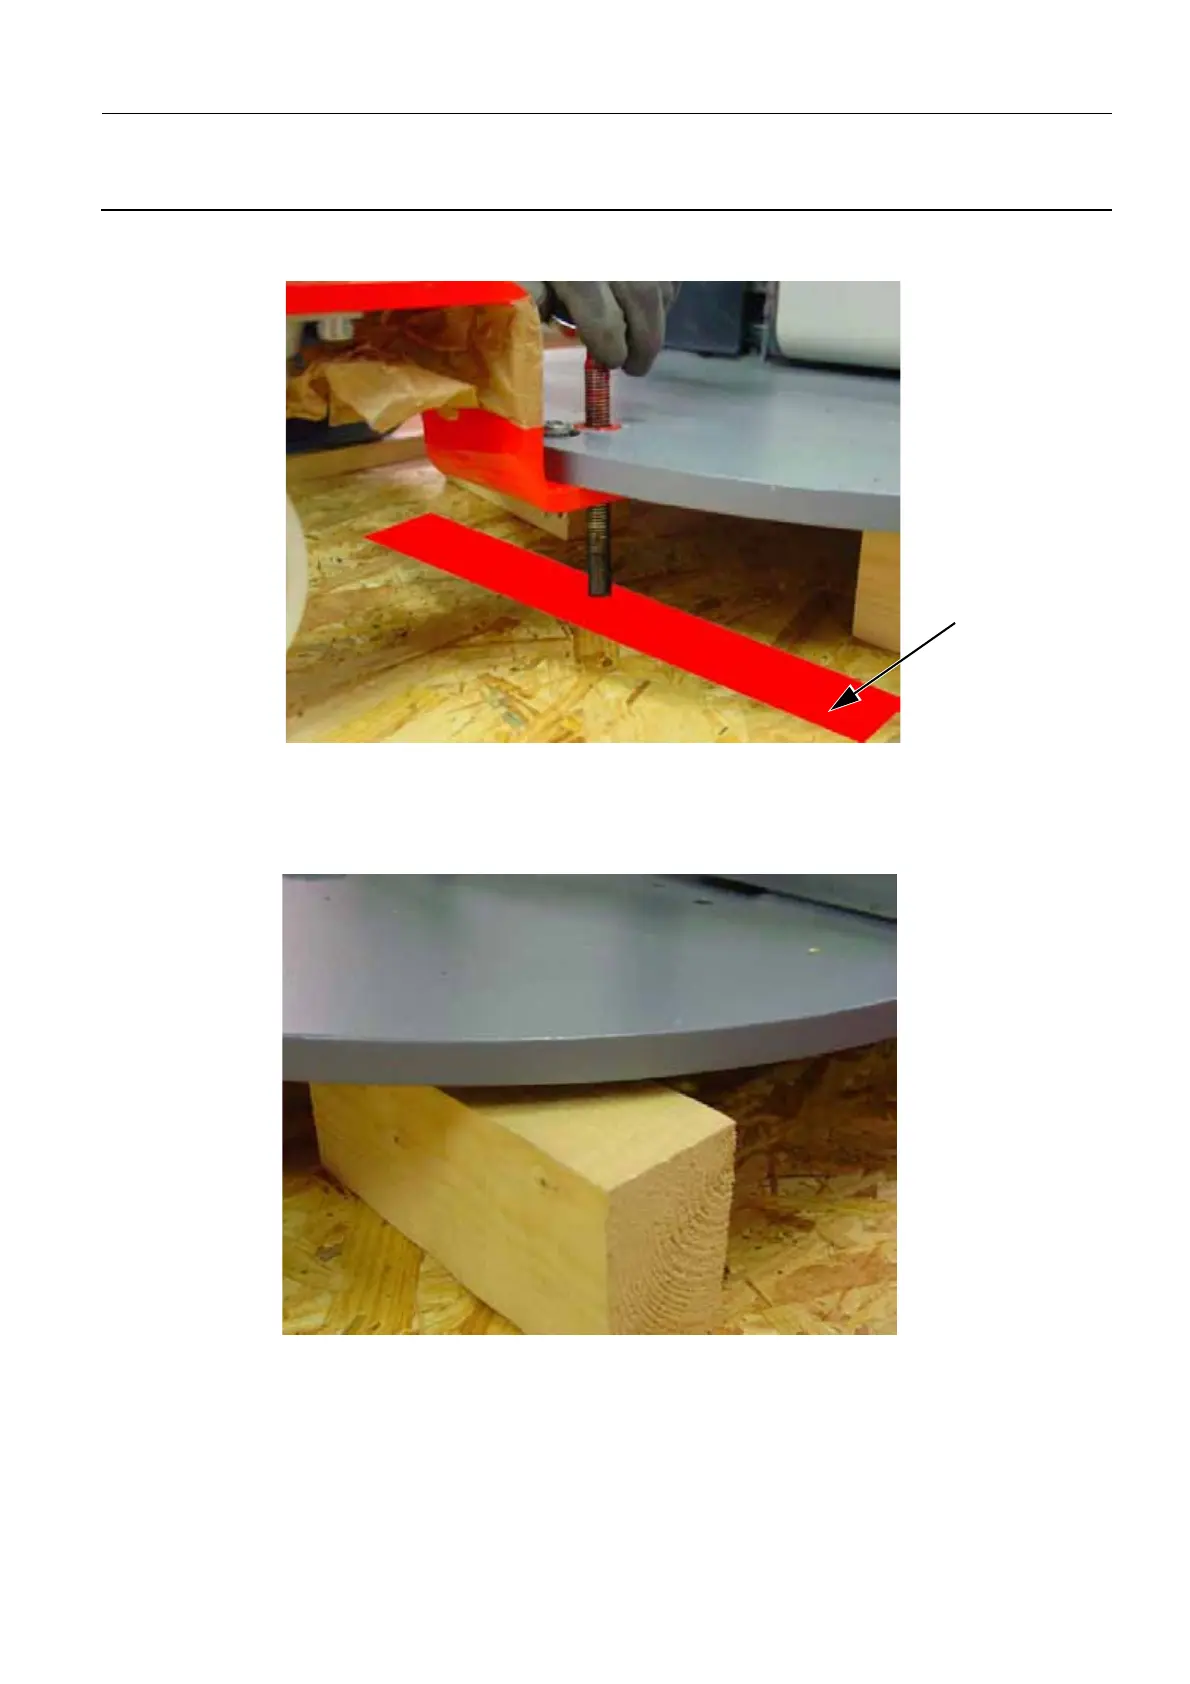
6. For each of the three bolts, place the metal bar (6) you removed earlier below the screw. Ensure that
the metal bar fully covers the hole in the pallet floor.
7. Carefully re-screw (turn clockwise) each of the bolts so that they make contact with the metal bar.
8. Continue to re-screw carefully (turn clockwise) each of the bolts so that they raise the Gantry off of
the wooden blocks as shown below. Ensure that you raise the Gantry progressively (keep the base
close to horizontal).
9. When the Gantry base is high enough to be clear of the two wooden support blocks, remove these
blocks.
10. Lower the Gantry progressively (keep the base close to horizontal). Do this by unscrewing (turning
anti-clockwise) each of the three bolts until the Gantry is fully supported by the wheels.
11. Ensure that the Gantry cannot roll on the wheels. Continue to unscrew (turn anti-clockwise) each of
6

 Loading...


