GE Healthcare Senographe DS
Revision 1 Service Information and Procedures Class A 2385072-16-8EN
Job Card ELE A008 - Configuring the 21-inch 3MP Monitor
Page no. 559 Chapter 7
JC-ELE-A-008.fm
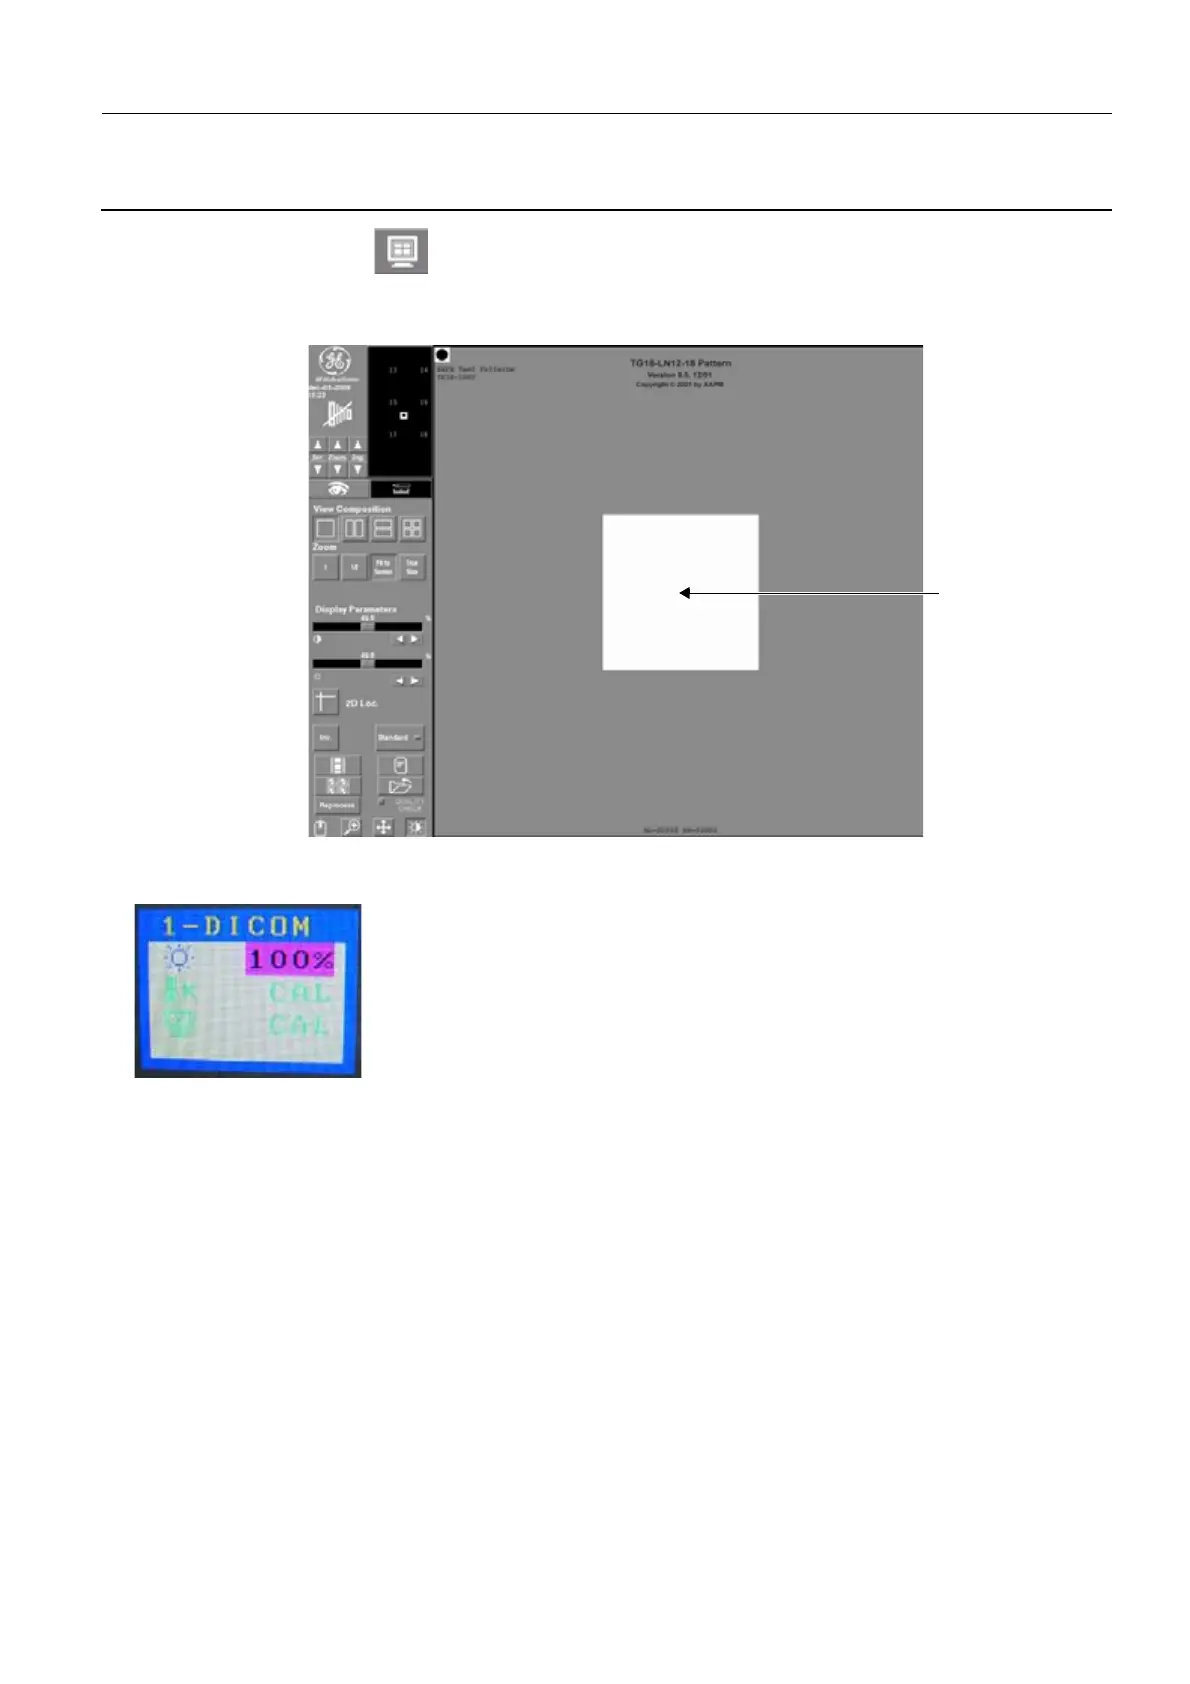
11. Click the Review Exam icon. The Exam Review window appears with images from the series.
12. Use the Img up/down buttons to select the 18th image (number 18) in the series. Ensure that the title
of the displayed image is TG18-LN12-18 Pattern.
13. Press the Mode button on the Monitor Control Panel until the 1-DICOM mode is displayed. If neces-
sary, press the Left/Right buttons on the Monitor Control Panel until the brigness value is 100%.
14. With the TG18-LN12-18 Pattern displayed, use the luminance meter to measure the value of the
luminance at the center of the white box. Allow the displayed luminance value on the luminance
meter to stablize.
If the value of the luminance meter is 400 cd/m², no further action is required.
If the value of the luminance meter is less than or greater than 400 cd/m², proceed as follows to
ensure that the maximum luminance of the central white box is at 400 cd/m²:
a. Press again the Mode button on the Monitor Control Panel to display the 1-DICOM mode.
b. With the lumninance meter positioned at the center of the white box, press the appropriate UP or
Down button on the Monitor Control Panel to adjust the brightness until the luminance meter
measures 400 cd/m².
Note:
When adjusting the monitor brightness, adjust the monitor brightness in small increments and al-
low the displayed luminance value on the luminance meter to stablize.
15. Click the Folder icon to close the Exam Review window.
Lumiance Meter
Position

 Loading...


