GE Healthcare Senographe DS
Revision 1 Service Information and Procedures Class A 2385072-16-8EN
Job Card ELE A050 - Changing Senographe Internal IP Addresses
Page no. 767 Chapter 7
JC-ELE-A-050.fm
window.
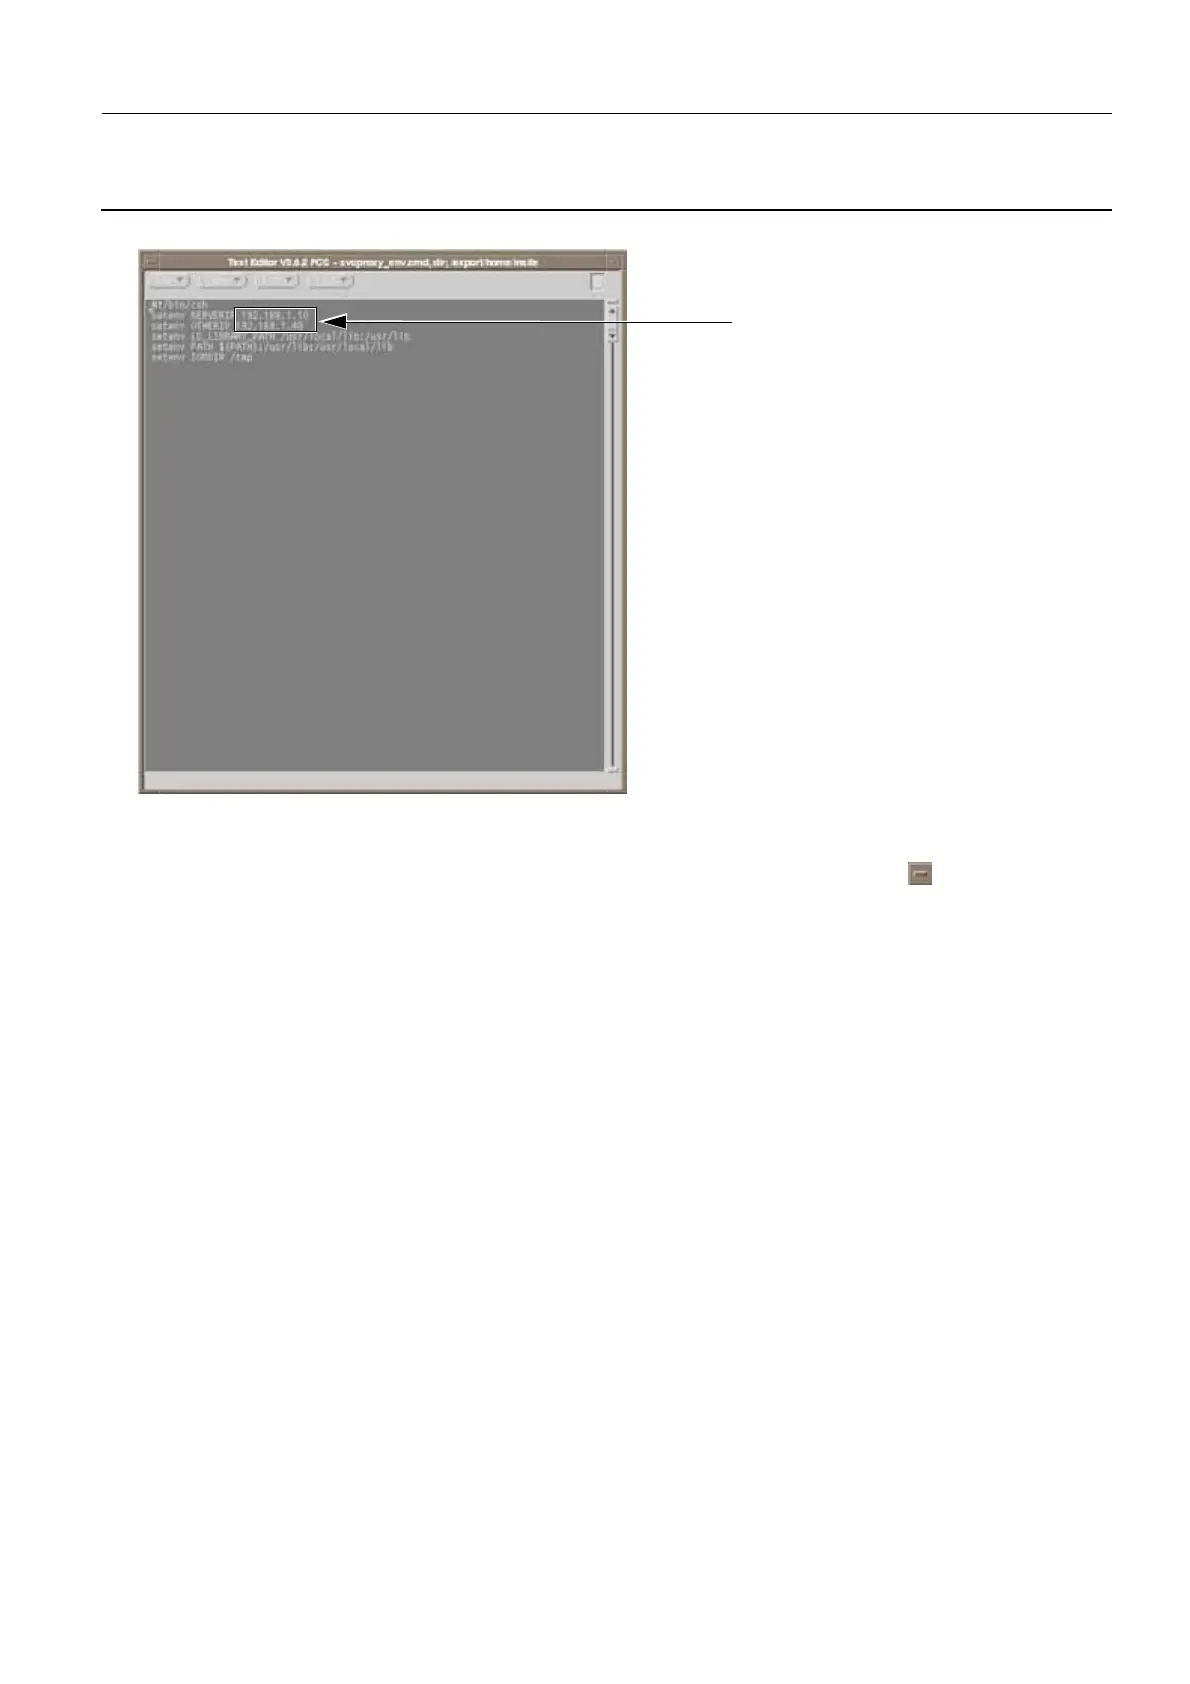
24. Within the TextEdit application window, change the all of the current Senographe system IP
addresses from 192.168.1.x to match your preferred new address scheme (e.g. 192.168.100.x).
25. Save the /export/home/insite/svcproxy_env.cmd file (File > Save) and click the button in the top
left of the TextEdit window to exit the editor.
26. Copy the newly modified /export/home/insite/svcproxy_env.cmd file to the /export/home/extra_tmp/
IPbak directory for backup purposes, by entering:
cp /export/home/insite/svcproxy_env.cmd /export/home/extra_tmp/IPbak/
svcproxy_env.cmd.new
27. Log in as root as follows:
a. At the ADS prompt enter:
su -
b. When requested to specify the root password, enter:
operator
28. Revert the permissions of some of the ADS configuration files back to their original state, as follows:
a. Change the /etc/inet/hosts file to its original permissions, by entering:
chmod o-w /etc/inet/hosts
b. Change the ~sdc/senovision/scripts/light_adjustment file to its original permissions, by entering:
chmod u-w ~sdc/senovision/scripts/light_adjustment
c. Change the ~sdc/senovision/config/PositionerServer.cfg file to its original permissions, by enter-
ing:
chmod u-w ~sdc/senovision/config/PositionerServer.cfg
29. Exit as root user to return to sdc user, by entering:
exit
You are returned to the command prompt as sdc user.
Edit all IP Addresses

 Loading...


