GE HEALTHCARERAFT VOLUSON E8 / VOLUSON E6
D
IRECTION KTD102576, REVISION 7 DRAFT (AUGUST 23, 2012) SERVICE MANUAL
6-8 Section 6-5 - Control Console Positioning
6-5-2-1 Moving down (lower) the console - without booting up the system
If it is impossible to boot up the system, the user interface can be moved downwards (lowered) by
pressing 3 keys on the control console.
1.) Connect the Main Power Cable to the back of the system.
2.) Connect the Main Power Cable to a hospital grade power outlet with the proper rated voltage.
3.) Press 3 keys (see: Figure 6-8 below) on the control console simultaneously to move it downwards.
NOTE: Shipping the Voluson E8 / Voluson E6 ultrasound system in its original packaging is only possible when
the system is lowered to its minimum height with monitor flapped and locked down, and when the control
console is centered and locked in position (see Figure on page 3-6).
6-5-2-2 Moving up (lift) the console - without booting up the system
1.) Connect the Main Power Cable to the back of the system.
2.) Connect the Main Power Cable to a hospital grade power outlet with the proper rated voltage.
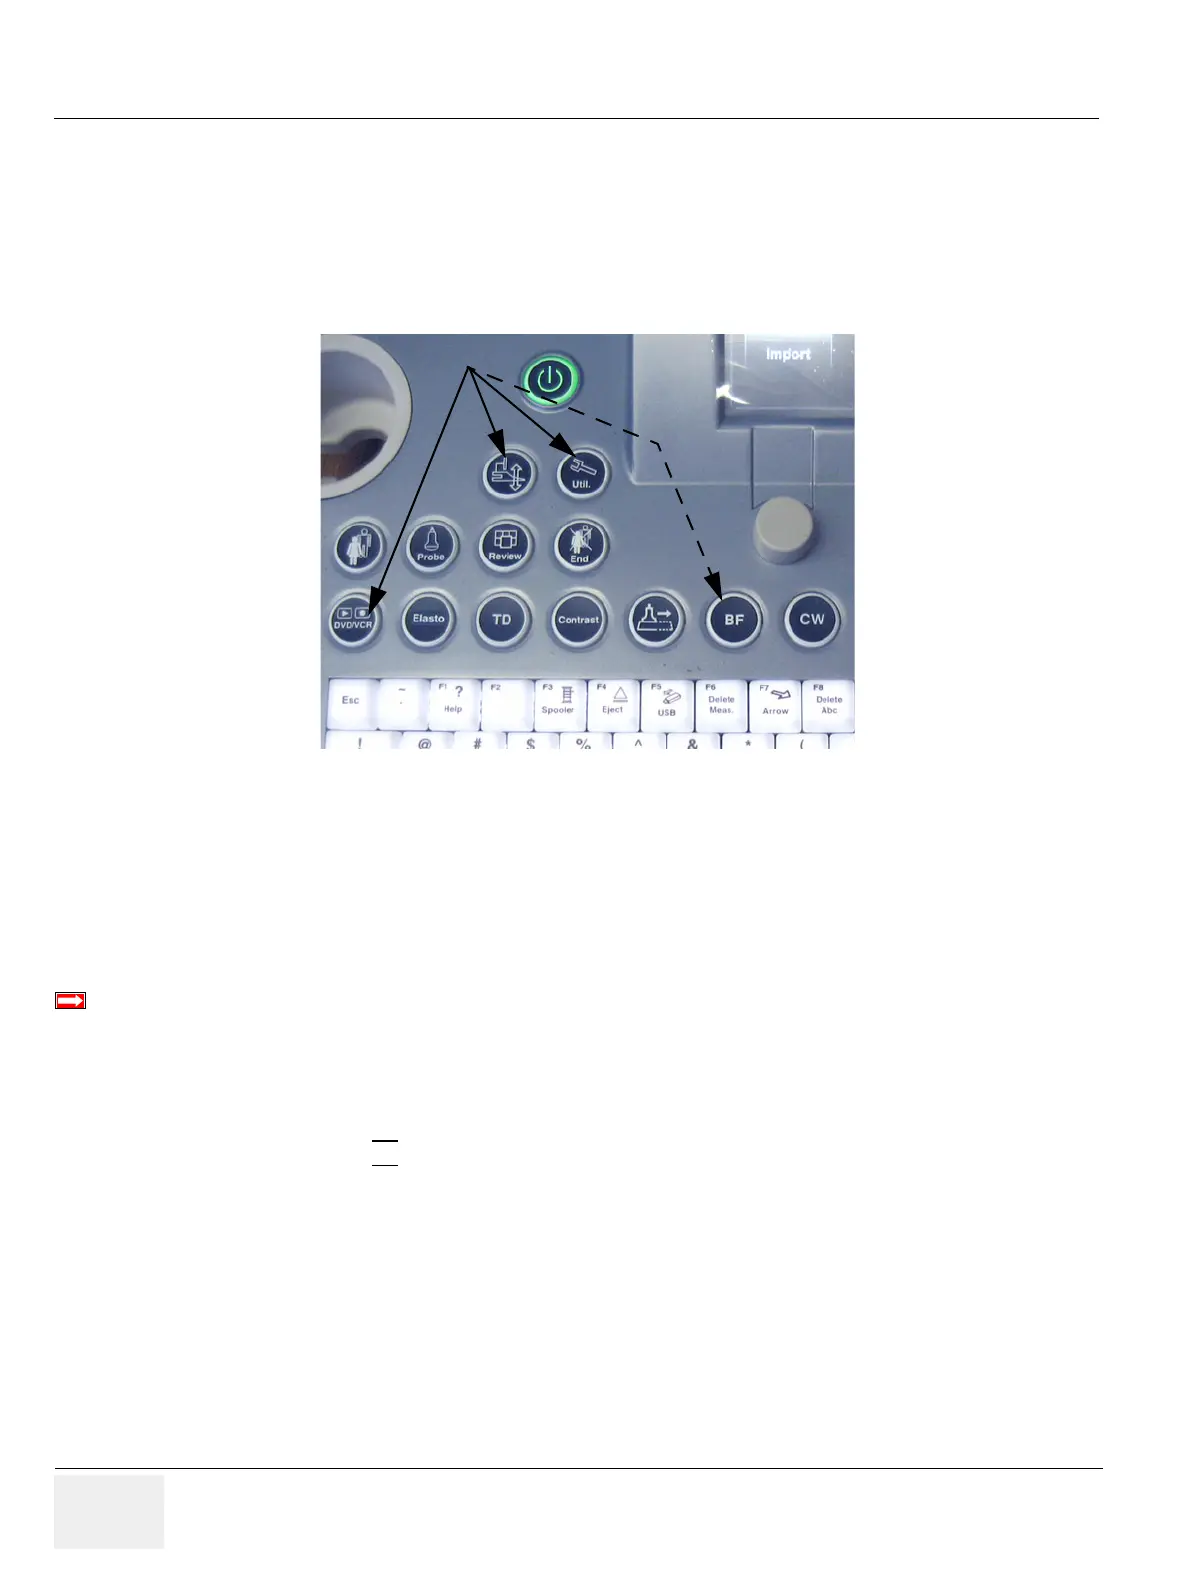
3.) Press 3 keys + BF
(see: Figure 6-8 above) on the control console simultaneously to move it
upwards.
Figure 6-8 keys to lower/lift the control console
BT13 (Whanam console) only:
If it is impossible to boot up the system, the user interface can be moved upwards (lifted) by pressing
4 keys on the control console