GE HEALTHCAREDRAFT VOLUSON E8 / VOLUSON E6
D
IRECTION KTD102576, REVISION 7 DRAFT (AUGUST 23, 2012) SERVICE MANUAL
Chapter 8 - Replacement Procedures 8-29
8-17-4 Mounting/Replacing the 19” LCD Secondary “Patient” Monitor
8-17-4-1 Wall Bracket Mount
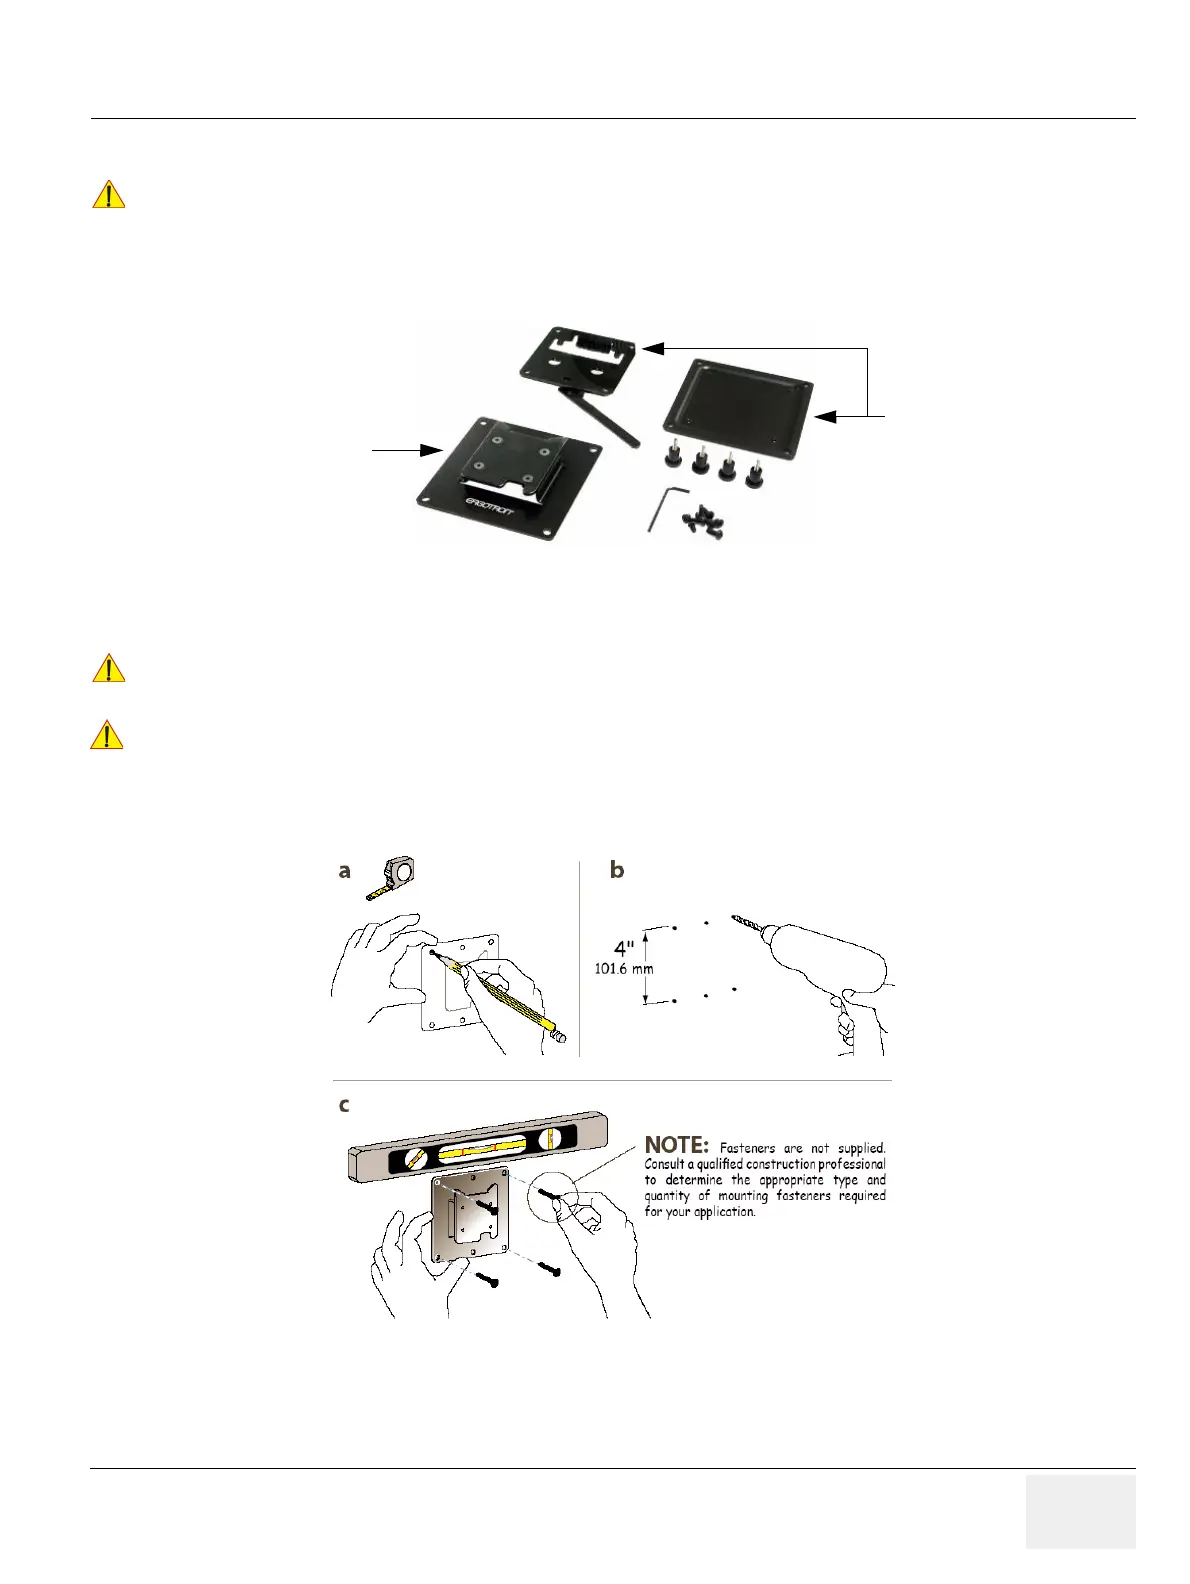
1.) Find out the exact position required, so patients can observe the monitor easily.
a.) Mark all the holes of the bracket mount on the wall. Make sure it is level.
b.) Drill the holes, using an electric drill.
c.) Fix the wall bracket mount by means of appropriate screws and wall dowels.
!! NOTICE:
The 19” LCD Secondary “Patient” Monitor is NOT intended for diagnostic use.
It is an additional device used to allow the patient to watch the proceedings.
Figure 8-34 Wall Mount kit for 19” LCD Secondary Monitor
!! NOTICE:
Take your time to think about the best wall mount position of the monitor in your facilities.
Patients should be able to view the monitor easily and without having to bend or turn around.
!! WARNING:
Because vertical surfaces vary widely and the ultimate mounting method is out of the
manufacturer´s control, it is imperative that you consult with appropriate engineering,
architectural or construction personnel to ensure that the bracket is mounted properly
to handle applied loads. Use appropriate screws and wall dowels.
Figure 8-35 wall bracket mount
Wall Bracket Mount
Monitor Bracket Mount