2 - Preparing the Instrument
20 / 112
000HZ6006EN.US • 02 • GEM Hemochron 100 Operator Manual
2.2
Instrument Power and Charging
2.2.1
Battery Information
The hand‑held instrument is powered by a RoHS‑compliant, rechargeable lithium‑ion (Li‑ion) battery.
Battery life is greatly inuenced by factors such as environmental temperature, depth of discharge before
recharging, and usage pattern. Leaving the power supply connected to the instrument does not decrease
battery life but if the instrument is not used for an extended period of time, it is recommended to leave it
disconnected from the power supply.
The instrument automatically checks to ensure enough battery power is available when the
Operator
powers on the instrument and when an
Operator
runs a test. For more information, see
“Electronic Quality
Control (EQC) Testing” (page 52)
.
The instrument records the percentage of battery power used based on the resource that is used. For more
information, see
“View Battery Usage Information Based on System Resource” (page 33)
.
To view the features that help save battery power, see
“Sleep Mode” (page 21)
and
“Automatic
Shutdown” (page 21)
.
2.2.2
Charging the Battery
NOTE: The power supply has been selected specically for use with the instrument. Only use the power
supply that is authorized by the manufacturer. Do not use any other power supply.
The battery must be charged under the following conditions:
● The instrument is being used for the rst time.
● The instrument displays a low-battery message.
To Charge the Battery:
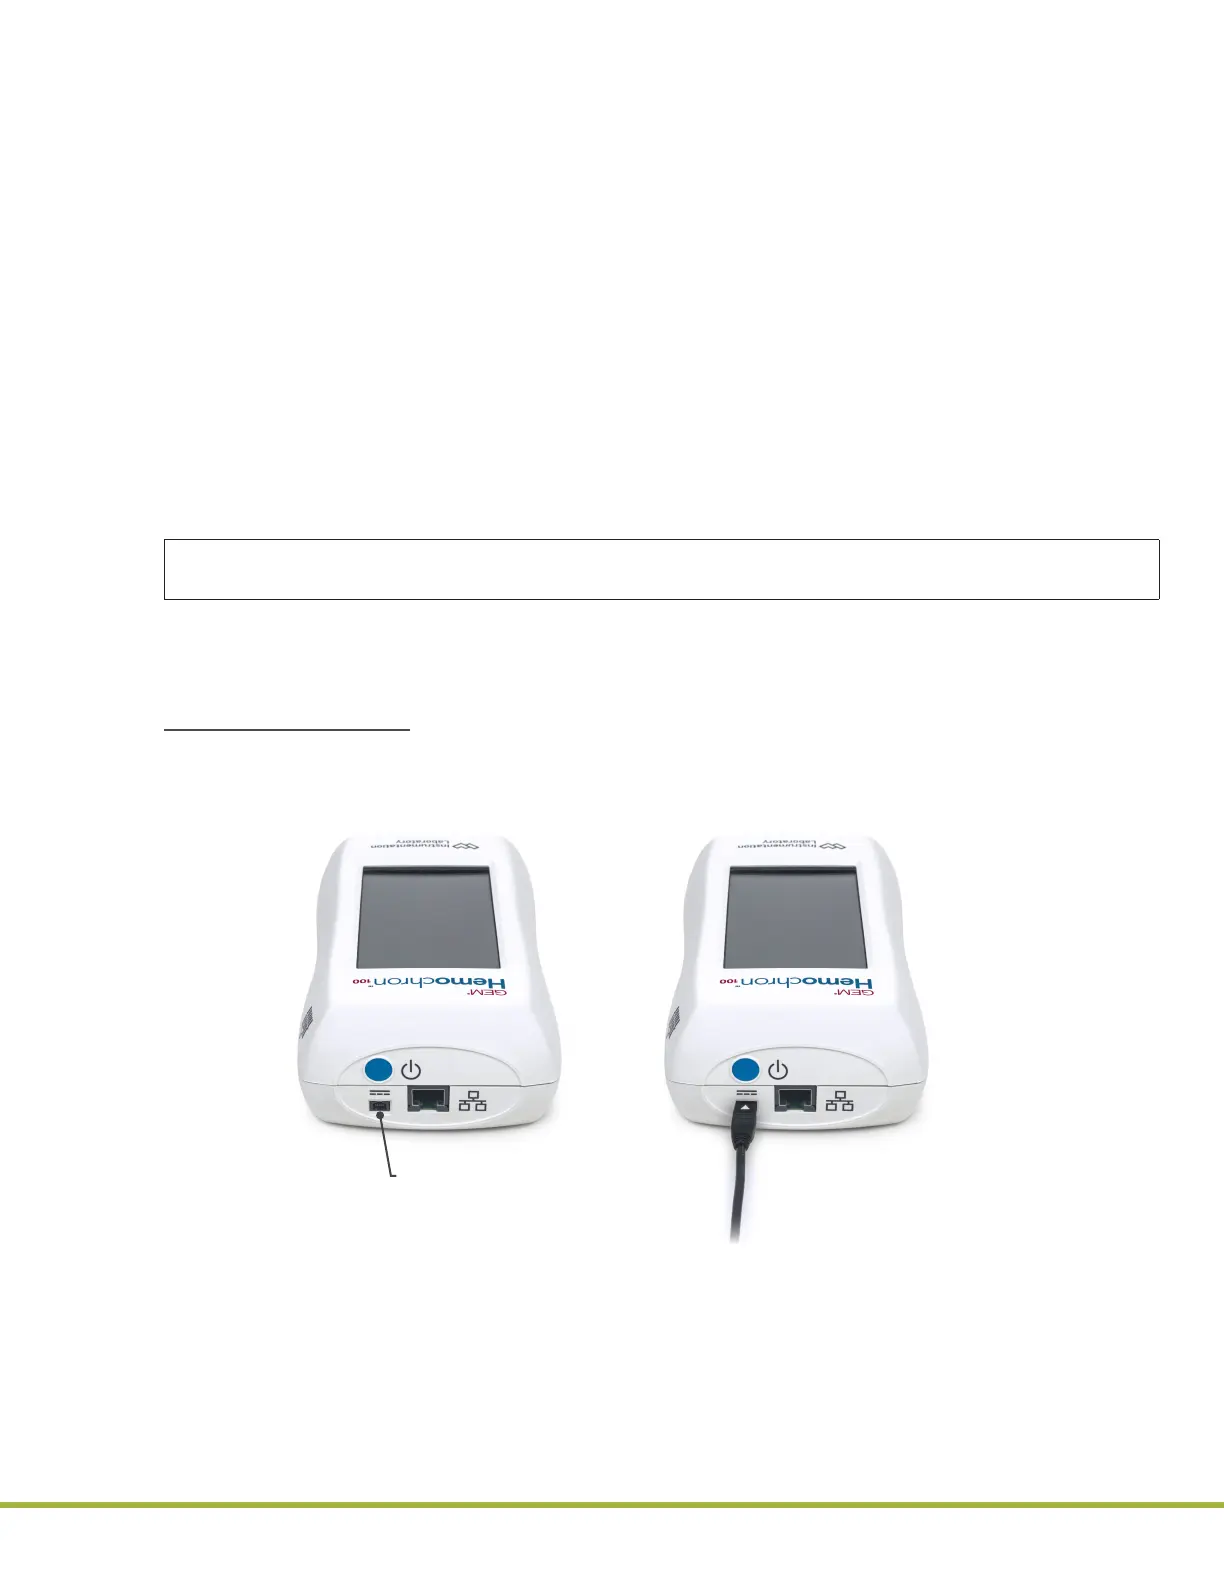
1 Connect the power supply cable to the power supply port on the side of the instrument (
Figure 5
).
NOTE: The battery pull-tab must be removed from the bottom of the instrument before charging
(Figure 4 (page 19)).
Figure 5
: Power Supply Port
Power Supply Port
2 Connect the power supply cable to a wall outlet. The power supply converts AC power to DC power.
The instrument can be used while it is being charged.
NOTE: The battery charge indicator is displayed in the status bar at the top of the screen. For more
information, see “Battery Power Icons” (page 10).
 Loading...