3 - Instrument Settings
28 / 112
000HZ6006EN.US • 02 • GEM Hemochron 100 Operator Manual
29 / 112
000HZ6006EN.US • 02 • GEM Hemochron 100 Operator Manual
Δ 3.3
Supervisor Settings (Advanced Settings)
NOTE: Supervisors have access to User Settings and Supervisor Settings.
To view Supervisor Settings, select (Settings) > Supervisor Settings. For more information about these
settings, see
Table 6
.
Supervisors
can also use CCM software to change many of these settings and more
advanced changes. For more information, see
“Centralized Conguration Manager (CCM) Software”
(page 71)
.
Factory Default Setting Supervisor Account:
NOTE: Menu items under (Settings) > Supervisor Settings are password-protected.
Supervisors
are required to log into the instrument. The factory default setting
Supervisor
account password
should be changed, recorded, and stored in a safe place.
To change the password, use CCM. See
“GEM Hemochron 100 System User Accounts” (page 71)
.
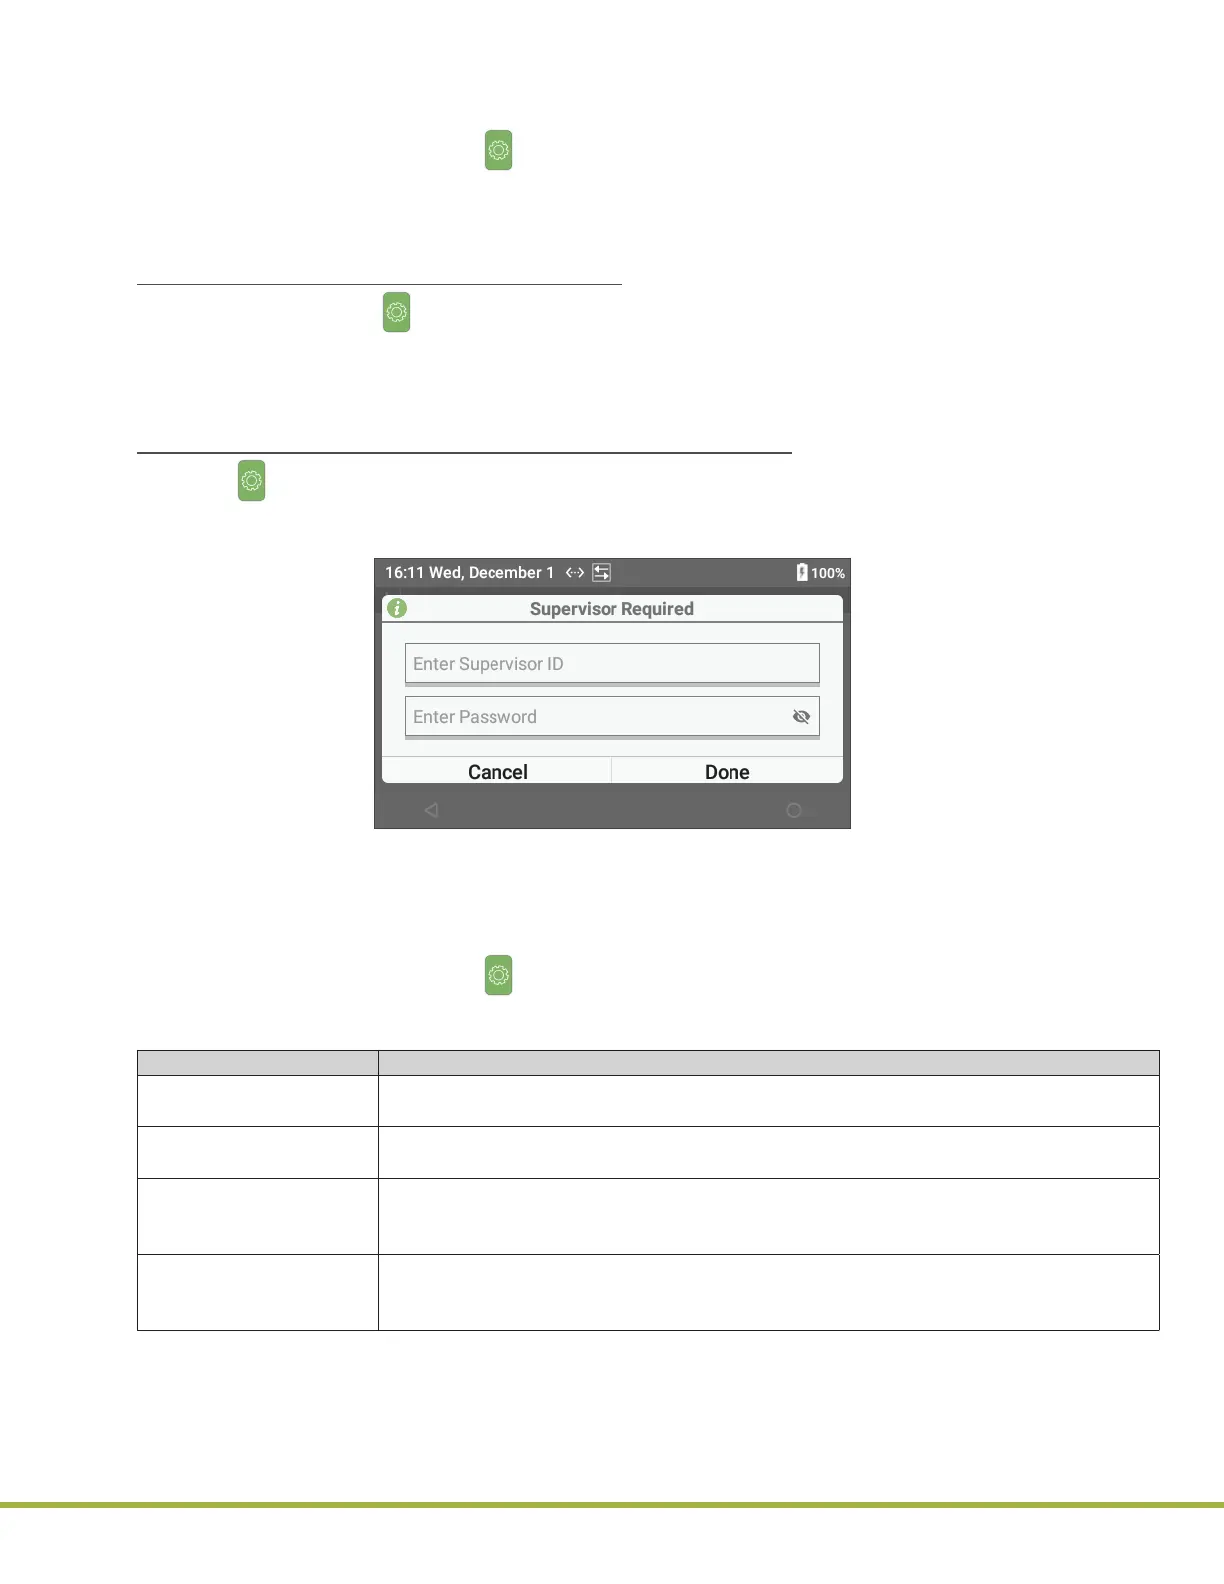
To Log into the Factory Default Setting Supervisor Account:
1 Select (Settings) > Supervisor Settings.
2 Select the Enter Supervisor ID text eld (
Figure 20
) to display the virtual keyboard.
NOTE: For more information about the virtual keyboard, see “Using the Virtual Keyboard” (page 23).
Figure 20
: Enter Factory Default Setting Supervisor Password
3 Enter the Supervisor ID and select Next.
4 Enter the Password and select Done.
5 Select Done.
To view Supervisor Settings, select (Settings) > Supervisor Settings. For more information about these
settings, see
Table 6
.
Table 6: Supervisor Settings
Setting Description
Reset Counters Reset the counters associated with the number of failed EQC/LQC tests and the number
of patient tests after EQC/LQC lockout. See
“Reset Counters” (page 31)
.
Instrument Name Instrument Settings > Instrument Name.
Set instrument name. See
“Add Instrument Name” (page 31)
.
Sleep Instrument Settings > Display > Sleep.
Set the time that elapses before the instrument goes into sleep mode. See
“Set the
Sleep Mode Interval” (page 31).
Shutdown Instrument Settings > Display > Shutdown.
Set the time that elapses before the instrument automatically shuts down. See
“Set the
Shutdown Interval” (page 32).
 Loading...