PROGRAMMING
96-8000
139
June 1999
This section contains the following:
Alphabetical Address Codes
Cutter Compensation
Subroutines
Functions
4. PROGRAMMING
4.1 WORK C OORDINATE S YSTEM
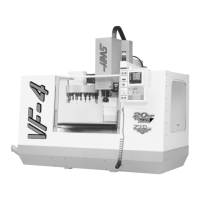
These machines have three linear axes named X, Y, and Z. The X-axis moves the table left and right, the Y-axis
moves it to and from the operator and the Z moves the milling head up and down. The machine zero position is
the upper right corner of the mill table. All moves from this point are in a negative machine direction. If a rotary
table is connected, an additional A-axis work offset is provided.
The work offset display is found on the offset display by pushing the PAGE UP key. You can display and
manually enter work offsets from here. The work coordinate systems on a control with a fifth axis have all been
expanded to accommodate B, the fifth axis. Work coordinate offsets can be set for the B axis in the offset
display. Note that the auxiliary axes C, U, V, and W do not have any offsets; they are always programmed in
machine coordinates.
The Home or Machine-Zero position is X0, Y0, Z0. Travel of these axes is limited in the negative direction by
stored stroke limits defined in the parameters. Travel in the positive direction for the X and Y axes is limited
simply to values less than zero. Positive travel for the Z-axis is limited to the highest position used for tool
changing (about Z4.5). In addition, positive travel for all axes is limited by the home switch which acts as a limit
switch.
Before a tool can machine your part, the control must know where your part is. The work coordinate system
tells the control the distance from the work zero point of your part to the machine zero position. The work zero
point of the part is decided by the programmer and usually is the common point where all print dimensions are
referenced from. The machine zero position is fixed by the machine on power up and does not change. The
operator must determine this distance and enter the value.
This control automatically chooses the G54 system on power up. If you do not wish to use this system, zero
out the values in the G54 X, Y, and Z or select another work offset.
The G54 through G59 or G110 through G129 offsets can be set by using the PART ZERO SET key. Position the
axes to the work zero point of your part. Using the cursor, select the proper axis and work number. Press the
PART ZERO SET key and the current machine position will be automatically stored in that address. This will
work with only the work zero offsets display selected. Note that entering a nonzero Z work offset will interfere
with the operation of an automatically entered tool length offset.
Work coordinate numbers are usually entered as positive numbers, except when Parameter 57, bit "Neg. Work
Offset" is set to 1. In this case, the work coordinate numbers are entered as negative numbers.
Work coordinates are entered into the table as a number only. To enter an X value of X2.00 into G54, you would
cursor over to the X column and enter the number 2.0 only.

 Loading...