17
INSTALLATION
June 1999
96-8000
Step 2 Setting the Anchors
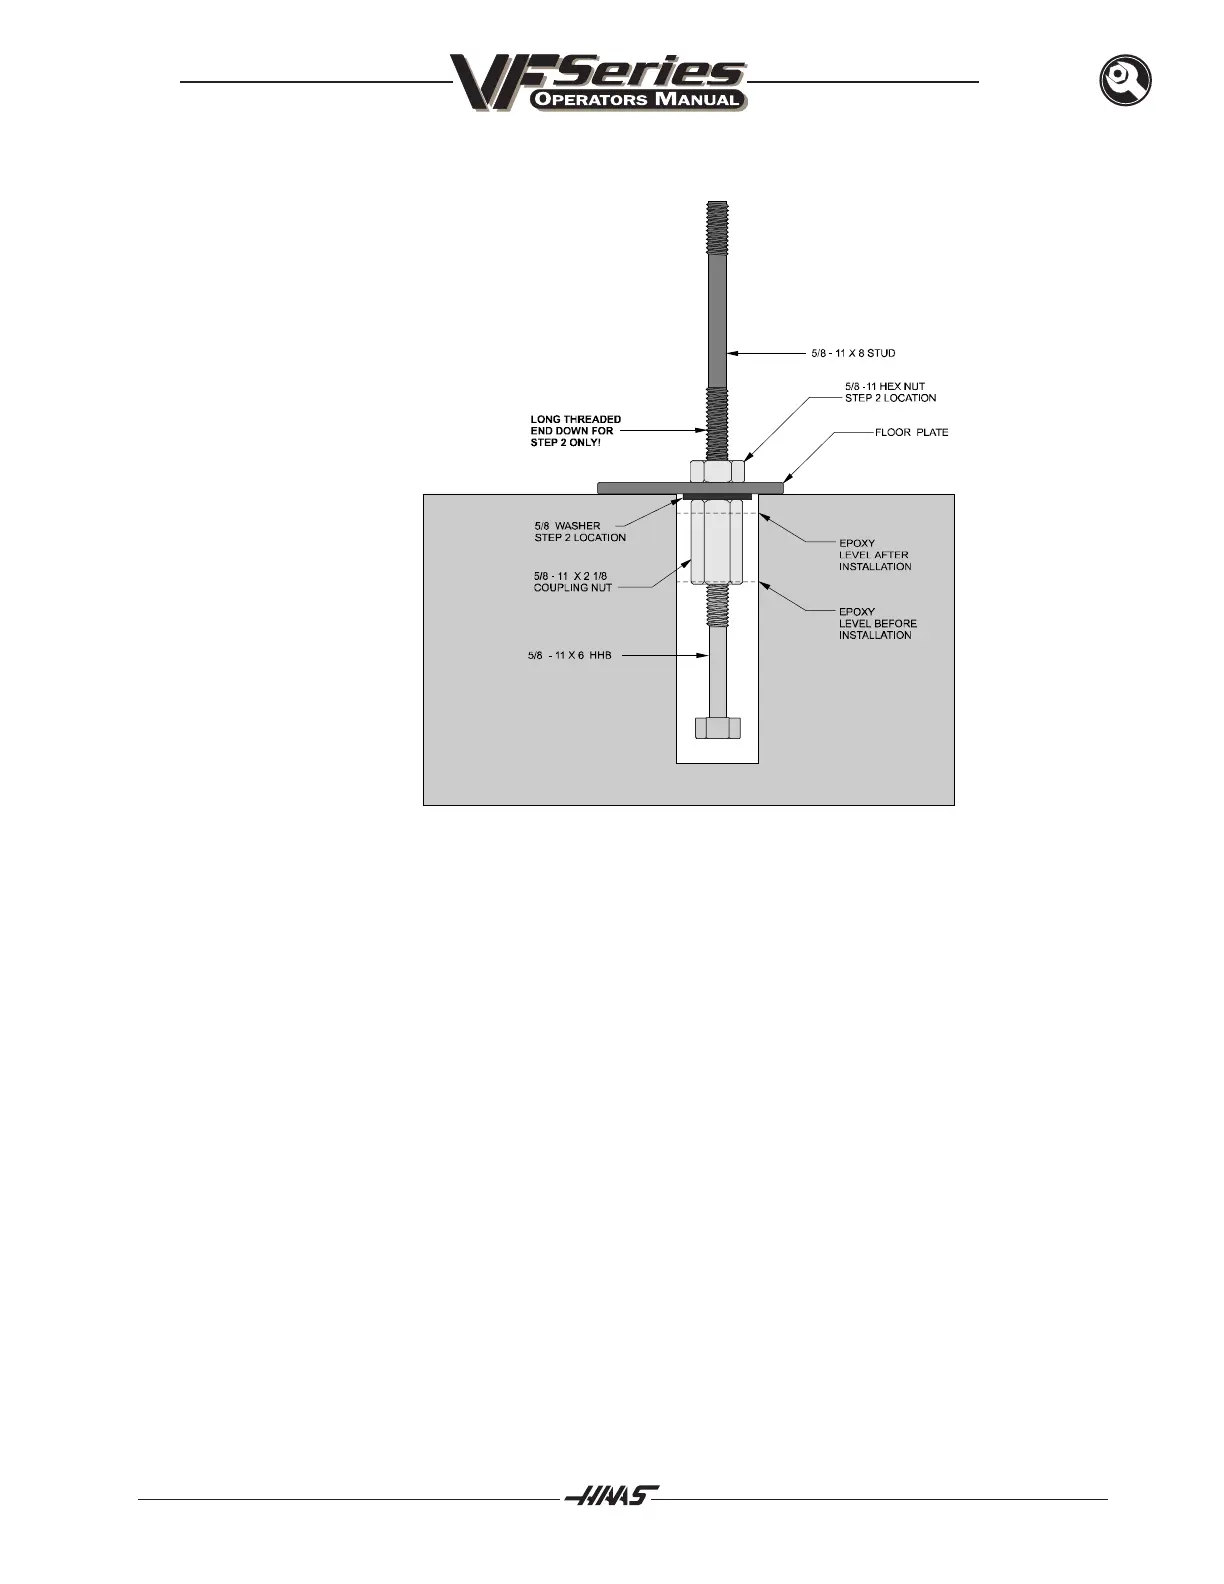
Step 2 diagram
Mix the epoxy according to the manufactures instructions. Working time for the epoxy is approximately 30 - 35
once it is mixed together.
Fill the hole until the epoxy is approximately 2 inches from the top of the hole (Refer to Figure).
Important! Do not overfill the hole because the epoxy will rise once the assembly is placed into the
hole. Make sure that the epoxy does not seep onto the top of the coupling nut or you may not be
able to remove the stud.
Place the anchor assembly into the hole (stud end sticking up), then lift the assembly out of the hole like a
dipstick and check to see how much of the coupling nut is covered in epoxy. At least half of the nut must be
covered in epoxy. At this point work as quickly as possible since the epoxy will begin to harden.
Use a carpenters square to make sure the studs are perpendicular to the floor.
The epoxy will take 18 - 24 hours to cure.

 Loading...


