292 THE HASSELBLAD MANUAL
Basic Meter Prism Operation
Set the correct ISO rating on all meter prism fi nders by pressing the ISO button and then
using the adjustment controls to set the proper ISO value. Set the meter prism fi nder for the
maximum aperture of the lens on the camera by pressing the Fmax button and then using
the adjustment controls (Figure 15-16). Change this setting when you change to a lens with a
different maximum aperture. As a precaution, I suggest that you make certain that the lens is
not manually closed down when the meter reading is taken.
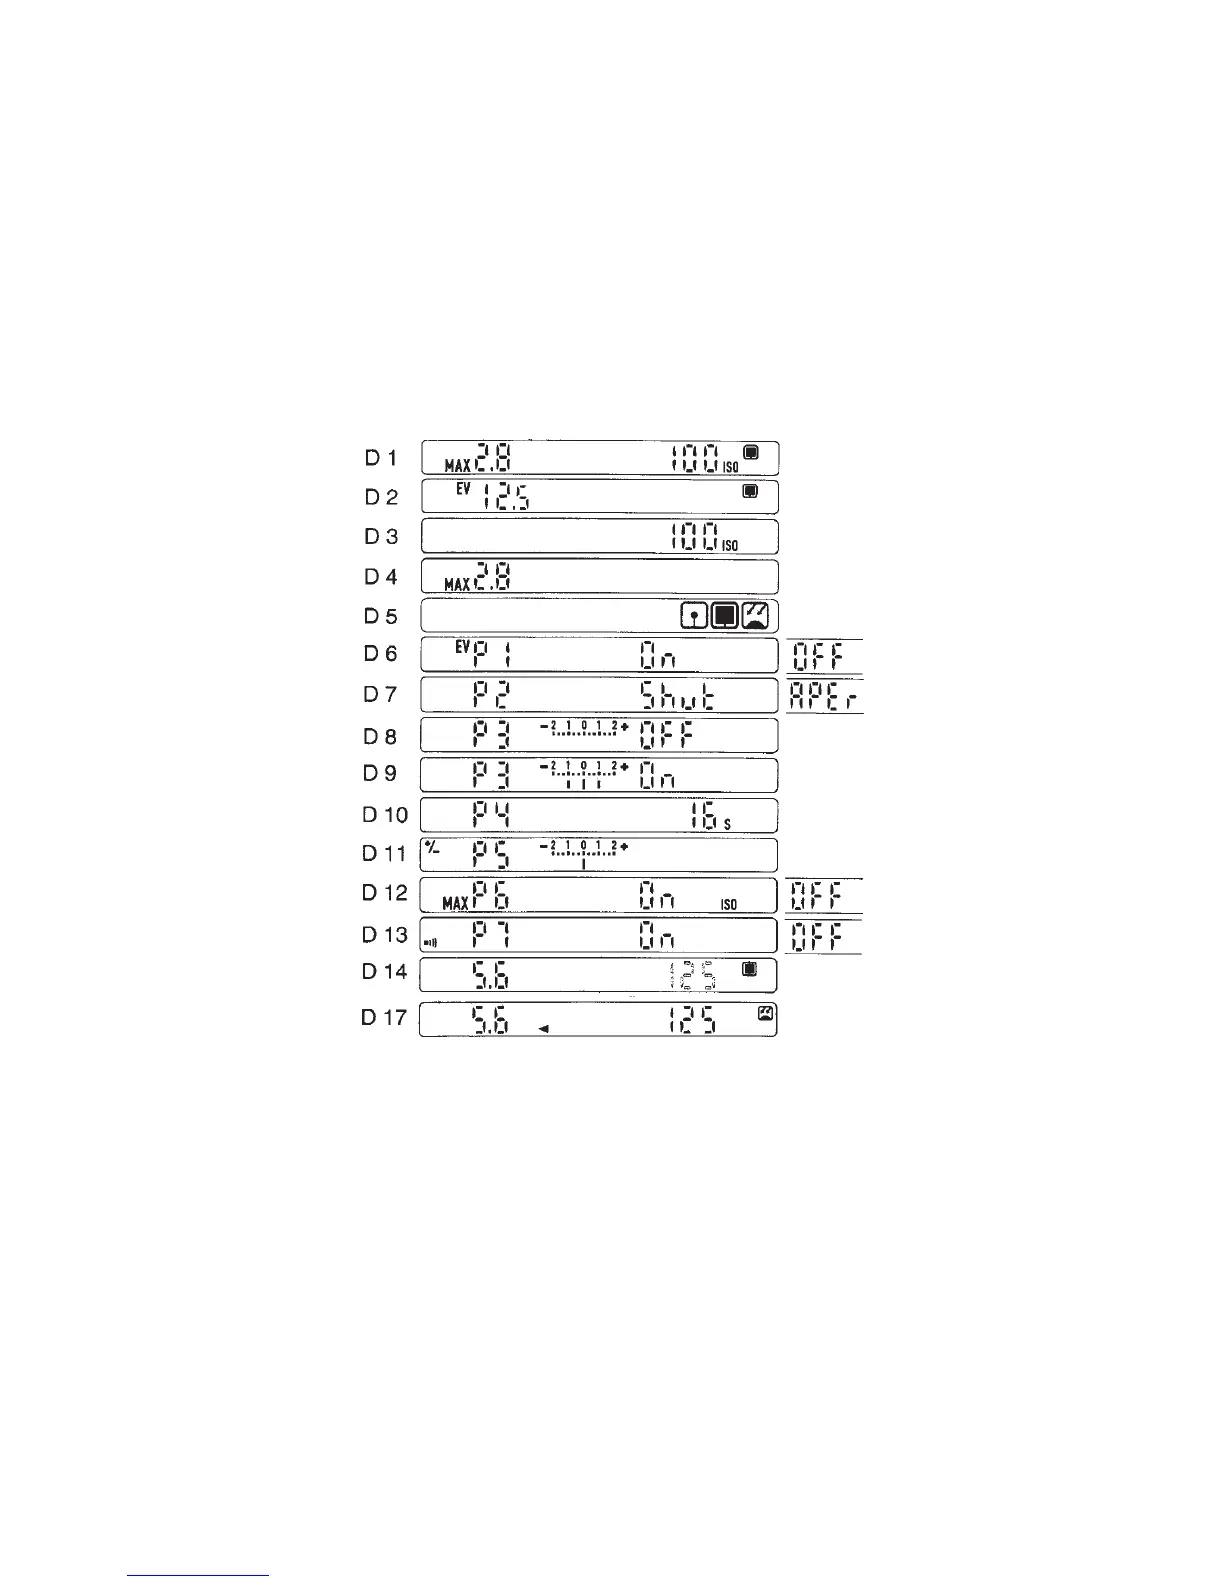
Figure 15-16 PME viewfi nder display for various operating modes. The set ISO value and the
MAX lens aperture (D 1) appear when the meter is turned on. After 1.5 seconds, the display
changes (D 2). The ISO value seen after the ISO button is pressed (D 3). Set maximum aperture
shows after pressing the Fmax button (D 4). The metering mode symbols (D 5) spot meter,
center metering, and incident metering mode. In Pr 1 mode you see EV values (D 6). In Pr 2,
the meter is set for either aperture priority or shutter speed priority (D 7). In Pr 3, a reference
value can be programmed into the meter. It is turned off (D 8) and turned on with a 1 and
1 value programmed into the fi nder (D 9). The metering duration is programmed in Pr 4
and is set to 16 seconds in A permanently (D 10). An exposure correction from 2 to 2 can
be programmed into the meter in Pr 5 (D 11). With Pr 6 turned on, the set ISO and maximum
aperture values appear on the display for 1.5 seconds before the meter reading comes on (D
12). A sound warning can be added to the reference mode in Pr 7 (D 13). Display with center
area metering and aperture priority (aperture fi gure solid) is shown (D 14). A stored value is
indicated by an arrowhead pointing toward the stored value, in this case the aperture (D 17).
All values programmed into the PME fi nders remain memorized in the fi nder until they are
changed. Removing or replacing the battery does not affect the settings.