132 THE HASSELBLAD MANUAL
Databus connections when the 205TCC camera was introduced and were changed later, in
name only, to the FE types.
WORKING WITH THE V SYSTEM COMPONENTS ON 503 AND OTHER V SYSTEM CAMERAS
Removing and Attaching Lenses
Lenses can be removed and attached only when the shutter in the lens and/or camera is
cocked and the camera is ready to be released but is not pre-released. If not, turn the wind-
ing crank, with fi lm magazine removed to avoid wasting a frame, before you try to remove
the lens. On 200 and 2000 cameras, simply turn the winding crank while pressing the center
chrome button.
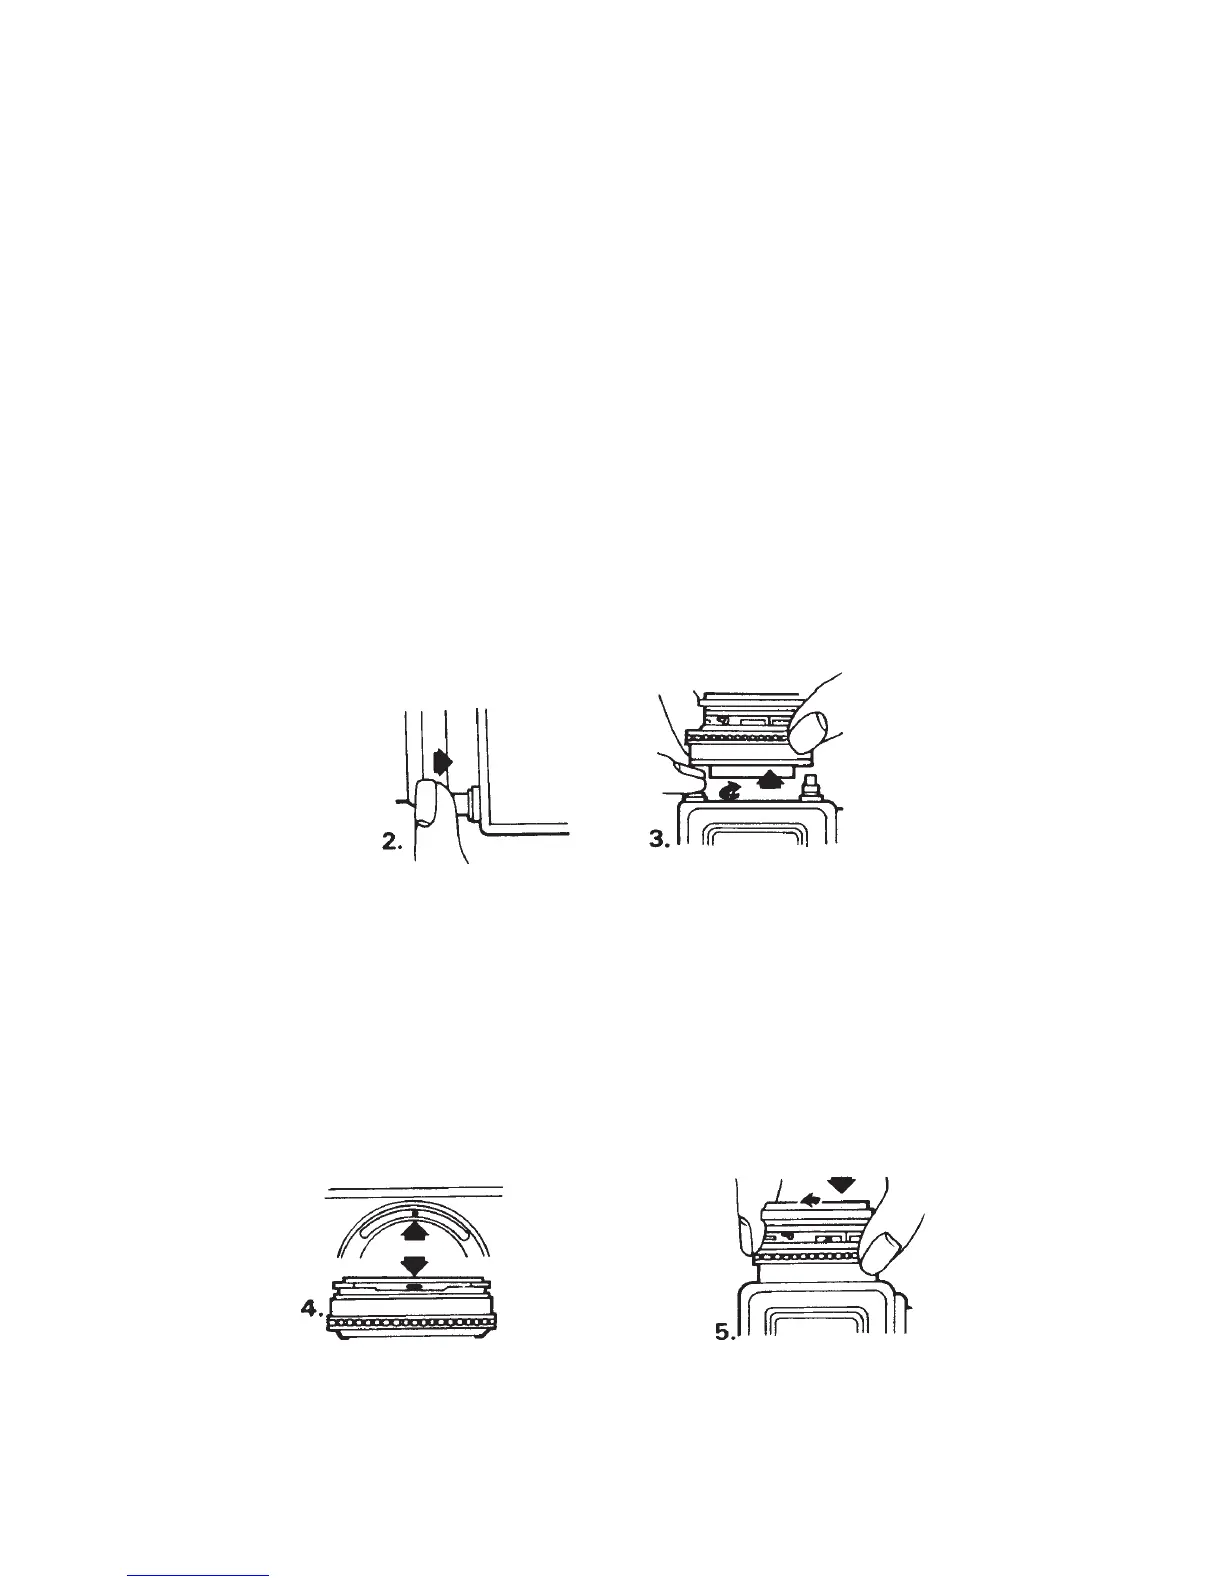
To remove any lens from a camera body, press the lens lock lever, turn the lens about 35
degrees counterclockwise (preferably by holding the lens on a non-movable part), and lift it
out (Figure 6-4).
Figure 6-4 (2) To remove a lens press the lens lock button. (3) Turn the lens counterclockwise as
seen from the front. Before removing a lens, check that the winding crank has been turned.
To attach a lens to any camera body simply place the lens into the mount and turn
it clockwise until you hear a defi nite click. It is not necessary to press the lens lock lever
(Figures 6-5 and 6-6). Lenses can be attached only if the shutter in the lens is cocked and the
ridge on the camera’s connecting shaft points to the dot. If not, turn the winding crank. If the
shutter in the lens is uncocked, cock by inserting a coin in the slot and turn clockwise.
Figure 6-5 (4) To attach a lens, insert the lens in the bayonet mount so that the marking on the
lens mount is aligned with the mark on the camera. (5) Rotate the lens clockwise until it
clicks into place.