68 THE HASSELBLAD MANUAL
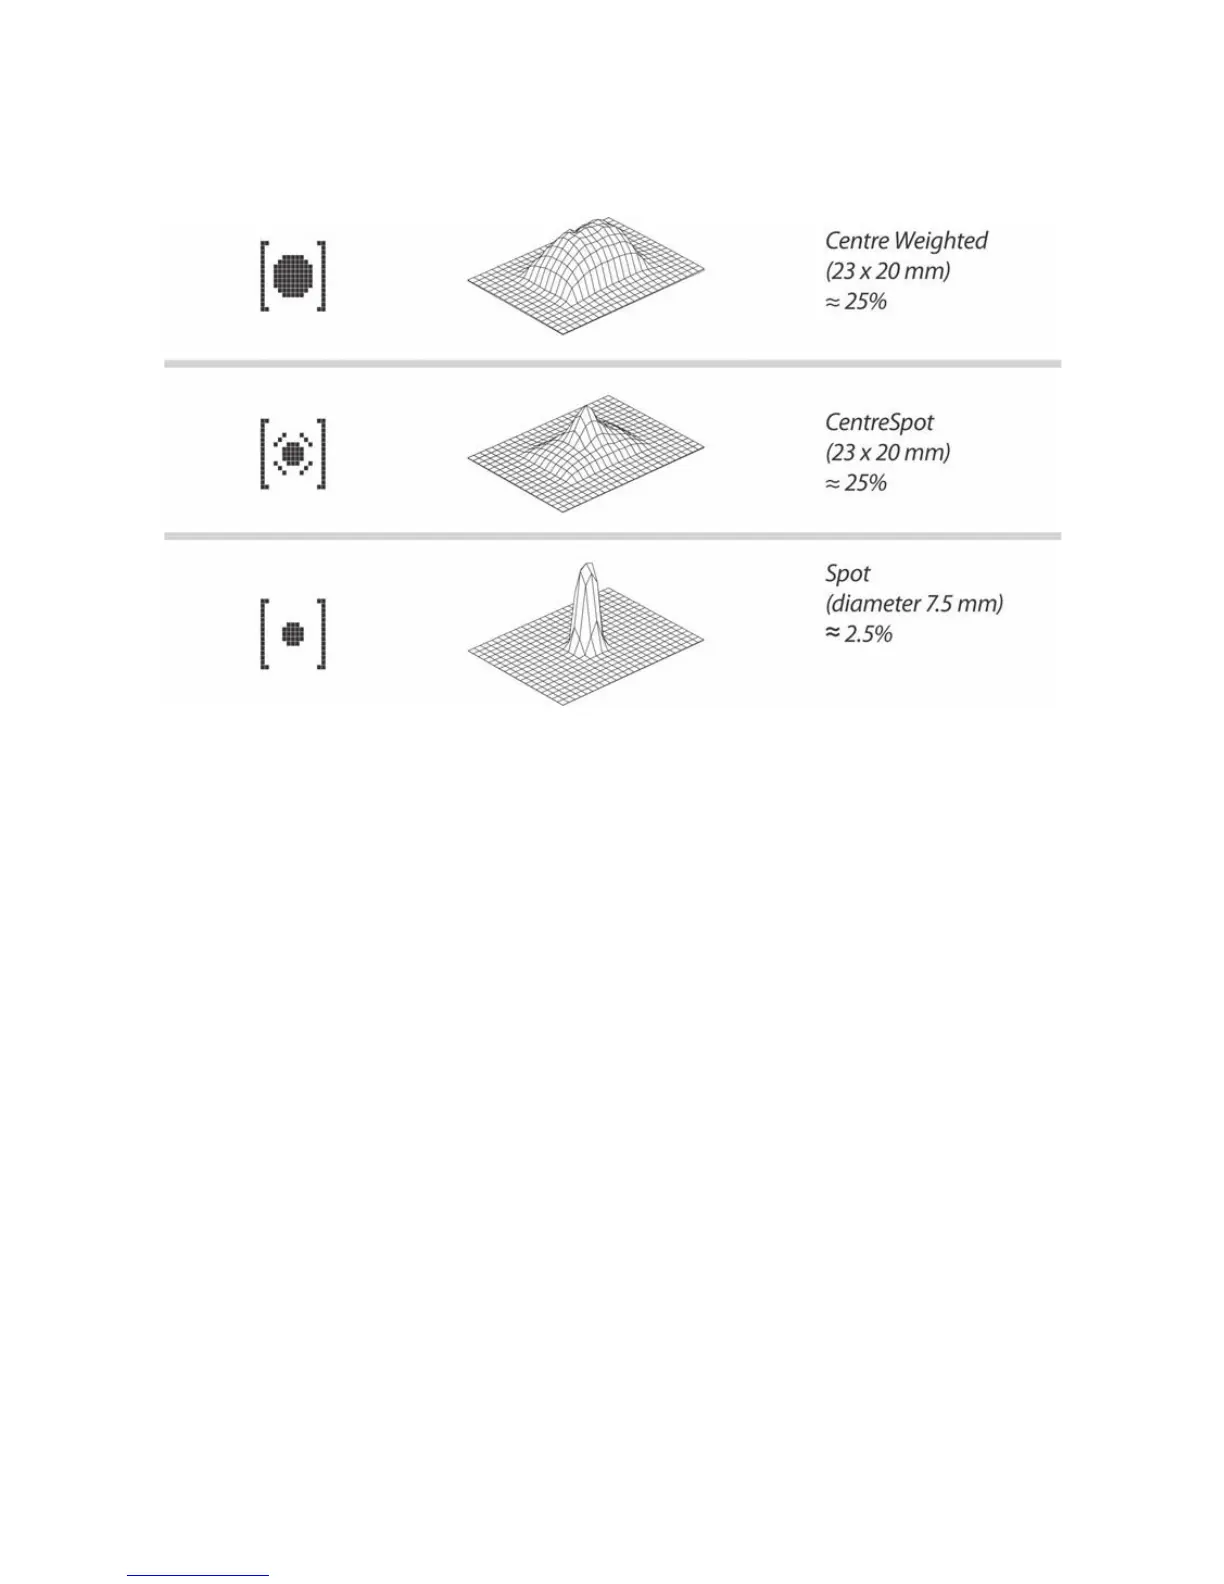
Figure 4-19 Metering areas. This diagram shows sensitivity distribution with an HVD 90 fi nder.
CentreWeighted (top) on a 23 20 area (25%), CentreSpot (middle) also on a 23 20 area
but concentrated on the center area, and Spot (bottom) in a 7.5 mm area, about 2.5% of the
total area. The three metering modes are indicated with the symbols shown on the left for
CentreWeighted (top), CentreSpot, and Spot (bottom).
Setting the Exposure Mode The desired exposure mode is set as follows:
1. Press the Exposure Mode button (item 3, Figure 4-1).
2. Turn the front control wheel until the desired mode appears on the display.
3. Press the ISO/WB (Drive) button.
The selected aperture and shutter speed are shown in all modes in the viewfi nder and on
the grip LCD display. In all automatic exposure modes, you can change the selected aperture/
shutter speed combination in an interlocked fashion without changing the EV value and thus
the exposure. This is done by turning the front wheel.
The Programmed (P) and Programmed Variable (Pv) Modes In both programmed modes, the camera selects
both the aperture and the shutter speed that its electronic brain considers best for that par-
ticular light situation. This point-and-shoot approach provides amazingly accurate results in
many cases. It can certainly be considered for fast candid shooting when there is no time for
a manual selection of aperture and shutter speed, and when subjects are of more or less aver-
age brightness and without a mixture of large shaded and brightly lit areas.
The Pv mode is identical to P but selects aperture and shutter speed based not only on
the subject brightness but also on the focal length of the lens on the camera. For example, it