5. As a default, DHCP will be checked which will grey out the IP Address, subnet mask and
gateway.
a. To be able to set these values DHCP must be unchecked.
6. Set the required IP address on both instruments and press save on both instruments.
7. To confirm that the IP address has been set correctly the following can be done:
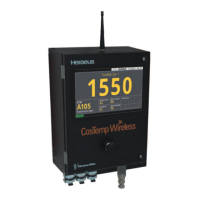
a. Access the CasTemp Wireless instrument menu screen (when not paired to a
CasTemp) using the “24816” password.
b. And click “operating system” this will load command prompt.
c. Type into command prompt “ipconfig” and press enter. This will show the instruments
set IP address/es.
d. Once happy that both IP addresses are set, type “ping (IP address of instrument you
want to connect too)” into command prompt the press enter. This will then tell you if
connection is successful or failed.
i. Example “ping 168.254.0.1”
9.7.2 How to set the instrument to slave
Once a connection is established one instrument needs to be set to slave.
• Access the CasTemp Wireless instrument menu screen (when not paired to a CasTemp)
using the “24816” password.
• Click “settings”.
• In the “instrument” page the “enable slave mode” must be selected on one of the instruments.
9.8 How to set up and use the QUBE CasTip
9.8.1 How to change the PAN ID of the Qube CasTip
To change the PAN ID of the QUBE CasTip first open the battery compartment and insert the battery.
The firmware version will flash up followed by the current pan ID. Once the pan ID is shown press and
hold the small black button next to the display until this value starts to flash let go of the button at this
point. Rotate the QUBE CasTip to the direction you would like the pan ID to go, rotate anti clockwise
for reducing pan ID and clockwise for increasing pan ID then press the small black button until you
reach the required pan ID. Once required pan ID is displayed waiting for the “Set” to be displayed and
press the black button the final screen will say “yes” to confirm, again press the black button to
complete the set up.
If connection has been completed successful a GREEN wireless light should be shown on the QUBE
CasTip, if this is RED then the setup is incorrect. If this LED is AMBER the setup is correct but
wireless safety lock may be preventing the successful pairing of the QUBE CasTip.