Running gear electric components
4990851_002_00 – 2082262 – 2022-01-10 81
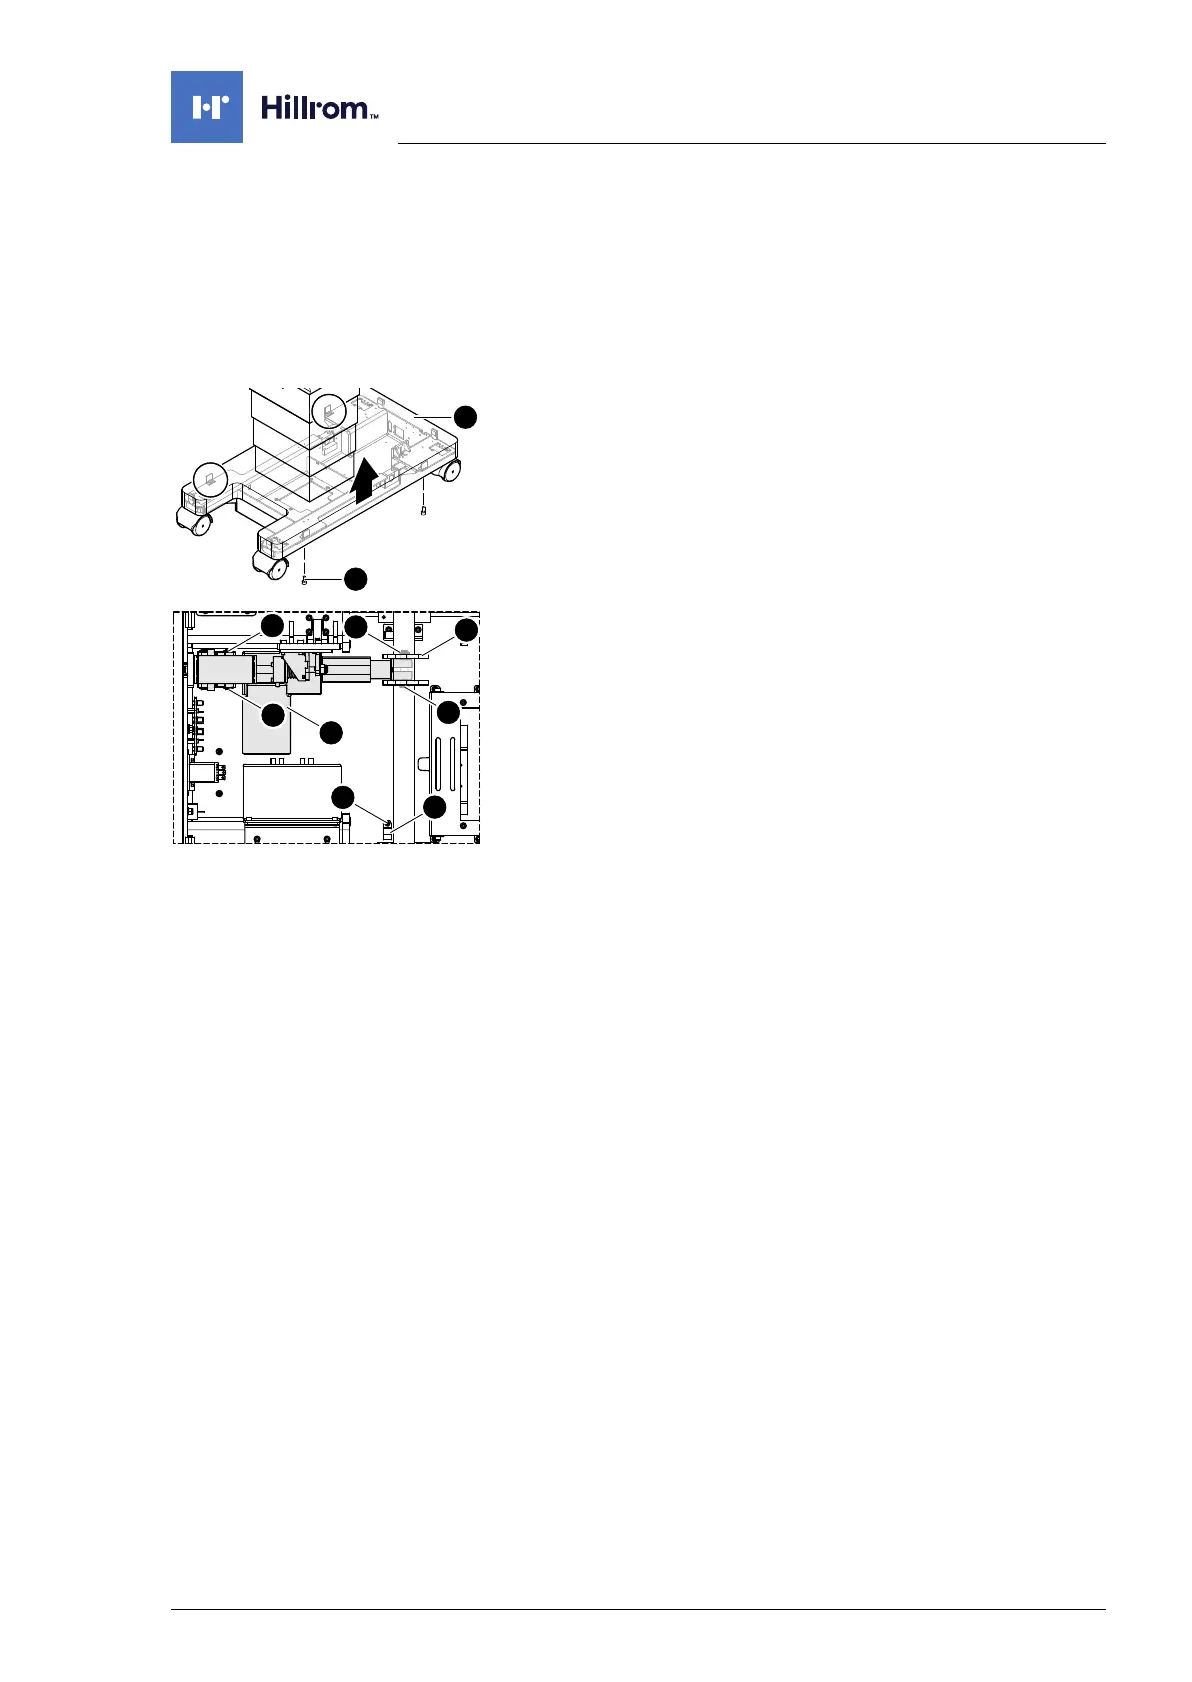
12.2 Jack-up unit linear drive
Attention: The jack-up unit linear drive requires a serial number.
Observe Chapter 1.9 when replacing the jack-up unit linear drive.
Removal 1. Prepare the operating table (Chapter 5).
2. Release the parking brake of the operating table or if
necessary operate the emergency release of the operating
table running gear.
3. Disconnect the power supply on the operating table
(Chapter 6.1).
4. Open the column cover on the running gear (Chapter 6.3).
5. Loosen the running gear metal cover [1] (4 screws [2]).
6. Push up the running gear metal cover [1] and fix in the upper
position.
7. Remove the safety ring [3] at the bottom of the eccentric
tappet [4].
8. Pull the bolts [5] out of the eccentric tappet [4].
9. Remove both safety rings [7] from the head end of the linear
drive [6] on the bolts [8].
10. Remove the bolts [8] from the head end of the linear drive [6].
11. Note the cable routing. Remove the cable clip [9] (1
screw [10]) and cable ties from the connecting cable.
12. Note the cable routing. Remove the plug of the connecting
cable.
13. Remove the jack-up unit linear drive assembly and safely
place on a level work surface.
14. Update the firmware of the operating table.
Assembly 1. Insert the jack-up unit linear drive assembly.
2. Attention: Do not interchange the plug connections. Pay
attention to the wiring diagram on page 64.
Restore the original cable routing. Connect the plug of the
connecting cable.
3. Restore the original cable routing. Mount the cable clip (1
screw) and cable ties of the connecting cable.
4. Mount the linear drive to the top end (1 bolt with 2 safety
rings).
5. Insert the bolt on the eccentric tappet.
6. Secure the bolt with the securing ring at the base of the
eccentric tappet.
7. Mount the running gear metal cover on the running gear
(Chapter 11.2).
8. Guide the column cover downwards and close on the running
gear (Chapter 6.4).
9. Apply the parking brake of the operating table.
10. Put the pad in place.
11. Connect the power supply to the operating table
(Chapter 6.2).
 Loading...