Tabletop electric components
50
4990851_002_00 – 2082262 – 2022-01-10
8.6 Longitudinal slide drive unit
Attention: the drive unit requires a serial number. Observe
Chapter 1.9 when replacing the drive unit.
Removal 1. Prepare the operating table (Chapter 5).
CAUTION! The tabletop must be in horizontal position. If the
tabletop is tilted, the tabletop will independently slide to the
mechanical end stop while removing the drive.
2. Disconnect the power supply on the operating table
(Chapter 6.1).
3. Remove the pad plate from the seat section (Chapter 7.2).
Attention: Leave the pad plate on the back section attached
so that the adjustment of the struts is maintained.
4. Remove the column head cover (Chapter 9.3).
5. Open the column top and guide the column cover
downwards (Chapter 6.5).
6. Note the cable routing. Pull the plug of the motor connecting
cable (longitudinal slide) out of the W305 cable socket.
7. Note the cable routing. Remove the cable fastening from the
connecting cable (1 screw).
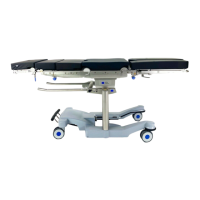
8. Remove the cover of the gear wheel [1] (3 screws).
9. Remove the nut [2].
10. Remove the gear wheel [3] with the gear wheel extractor
(#2067884).
11. Switch on the operating table using the switch at the running
gear.
12. Shift the longitudinal slide of the tabletop to end position on
the foot-end.
13. Switch off the operating table using the switch at the running
gear.
14. Unscrew the longitudinal slide drive unit from the column
head (8 screws [5] and 2 pins [6]).
15. Note the mounting position of the end stops. Remove the end
stops [7] from the column head on the head end of the
tabletop on both sides (2 screw each).
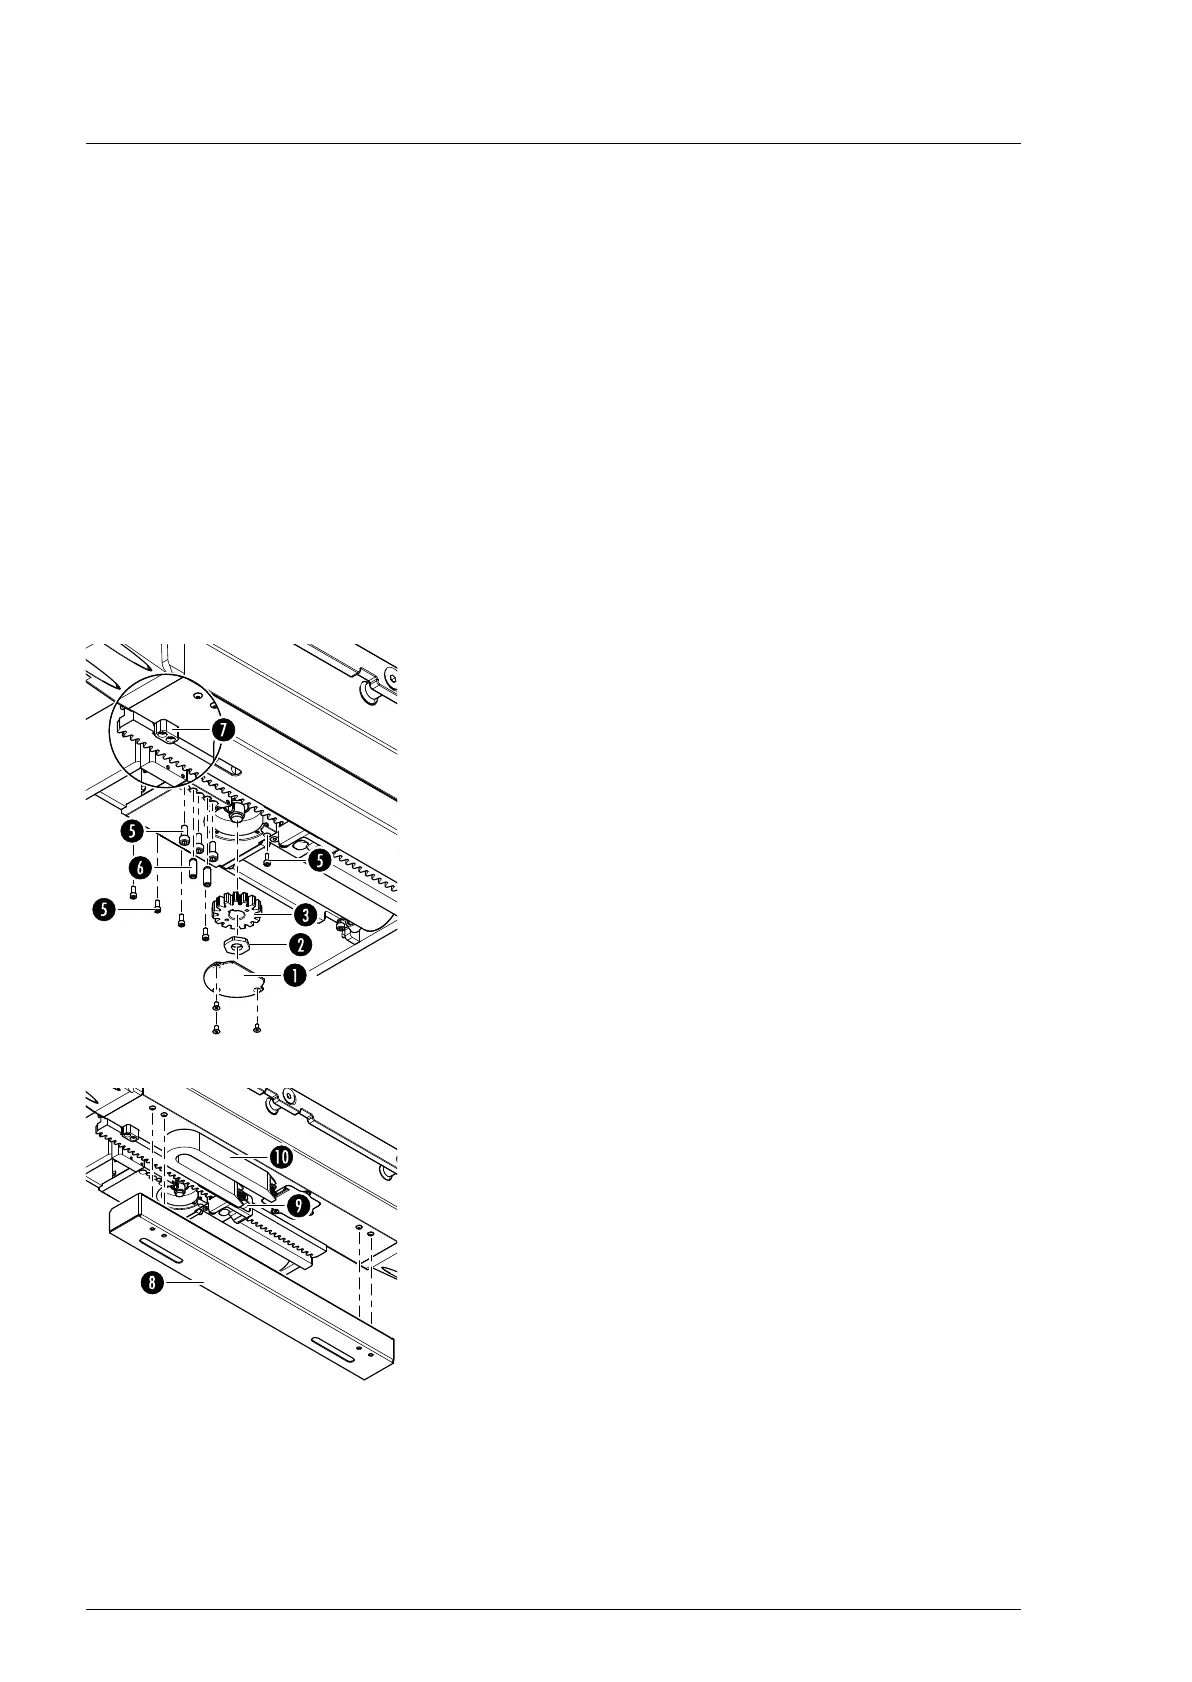
16. Unscrew the covers [8] of the power chain on both sides of
the tabletop (4 screws each, do not unscrew completely) and
disengage.
17. Remove the power chain [9] on both sides of the tabletop at
the bottom end [10] from the tabletop (3 screws each).