Running gear electric components
4990851_002_00 – 2082262 – 2022-01-10 89
12.10 Switching relay transformer
Removal 1. Prepare the operating table (Chapter 5).
2. Disconnect the power supply on the operating table
(Chapter 6.1).
3. Open the column cover on the running gear (Chapter 6.3).
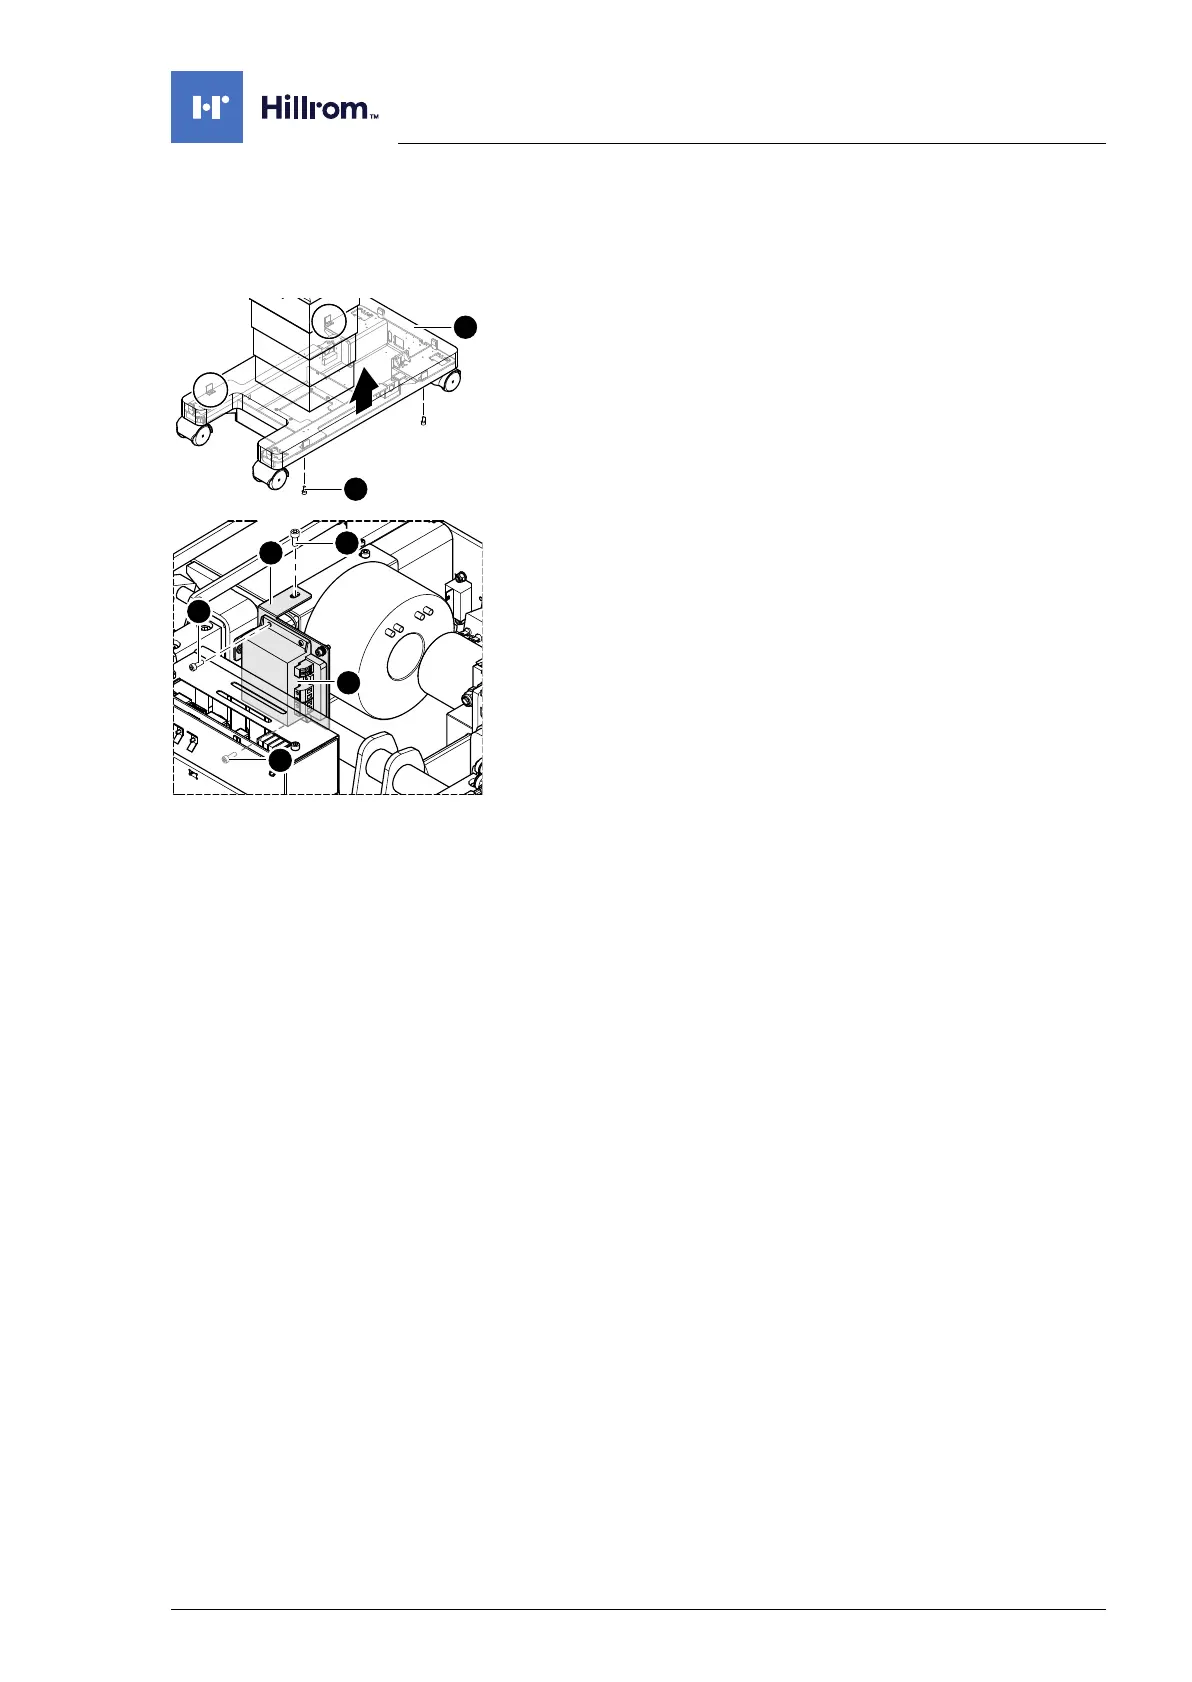
4. Loosen the running gear metal cover [1] (4 screws [2]).
5. Push up the running gear metal cover [1] and fix in the upper
position.
6. Remove the retaining plate [4] from the running gear (1
screw [5]) and slightly raise the switching relay.
7. Note the cable routing. Disconnect cable W721 from the
switching relay [3].
8. Note the cable routing. Disconnect cable W720 from the
switching relay [3].
9. Note the cable routing. Remove the earth connection on the
retaining plate of the switching relay (1 screw with 2 serrated
lock washers and 1 washer).
10. Remove the switching relay with retaining plate and place
safely on a level work surface.
11. Remove the retaining plate [4] from the switching relay (2
screws [6]).
12. Unclamp the jumper bar on the switching relay from the
connections S1 and S2.
Assembly 1. Clamp the jumper bar onto the switching relay at the
connections S1 and S2.
2. Set the correct transformer type to the potentiometer of the
switching relay.
3. Mount the retaining plate on the switching relay (2 screws).
4. Restore the original cable routing. Mount the earth
connection on the retaining plate of the switching relay (1
screw with 2 serrated lock washers and 1 washer).
5. Attention: Do not interchange the plug connections. Pay
attention to the wiring diagram on page 64.
Restore the original cable routing. Connect cable W720 on
the switching relay.
6. Restore the original cable routing. Connect cable W721 on
the switching relay.
7. Insert the switching relay with retaining plate and fit the
retaining plate on the running gear (1 screw).
8. Mount the running gear metal cover on the running gear
(Chapter 11.2).
9. Guide the column cover downwards and close on the running
gear (Chapter 6.4).
10. Put the pad in place.
11. Connect the power supply to the operating table
(Chapter 6.2).