11.2 Preparations before Use (Connections and Settings)
223
11
Installation procedure
Install the driver before connecting the instrument and computer with a USB cable. If the
instrument has already been connected, disconnect the USB cable in order to perform
the installation.
• If the “Found New Hardware Wizard” screen is displayed, select “No, not this time” when
asked whether to connect to Windows Update and then choose “
Install the software auto-
matically
.”
• If an instrument with a different serial number is connected, the computer may recognize
it as a new device. Follow the instructions on the screen to install the device driver.
• A warning message will be displayed since the device driver has not undergone Windows
Logo testing. Choose “
Continue Anyway.”
Procedure to uninstall the driver (uninstall the driver once it is no longer needed)
Delete the Hioki USB CDC Driver using [Control Panel] - [Add or Remove Programs].
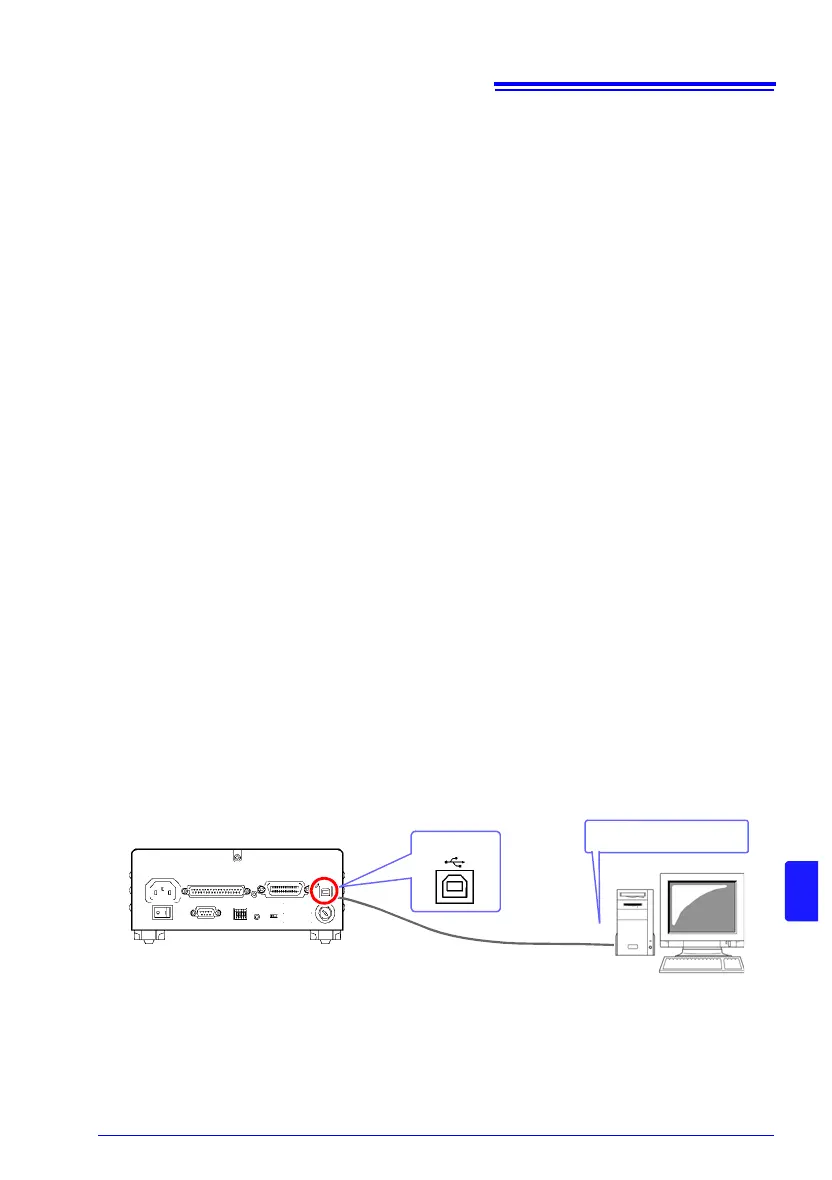
3. Connect the USB cable.
Connect the included USB cable to the instrument’s USB jack.
1 Log in to a user account on the computer with administrator privileges (for
example, “administrator”).
2 Before starting the installation, exit all applications running on the computer.
3 Launch HiokiUsbCdcDriver.msi. After doing so, follow the instructions on the
screen to complete the installation.
To run the installer from the included application disc, execute the following file:
X:\driver\HiokiUsbCdcDriver.msi (X
: CD-ROM drive)
In some operating environments, it may take some time for the dialog box to
be displayed.
4 After installing the software, the instrument will be recognized automatically
when it is connected to the computer with the USB cable.
USB cable
USB port on computer
Type B