12.2 Printing
244
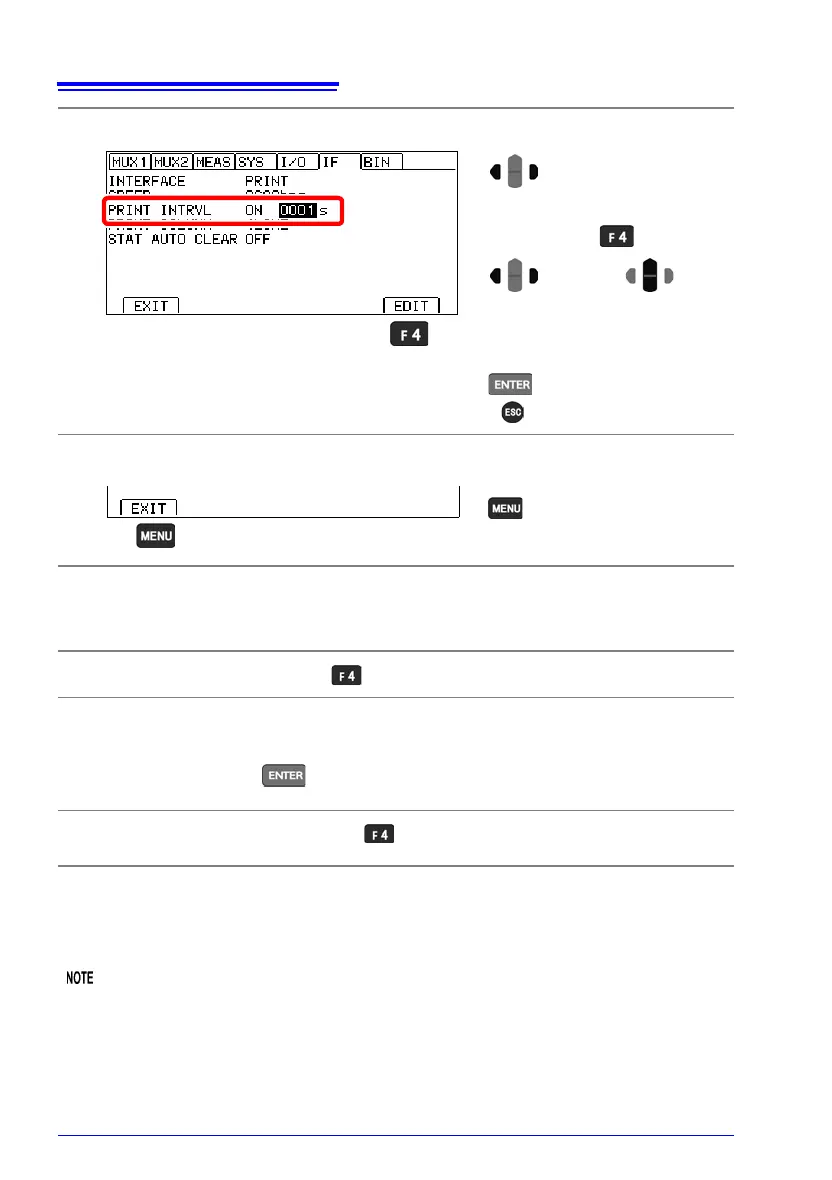
Interval printing operation
*1 When the elapsed time reaches 100 hours, it is reset to 00:00:00 and starts counting
from 0 again.
Example: 99 hours 59 minutes 50 seconds elapsed: 99:59:50
100 hours 2 minutes 30 seconds elapsed: 00:02:30
• Since measurement conditions and measured values will be mixed together when mea-
surement conditions are printed during interval printing, avoid printing settings while inter-
val printing is in progress.
• Interval printing cannot be used when the multiplexer’s scan function is set to auto or
step.
4
Set the interval.
5
Return to the Measurement screen.
1
Interval printing starts with [PRINT] key or EXT I/O PRINT signal input.
2
Every time the set interval elapses, the elapsed time (in hours:minutes:sec-
onds format)
*1
and measured value are printed.
Note that when the or EXT I/O TRIG signal is input, the elapsed time and
measured value at that point in time are displayed.
3
Interval printing stops when [PRINT] key or PRINT signal input is
received again.
Setting range: 0 to 3600 seconds
(Using a setting of 0 sec. disables automatic
printing.)
Move the cursor to the setting you
wish to configure. Make the value
editable with the key.
2
Move the cursor to the digit you
wish to set with the left and right
cursor keys. Change the value
with the up and down cursor keys.
Change
values.
1
Move among
digits.
3
Accept
( Cancel)
Return to the
Measurement screen.