15–28 Upgrading a Hitachi Unified Storage 130 system
Hitachi Unified Storage Hardware Service Guide
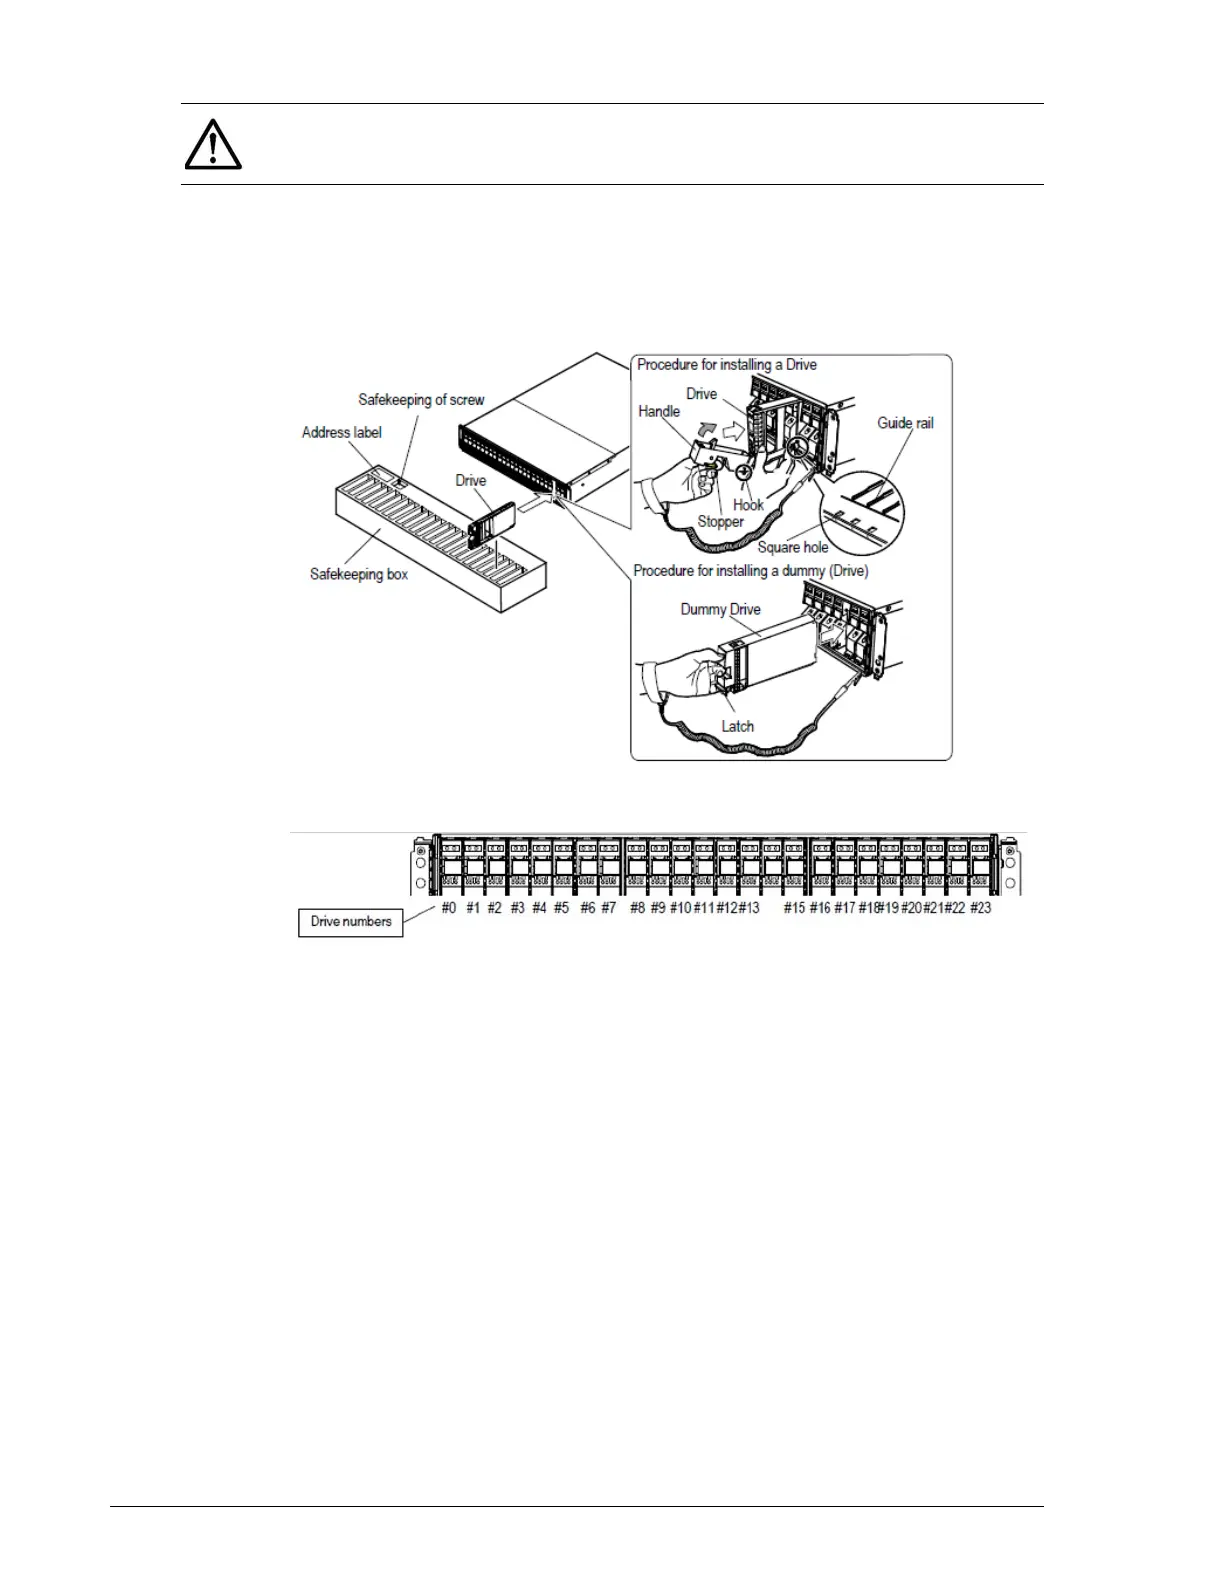
4. Pull the handle gently to ensure the drive cannot be pulled out.
5. If a drive slot does not contain a drive, insert a dummy drive slowly into
the slot until the drive latch moves to the lower side.
6. Attach the front bezel (see Removing and replacing the front bezel on
page 3-10).
Figure 15-13: Installing a drive in the DBS
Figure 15-14: Drive mounting locations on a CBXSS/CBSS/DBS
Installing drives in the DBX
To install drives in the DBX:
1. Pull the DBX out of the rack and remove the top cover (see Removing
and replacing the front bezel on page 3-10).
2. Hold the drive with both hands and insert the drive into the slot from
where it was removed.
3. Close the handle.
4. If a drive slot does not contain a drive, insert a dummy drive slowly into
the slot.
5. Attach the front bezel (see Removing and replacing the front bezel on
page 3-10).
6. Return the DBX to the rack.
NOTE: If the raised handle prevents the hook from being inserted into the
rectangular hole, the drive cannot be installed properly because it is
blocked by the frame of the disk array unit