4-8
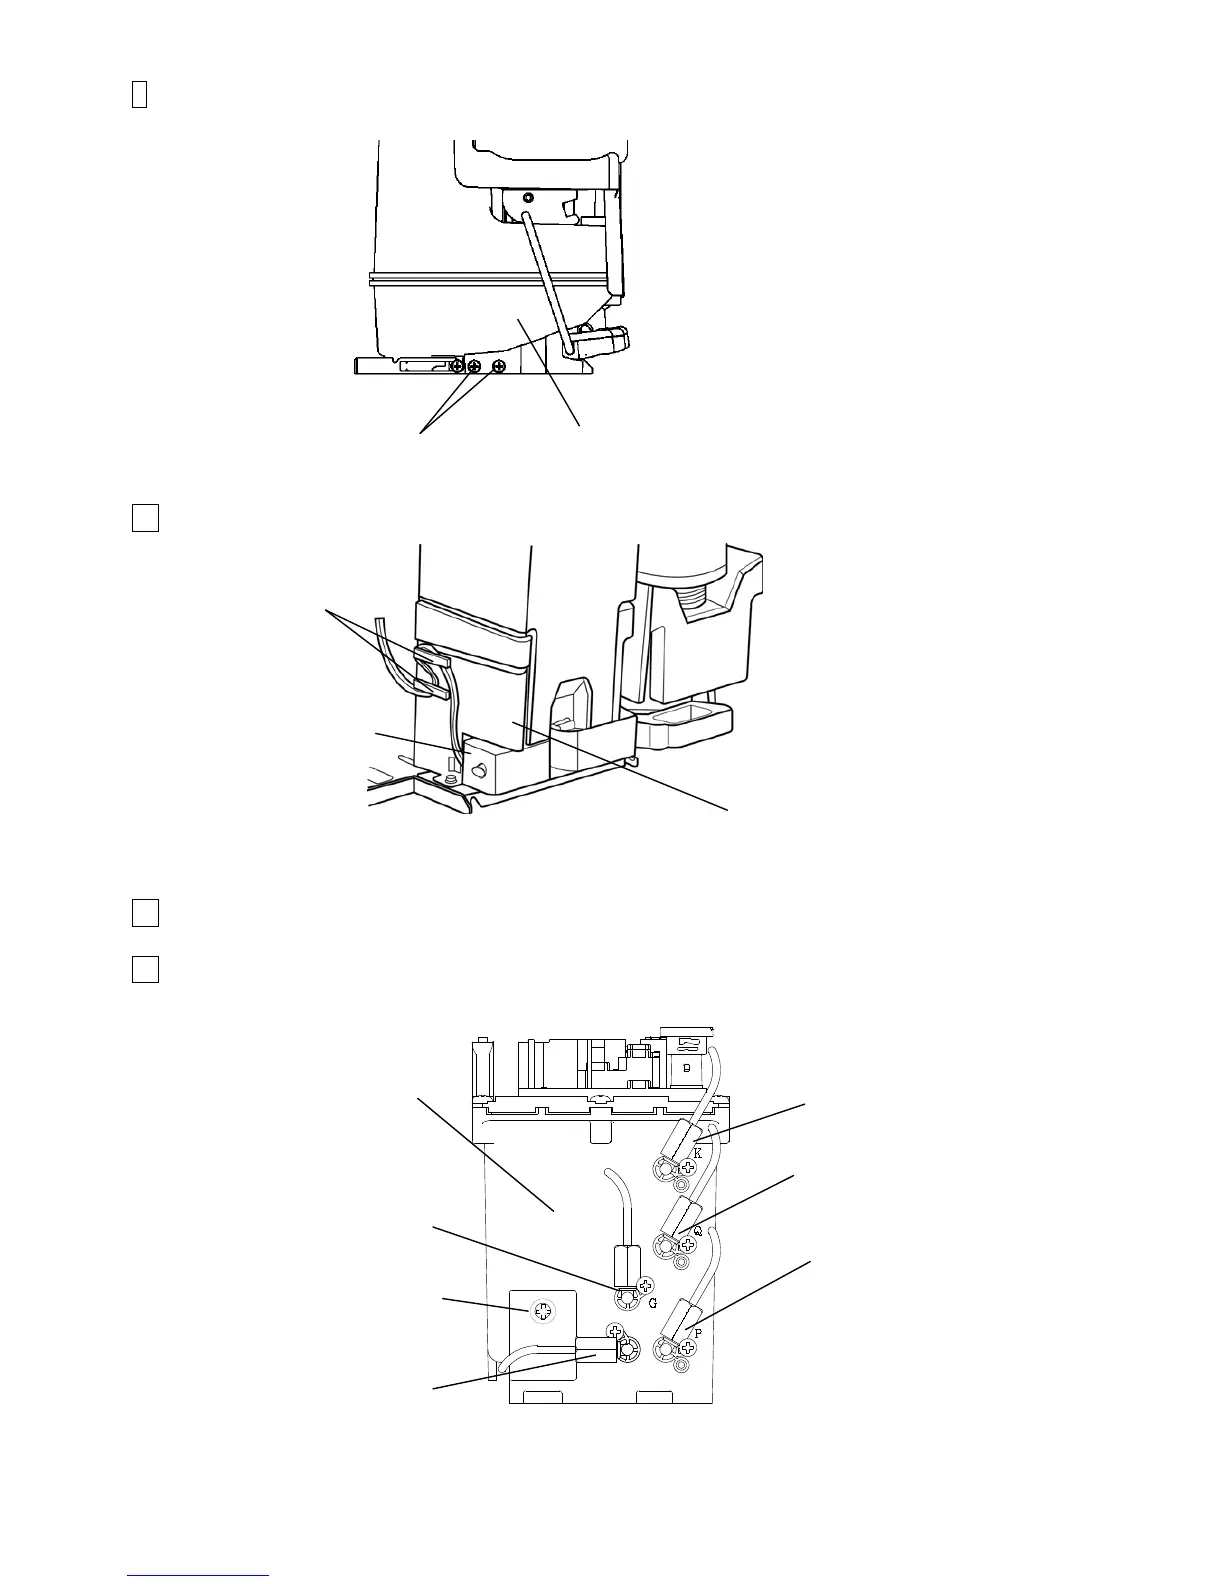
9 Remove the fixing screws (2 positions) and remove the Makeup reservoir.
10 Remove the Solenoid cable from the hook on the Inner cover (B).
[Caution] Pay attention NOT to pinch the Solenoid Cable while above work is implemented.
11 Remove the fixing screw (1 position) and take out the main ink tank.
12 Remove the tube locks (5 positions).
[Caution] Put wiping paper under the main ink tank for ink dripping.
Fixing screw
Tube lock
(K)
Tube lock
(Q)
Tube lock
(P)
Tube lock
(G)
Tube lock
(Drain tube)
Main ink tank
Hook
Inner cover (B)
Solenoid Cable
Fixing screws
Makeup reservoir

 Loading...


