4-9
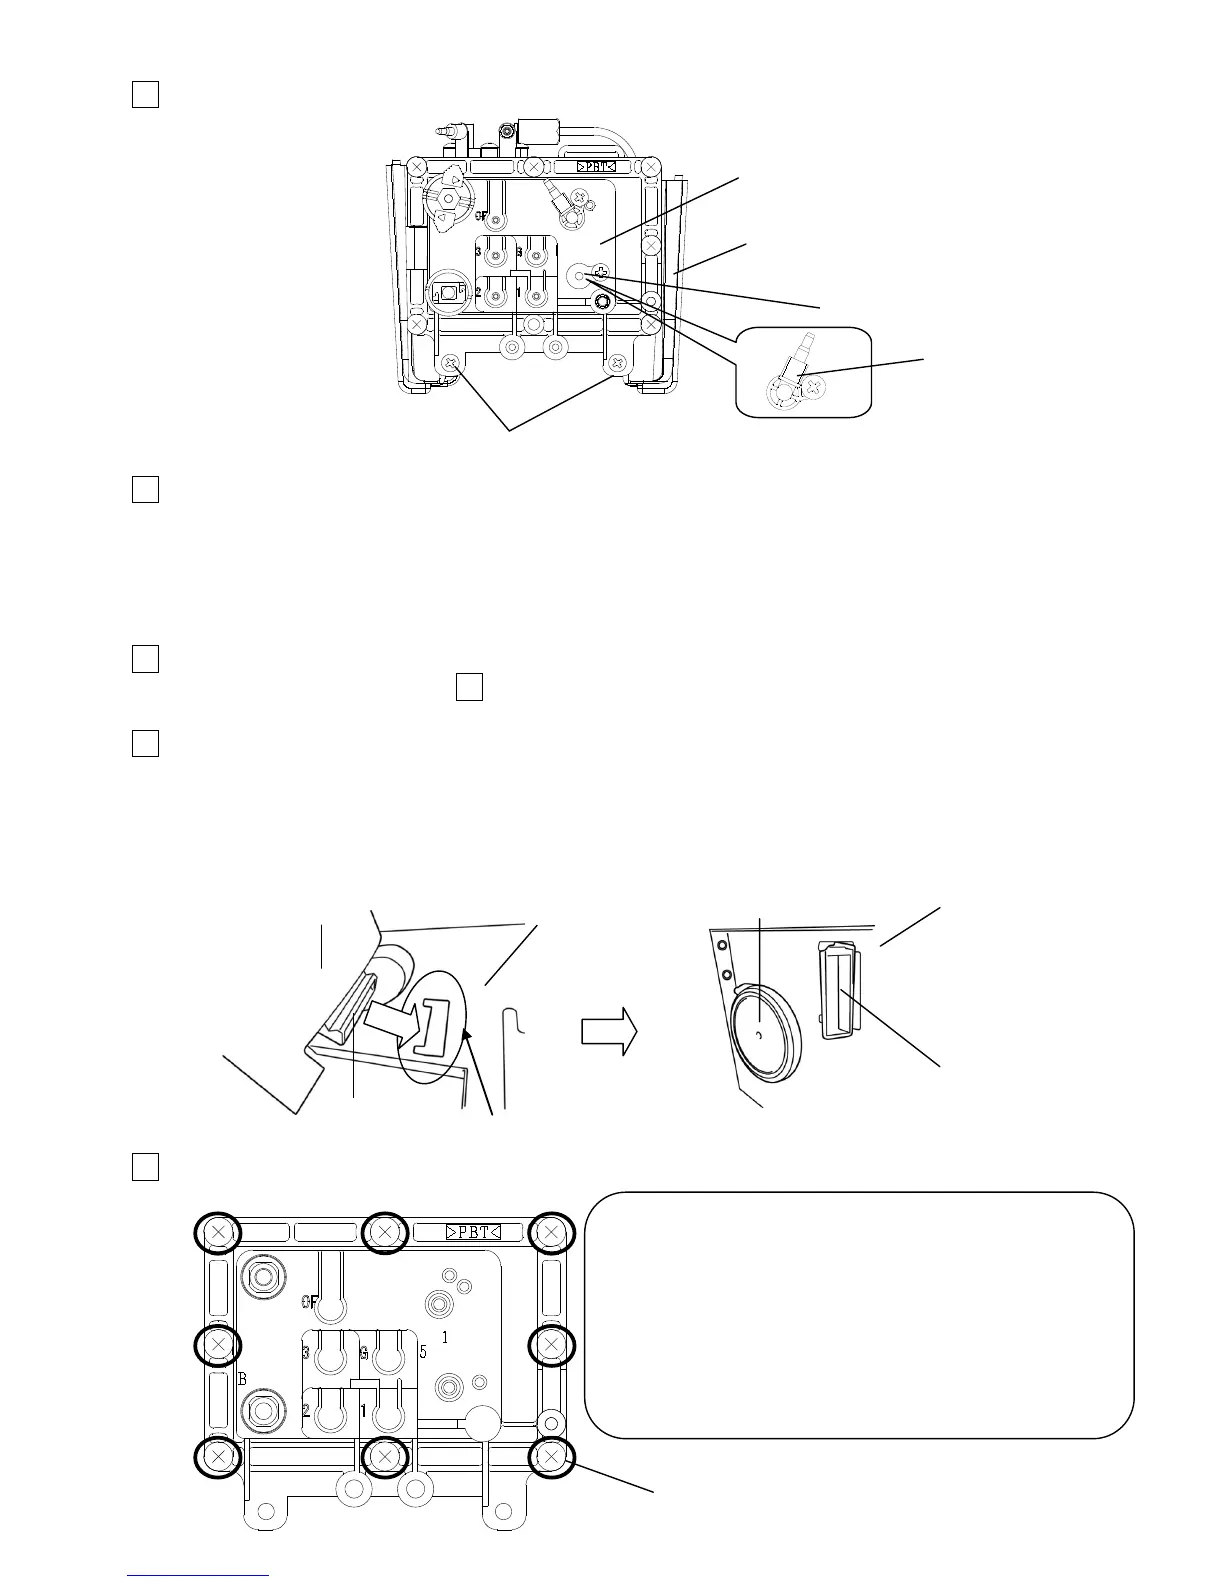
13 Remove the fixing screws (2 positions) and take out the inner cover (B)
14 Clean the portion stained with ink and then install the main ink tank in reverse order of the
procedures above.
[Caution] On Model UX-E, when you replace main ink tank which was mounted in the printer
with replacement part, replace the plug on the replacement part with the ICU joint which is
delivered together .
15 Route the solenoid cable to the hook of the inner cover (B).
(Refer to the figure in step 10 for how to route the Solenoid Cable.)
16 Installing the new Makeup Reservoir in reverse order of the procedures above.
[Caution] When installing the Makeup Reservoir, confirm that the Solenoid Cable is
routed to the hook of the inner cover(B).
When installing the Makeup Reservoir, out the hook of the Makeup reservoir
into the hole of the Reservoir base first.
17 Perform “Ink refill” and make sure that there is no ink leak.
4.2.3 Removal method of the Main ink tank lid
Fixing screws
Main ink tank
Inner cover (B)

 Loading...


