4-20
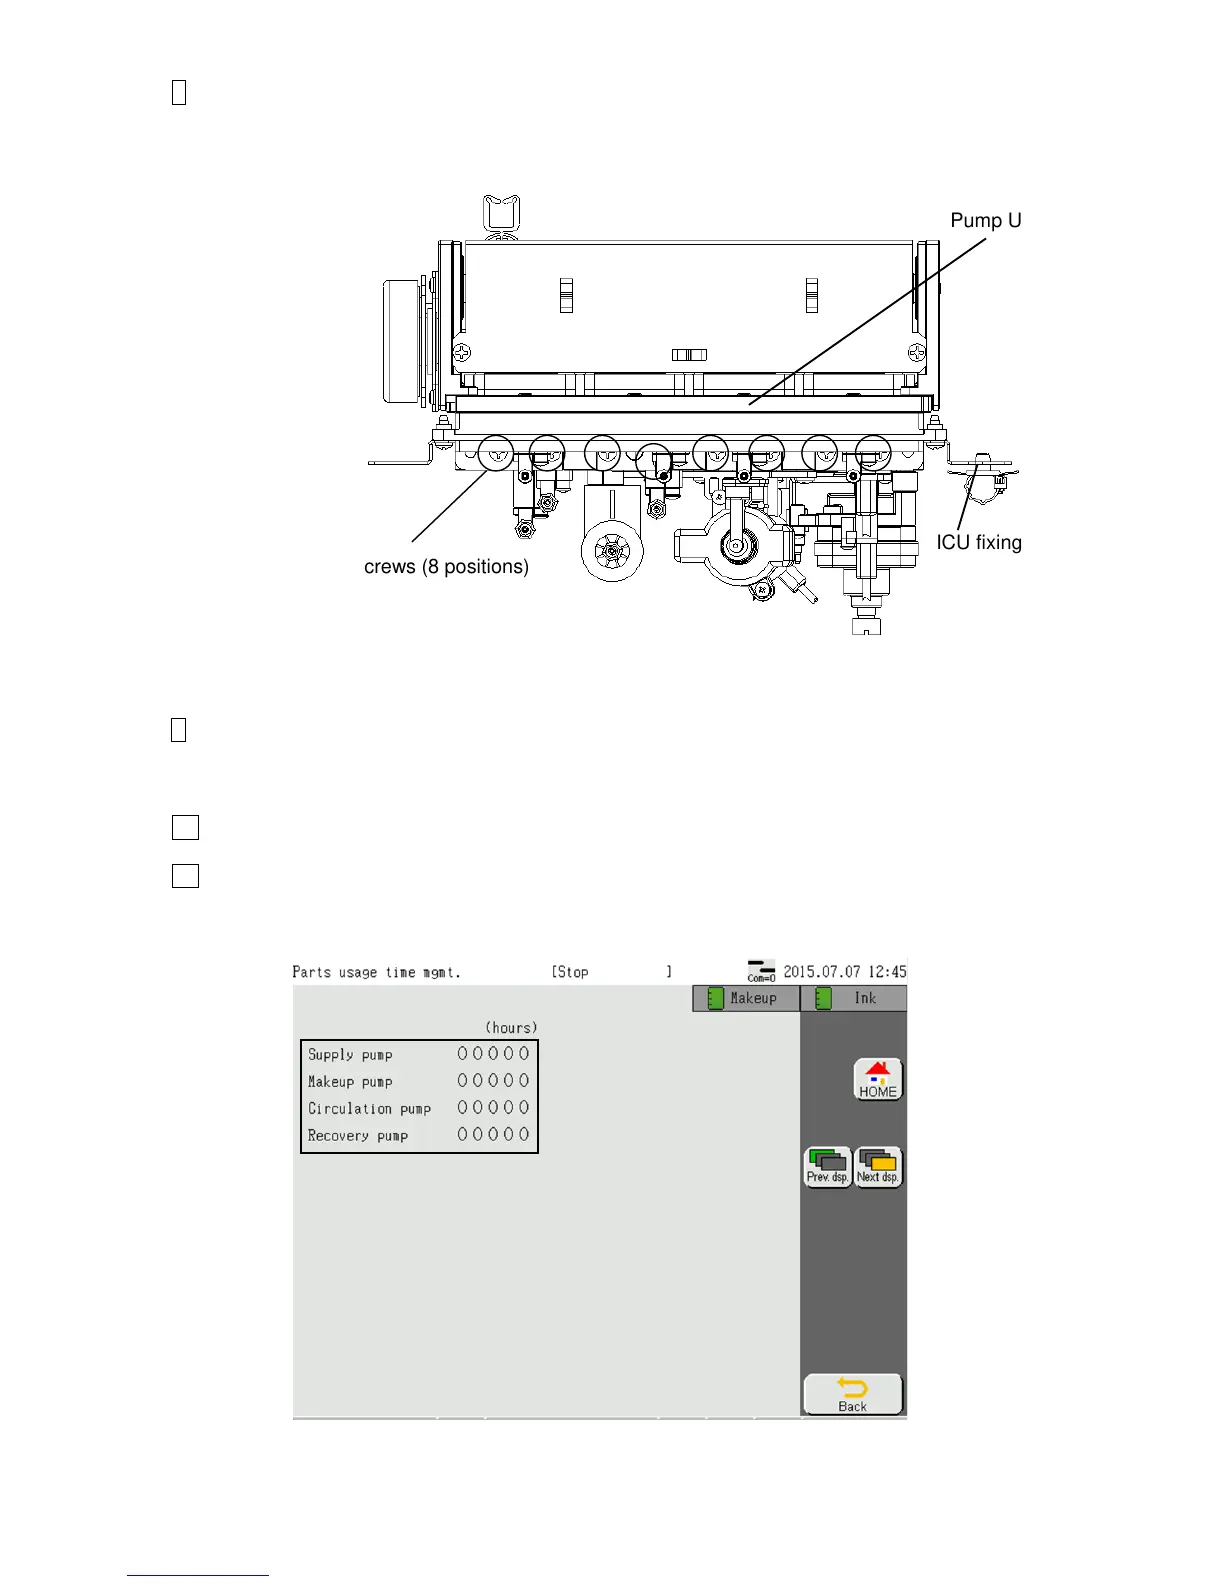
8 Remove the fixing screws (8 positions) which connects both the upper part and the lower
part of the circulation unit. The pump unit can be removed.
"Caution": Put wiping paper under the pump unit to provide for an ink drip.
9 Clean the portion stained with ink and make sure that the O-rings (4 positions) are
securely mounted in the concaves of the lower-side circulation unit. Then, install the
new pump unit in reverse order of the procedures above.
10 Perform “Ink refill” and adjust the pressure. Make sure that there is no ink leak.
11 Reset the pump time to "0" on the “Parts usage time management” screen.
Fixing screws (8 positions)
Pump Unit
ICU fixing plate

 Loading...


