4-35
6
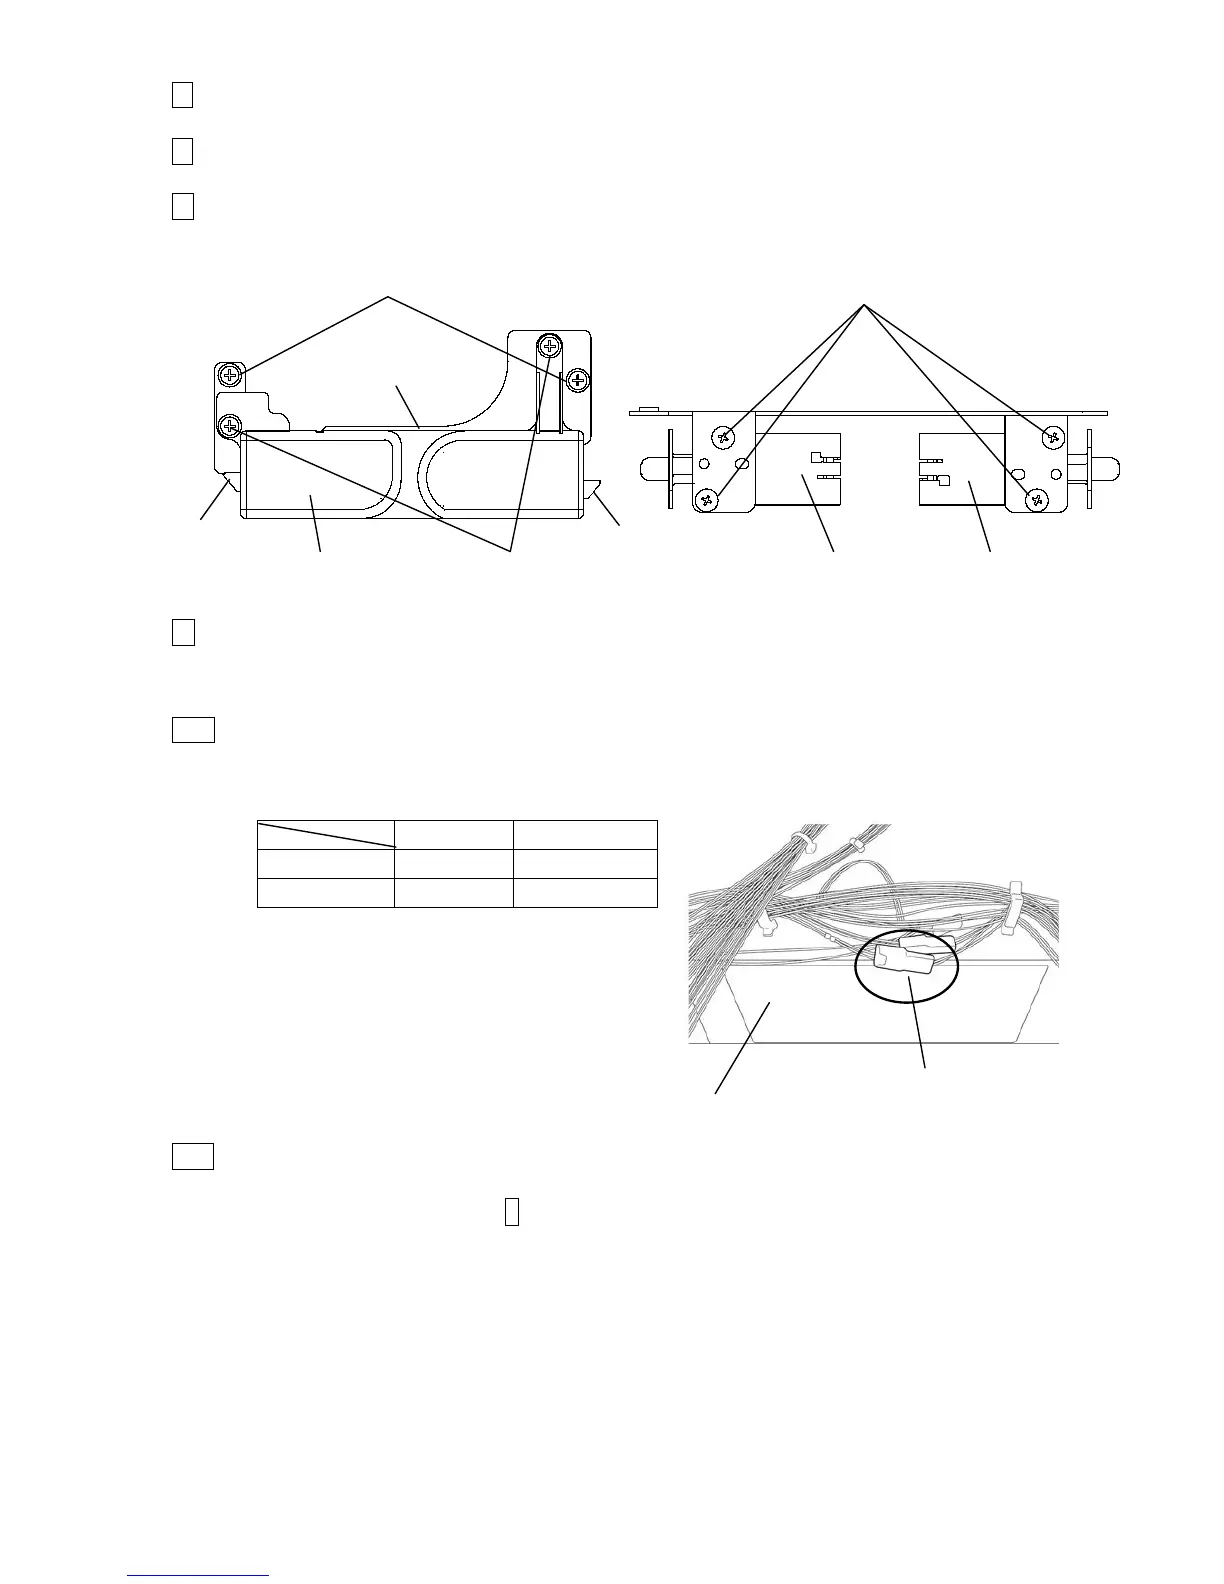
Remove the Fixing screws(1) (2 pieces) and remove the solenoid unit.
7
Remove the Fixing screws(2) (2 pieces) and remove the solenoid cover.
8 Remove the Fixing screws(3) (2 pieces each) of the Solenoid to be replaced, and
remove the solenoid.
9
Follow the procedures described in “4.1.3 Access to the parts on the rear side of
equipment”, “(1) Access method from the front” and open the unit door.
[Caution] Be careful not to catch the tubes.
10
Remove the Solenoid connector of the Solenoid to be replaced, and remove the
solenoid cable.
11
Put a new solenoid in reverse order of the procedures above.
Route the solenoid cable to the hook of the inner cover (B).
(Refer to the figure in step 5 for how to route the Solenoid Cable.)
[Caution] When you install the solenoid, do NOT pinch the wirings.
・Color of solenoid cable of maintenance part is orange only and it is compatible with
solenoid 13 and 14.
However be sure NOT to mix up two solenoids.
Solenoid (Makeup side)
Fixing screws(3)
Solenoid (Ink side)
Fixing screws(1)
Solenoid cover
Solenoid unit
Fixing screws(2)
Lock pin
Lock pin

 Loading...


