3-23
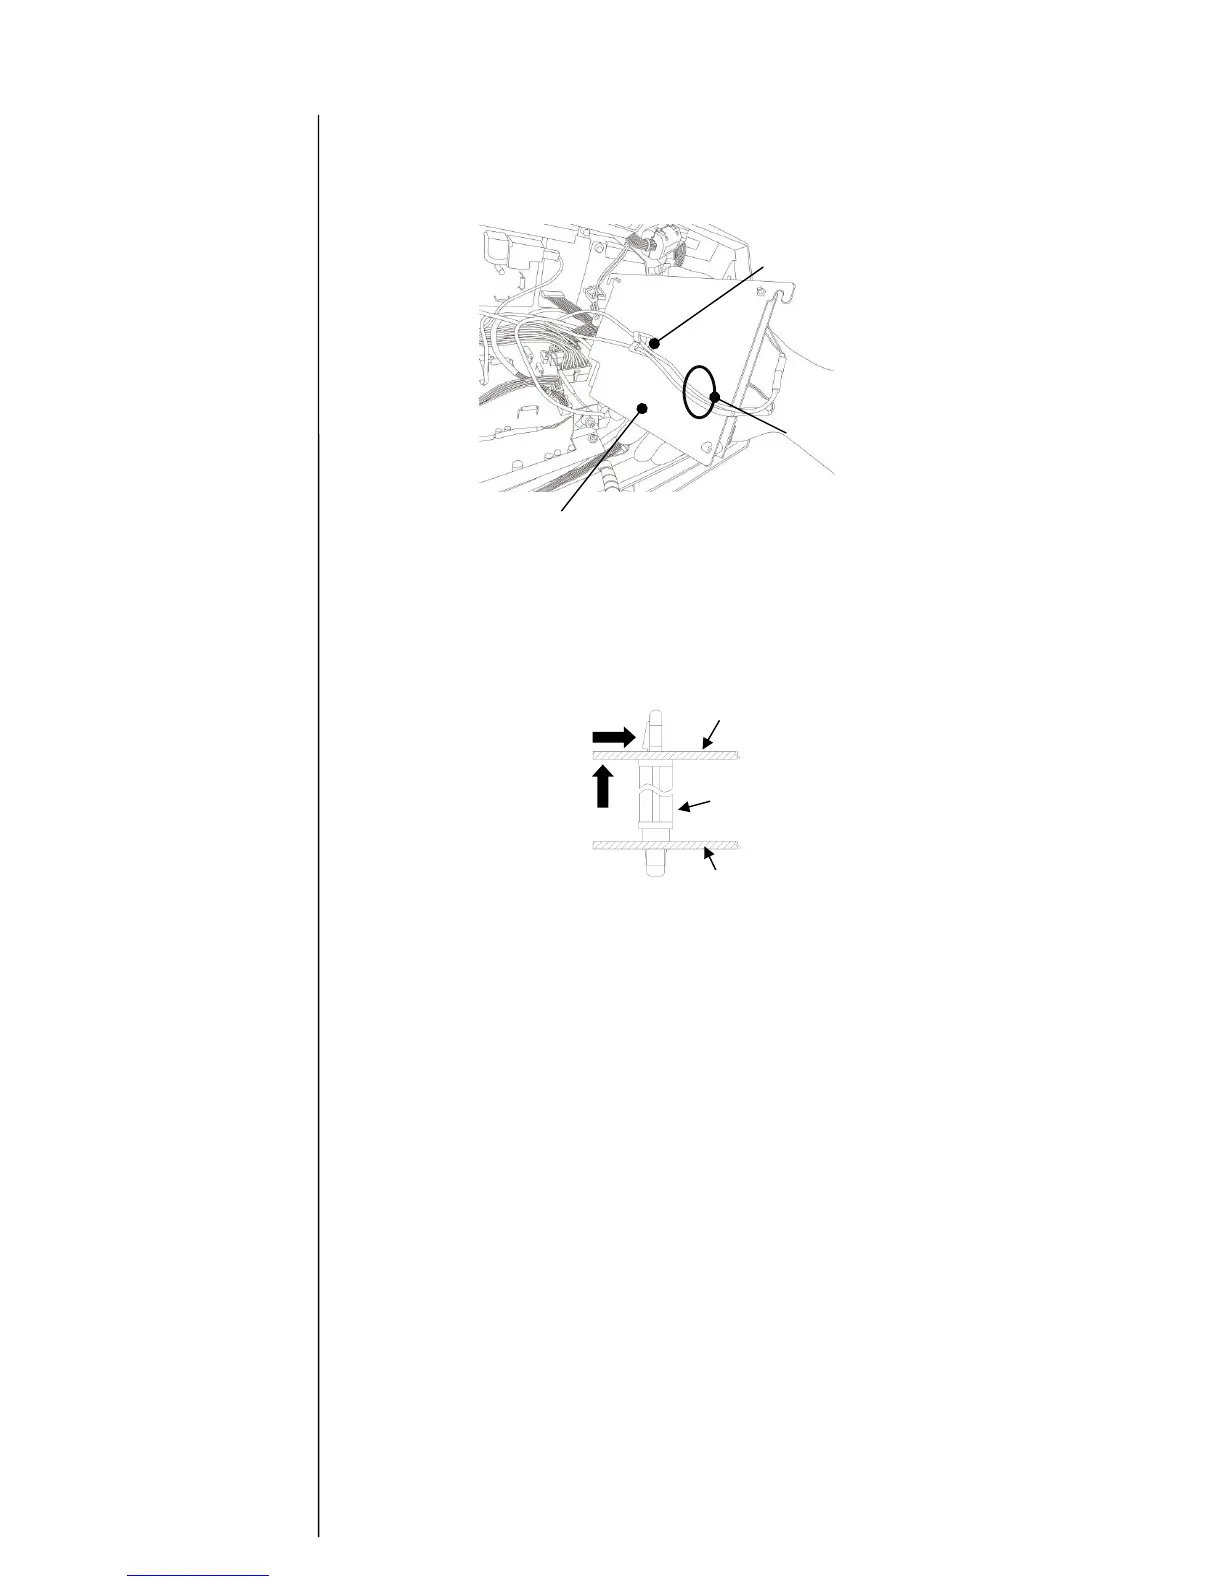
(4) Loosen fixing screws (2pcs) of metal plate fixing EZJ134 board. Slide the metal plate
upward as the picture below shows, and remove EZJ134 board with the metal plate
attached. Note that remove clamped cables of CN1 and CN3 from the back of metal
plate, and then remove connectors of CN1 and CN3.
(5) Remove EZJ134 board from the metal plate fixing EZJ134 board. First, remove fixing screws
(2pcs). Secondly, inch the hook of spacer with fingers and then remove EZJ134 board upward
with pushing the hook.
(6) Replace the EZJ134 board and then install the each part by the procedures above in
reverse order.
(7) Set up SW1 according to the nozzle diameter.
(8) Confirm the charging voltage.
(9) Perform “Excitation adjustment” and “Auto-phase gain adjustment”.
(10) Check if the respective nozzle can conduct print operation properly.

 Loading...


