Testing
and
Troubleshooting
3-7
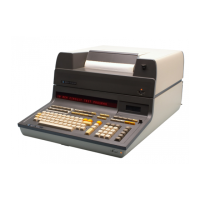
Printer
The printer self-test
is
initiated by powerup or by a SCRATCH
ALL
or
LOAD
BIN.
This test shifts
serial data through the shift register
on
the printhead chip modules
and
reads the output data,
checks the value of each printhead resistor, checksums the program
and
character ROMs,
and
tests
printer
RAM.
The printer checks each resistor for the proper resistance range
and
adjusts the burn
time for each
head
dependent
upon an average resistance of that head. If any resistors are
out
of
specification, an error message
is
issued. Also, the printer logic board monitors the motor drive
board, the head voltage,
and
the temperature of the printhead.
The printhead control lines are constantly monitored to prevent a sticking condition from destroying
a printhead.
In
the case of a failure, the head voltage
is
shut down
and
the printer's status register
reports the failure to the operating system.
An
LED
on
the printer's logic board also lights when a
failure occurs. The LED
is
visible through the air vents under the keyboard.
Pressing the form feed
and
paper advance switches at the same time produces a printer output.
This provides a quick confidence test of the printer, checking for missing dots
and
overall print
quality.
Keyboard
The keyboard processor turns the
CAPS
LED
on
and
off
and
turns the
PRINT
ALL
LED
on
at
power-up. This test indicates that the processor
is
capable of executing code. When the BASIC
operating system begins to run,
it
turns the
PRINT
ALL
LED off
and
turns the
CAPS
LED back on.
When
HP-UX runs, both the
PRINT
ALL
and and
CAPS
LEOs are
off.
With
an
operating system
installed, pressing
(CAPS)
and
checking the toggling of
the
LED verifies
keyboard
operation.
Successful
keyboard
operation
means
that
the keyboard processor
and
scanning circuits
are
working.
The
self-test supervisory
code
tests the keyboard
110
later in the
power-up
sequence.
Display Interface Module
(DIM)
The display interface module
(DIM)
contains self-teSting hardware which either verifies a greater
than
95%
confidence
in
the assembly or indicates a fault. The test hardware outputs a test pattern
to the display. The test
is
initiated by pressing the self-test button underneath the display
or
by
program request. The self-test supervisory code, described below, tests the display buffer memory
of
DIM.
98760A Standard Color Graphics Display
The green
SWEEP
INDICATOR
LED lights at powerup to indicate that the vertical
and
horizontal
scans are operating correctly. High voltage
is
enabled by proper scan functioning. The LED remains
on
as long as there
is
no
scan fault condition. If the LED
fails
to light at powerup, a faulty scan
is
indicated.
98770A
High Performance Color Graphics Display
The display contains its own power supply
and
can
be
tested when disconnected from the compu-
ter. A self-test connector
and
switch assembly enable the testing. The
DIM
must
be
removed for
offline testing of the display.
Offline testing
is
described in the 98770A Service Manual. Further
testing must
be
done
by the
DIM
or by the system integrity tests.