09/01/13www.HandiQuilter.com Installaon | 3.11
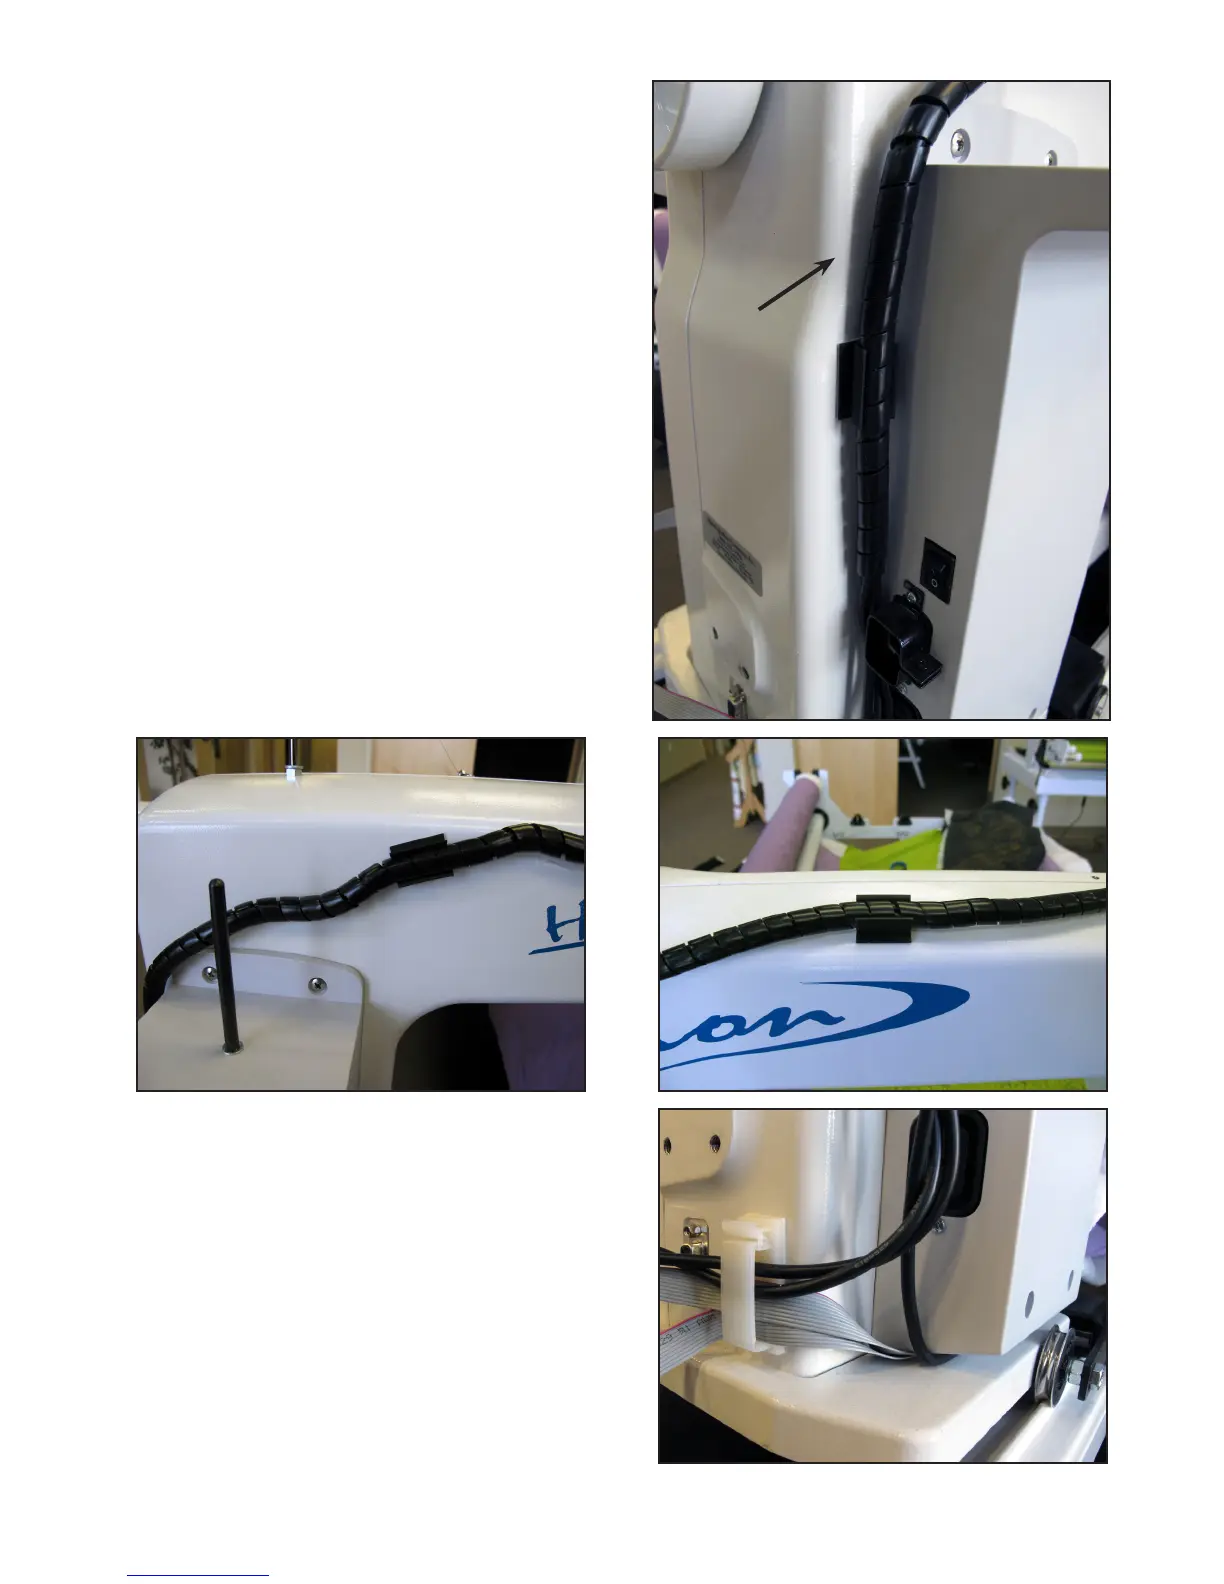
6. The black cables aached to the Pro-Stcher carriage
should be routed up between the rear handles and
the quilng machine, toward the right-hand side of
the machine (looking at the machine from the back).
Aach the cable clips (see Parts List, item J) and route
the cable accordingly.
7. The small black cable with the black 3-connector clip
should be routed underneath the P-Pod and snapped
into the quilng machine’s Y-encoder.
The two black cables that run from the carriage up to
the computer should be clipped into the cable clip
under the rear handlebar to help prevent these
cables from geng caught on the edges of the
carriage.
Stch-
regulator
cable