09/01/133.12 | Installaon www.HandiQuilter.com
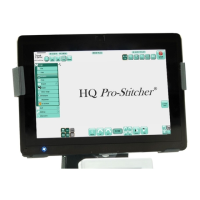
8. Once again verify that the y-axis gear engages the
blue Flexirack for the y-axis.
• Do this by looking from the back of the machine
between the boom of the quilng machine
and the top of the carriage. If necessary, use the
manual engagement/diseangagement tool to
move the gears so they engage.
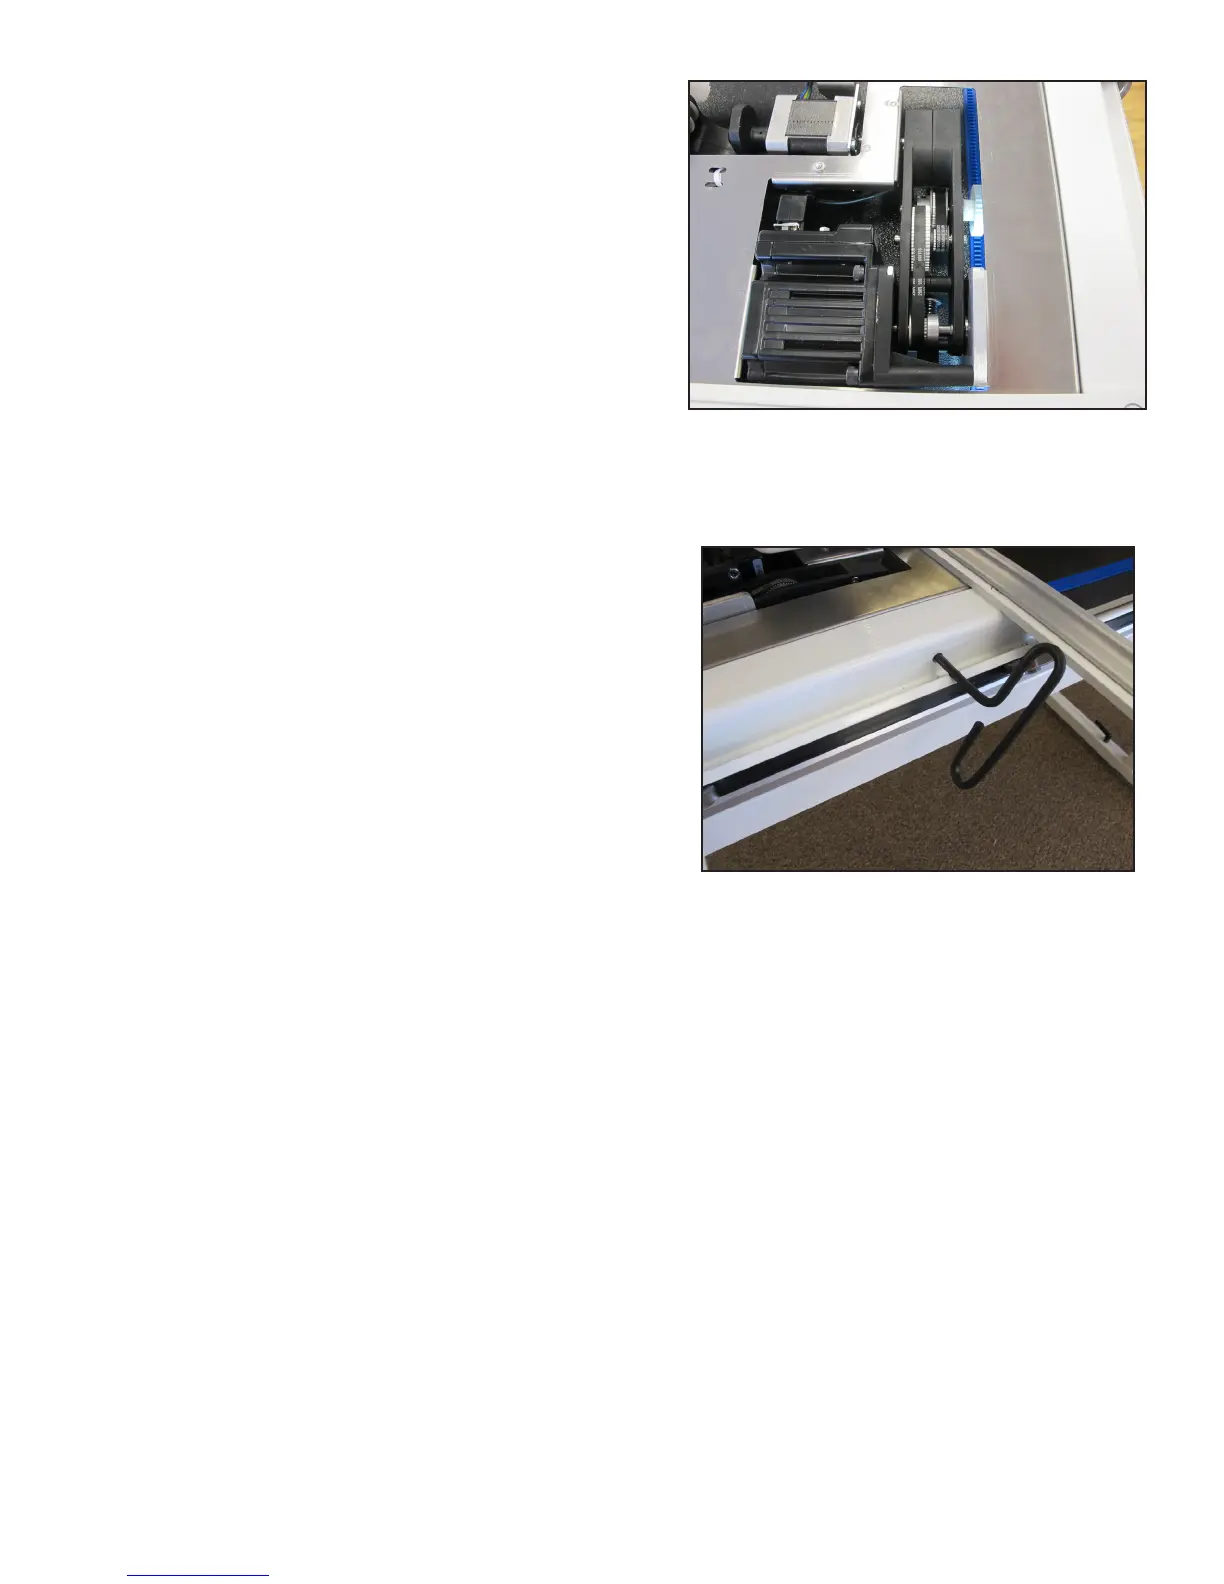
• If horizontal adjustment is needed to ensure that
at least half the white gear and blue Flexirack
are interlocking, loosen the two screws that
mount the y-axis bracket to the base plates and
push the bracket in the direcon necessary while
reghtening the screws.
IMPORTANT: If necessary, use the manual en-
gagement/disengagement tool to move the gears
so they engage. Insert the end of the tool into the
hole at the front of the EZ Carriage.
9. With the power cable unplugged and the motors in the engaged posion (use the manual
engagement/disengagement tool if necessary), ensure that as the quilng machine is moved in both
the X and the Y direcons, the corresponding gears are rotang as well.
Ü