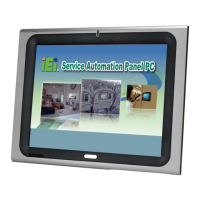
AFL-xxx-CX2 Panel PC
Page xiv
Figure 3-13: Arm Mounting Screw Holes (AFL-07A-CX2 and AFL-08AH-CX2) ......................58
Figure 3-14: Arm Mounting Screw Holes (AFL-10A-CX2 and AFL-12B-CX2).........................59
Figure 3-15: AFL-07A-CX2 Panel Opening.................................................................................60
Figure 3-16: AFL-08AH-CX2 Panel Opening ..............................................................................60
Figure 3-17: AFL-10A-CX2 Panel Opening.................................................................................61
Figure 3-18: AFL-12B-CX2 Panel Opening.................................................................................61
Figure 3-19: Tighten the Panel Mounting Clamp Screws.........................................................62
Figure 3-20: The Rack/Cabinet Bracket......................................................................................63
Figure 3-21: Secure the Rack/Cabinet Bracket..........................................................................64
Figure 3-22: Install into a Rack/Cabinet .....................................................................................64
Figure 3-23: LAN Connection......................................................................................................65
Figure 3-24: Serial Device Connector.........................................................................................66
Figure 3-25: USB Device Connection .........................................................................................67
Figure 4-1: AFL-07A-CX2 Aluminum Back Cover Retention Screws ......................................70
Figure 4-2: AFL-08AH-CX2 Aluminum Back Cover Retention Screws....................................71
Figure 4-3: AFL-10A-CX2 Aluminum Back Cover Retention Screws ......................................71
Figure 4-4: AFL-12B-CX2 Aluminum Back Cover Retention Screws ......................................72
Figure 4-5: Memory Module.........................................................................................................73
Figure 4-6: DDR2 SO-DIMM Module Installation........................................................................74
Figure 4-7: Jumper Locations .....................................................................................................75
Figure 6-1: Available Drivers.................................................................................................... 123
Figure 6-2: Chipset Driver Icon ................................................................................................ 124
Figure 6-3: Chipset Driver Welcome Screen........................................................................... 124
Figure 6-4: Chipset Driver License Agreement ...................................................................... 125
Figure 6-5: Chipset Driver List ................................................................................................. 125
Figure 6-6: Chipset Driver List ................................................................................................. 126
Figure 6-7: Chipset Driver Installed Drivers ........................................................................... 126
Figure 6-8: Chipset Driver Installed Drivers ........................................................................... 127
Figure 6-9: Graphics Driver Installation.................................................................................. 128
Figure 6-10: VGA Driver............................................................................................................ 129
Figure 6-11: Windows Control Panel....................................................................................... 130
Figure 6-12: System Icon.......................................................................................................... 131
Figure 6-13: System Properties................................................................................................ 131
Figure 6-14: Ethernet Controller .............................................................................................. 132
Figure 6-15: Hardware Update Wizard..................................................................................... 132
 Loading...