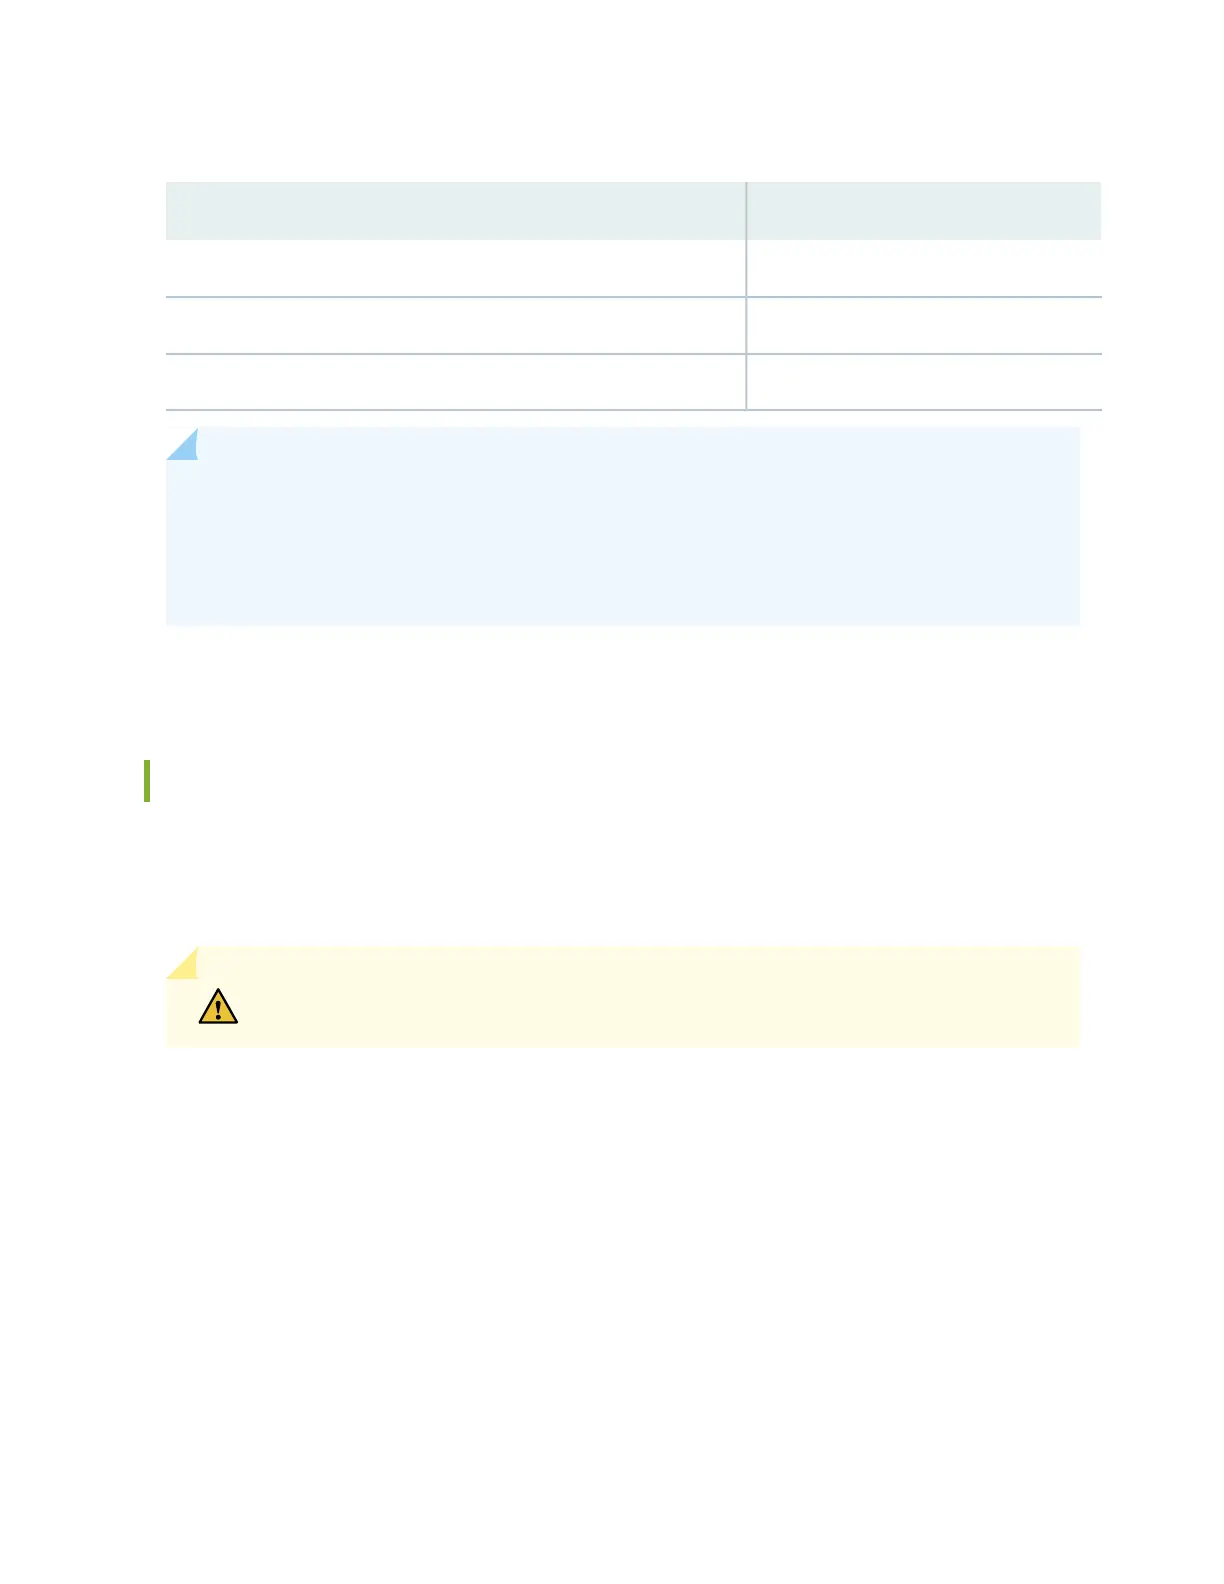
Table 56: Replacement Duration for the Fan Tray of an MX10016
DurationChassis Ambient Temperature
3 minutes27°C
2 minutes 46 seconds35°C
2 minutes40°C
NOTE: When replacing the fans or SIBs at 40°C chassis ambient temperature, ensure that the fans
run at 100% fan speed for at least 10 minutes before replacing the fans or SIBs.
Use the test chassis fan tray 0 speed minutesfull-speed and test chassis fan tray 1 speed full-speed
commands to set the chassis fans to 100% speed.
To install or remove the fan trays and fan tray controller, see the following sections:
Removing an MX10016 Fan Tray
An MX10016 has two independent, field-replaceable fan trays. Each fan tray is a hot-removable and
hot-insertable field-replaceable unit (FRU); you can remove and replace the fan tray while the router is
running without turning off power to the router or disrupting routing functions.
CAUTION: Do not remove a fan tray unless you have a replacement fan tray available.
Each fan tray is installed vertically on the rear side of the chassis.
Before you remove a fan tray:
•
Ensure you understand how to prevent ESD damage (see “Prevention of Electrostatic Discharge Damage”
on page 303).
•
Ensure that you have the following parts and tools available to remove a fan tray:
•
Electrostatic discharge (ESD) grounding strap
•
A Phillips (+) screwdriver, number 1 or 2 (optional), for the captive screws
163