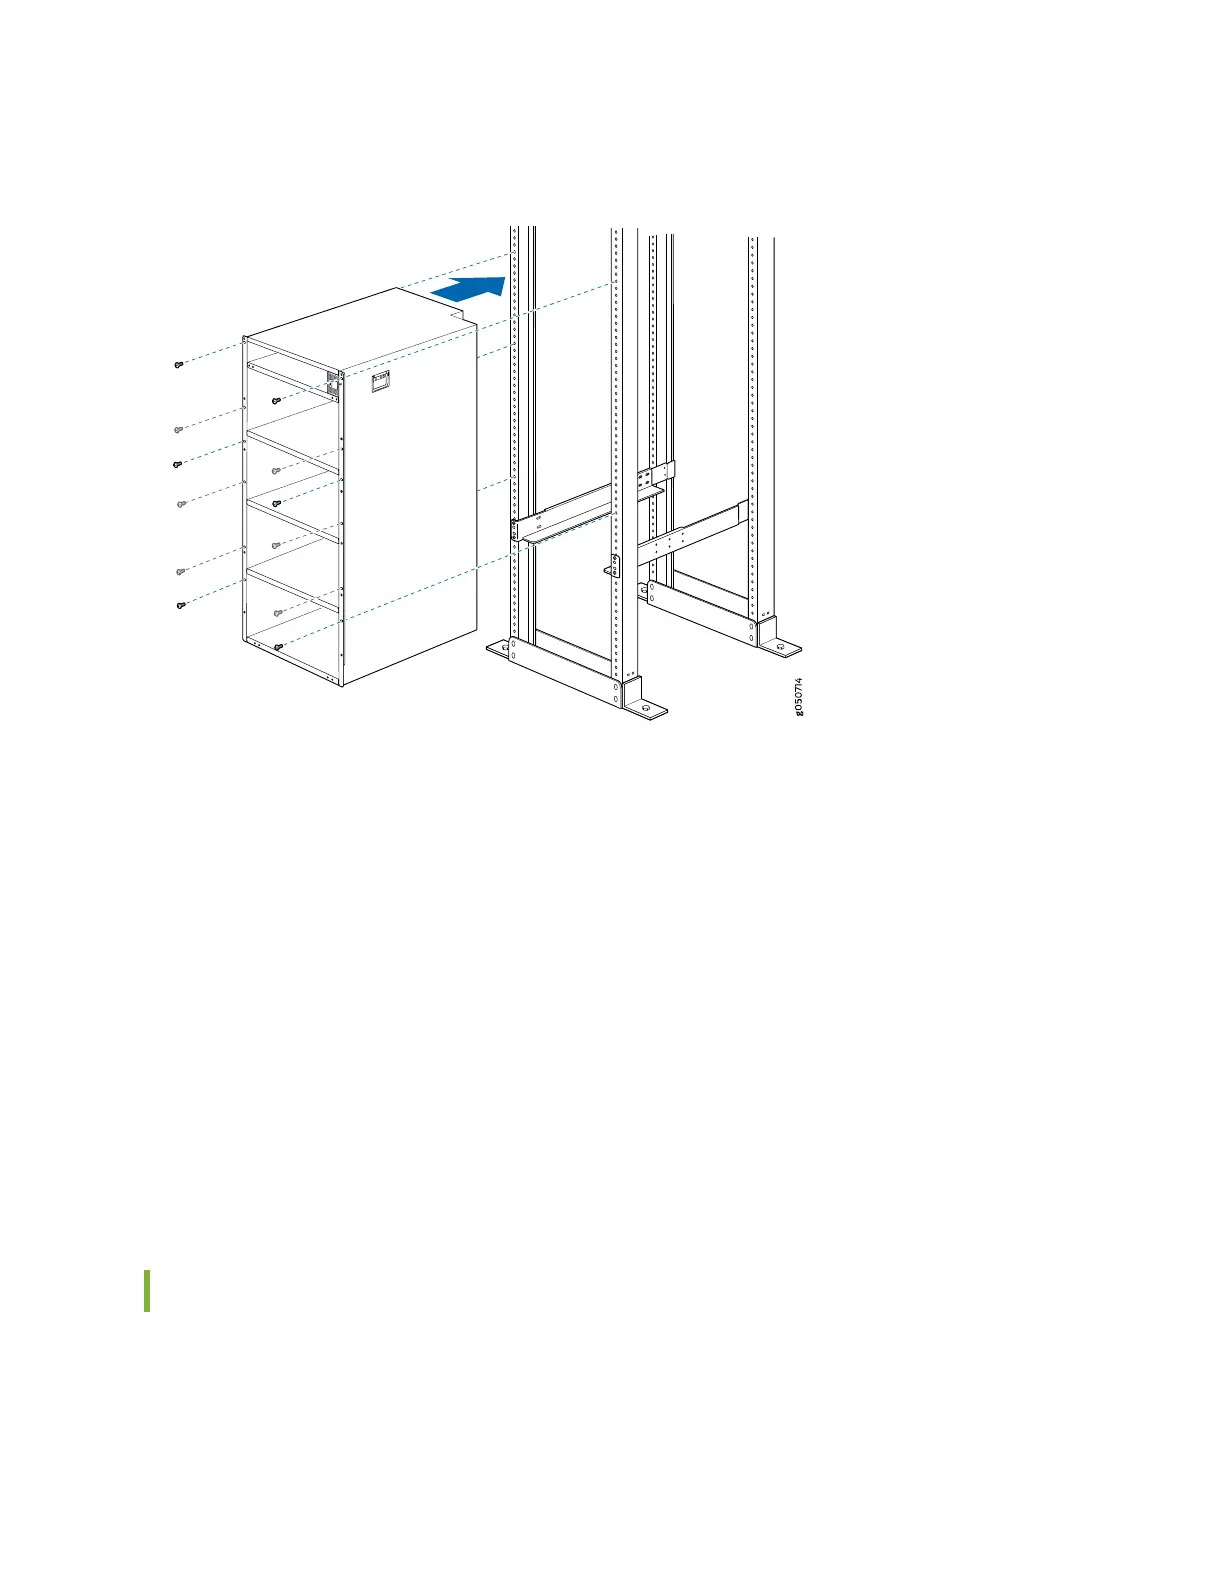
Figure 49: Attaching the Chassis Flange to the Rack
6. Move the lift away from the rack.
7. Attach the chassis to the rack by installing a mounting screw through the open flange holes and rack,
starting from the bottom.
8. Visually inspect the alignment of the router. If the router is installed properly in the rack, all the mounting
screws on one side of the rack are aligned with the mounting screws on the opposite side, and the
router is level.
9. After ensuring that the router is aligned properly, tighten the screws using a screwdriver.
10. After you install the mounting screws and securely bolt the chassis to the rack, reinstall the components
in the chassis.
Installing the Front Panel on an MX10016
The front panel is required on the MX10016 router to protect fiber-optic cabling and to provide additional
protection from electromagnetic interference (EMI). The front panel can be installed with or without the
optional cable management system.
142