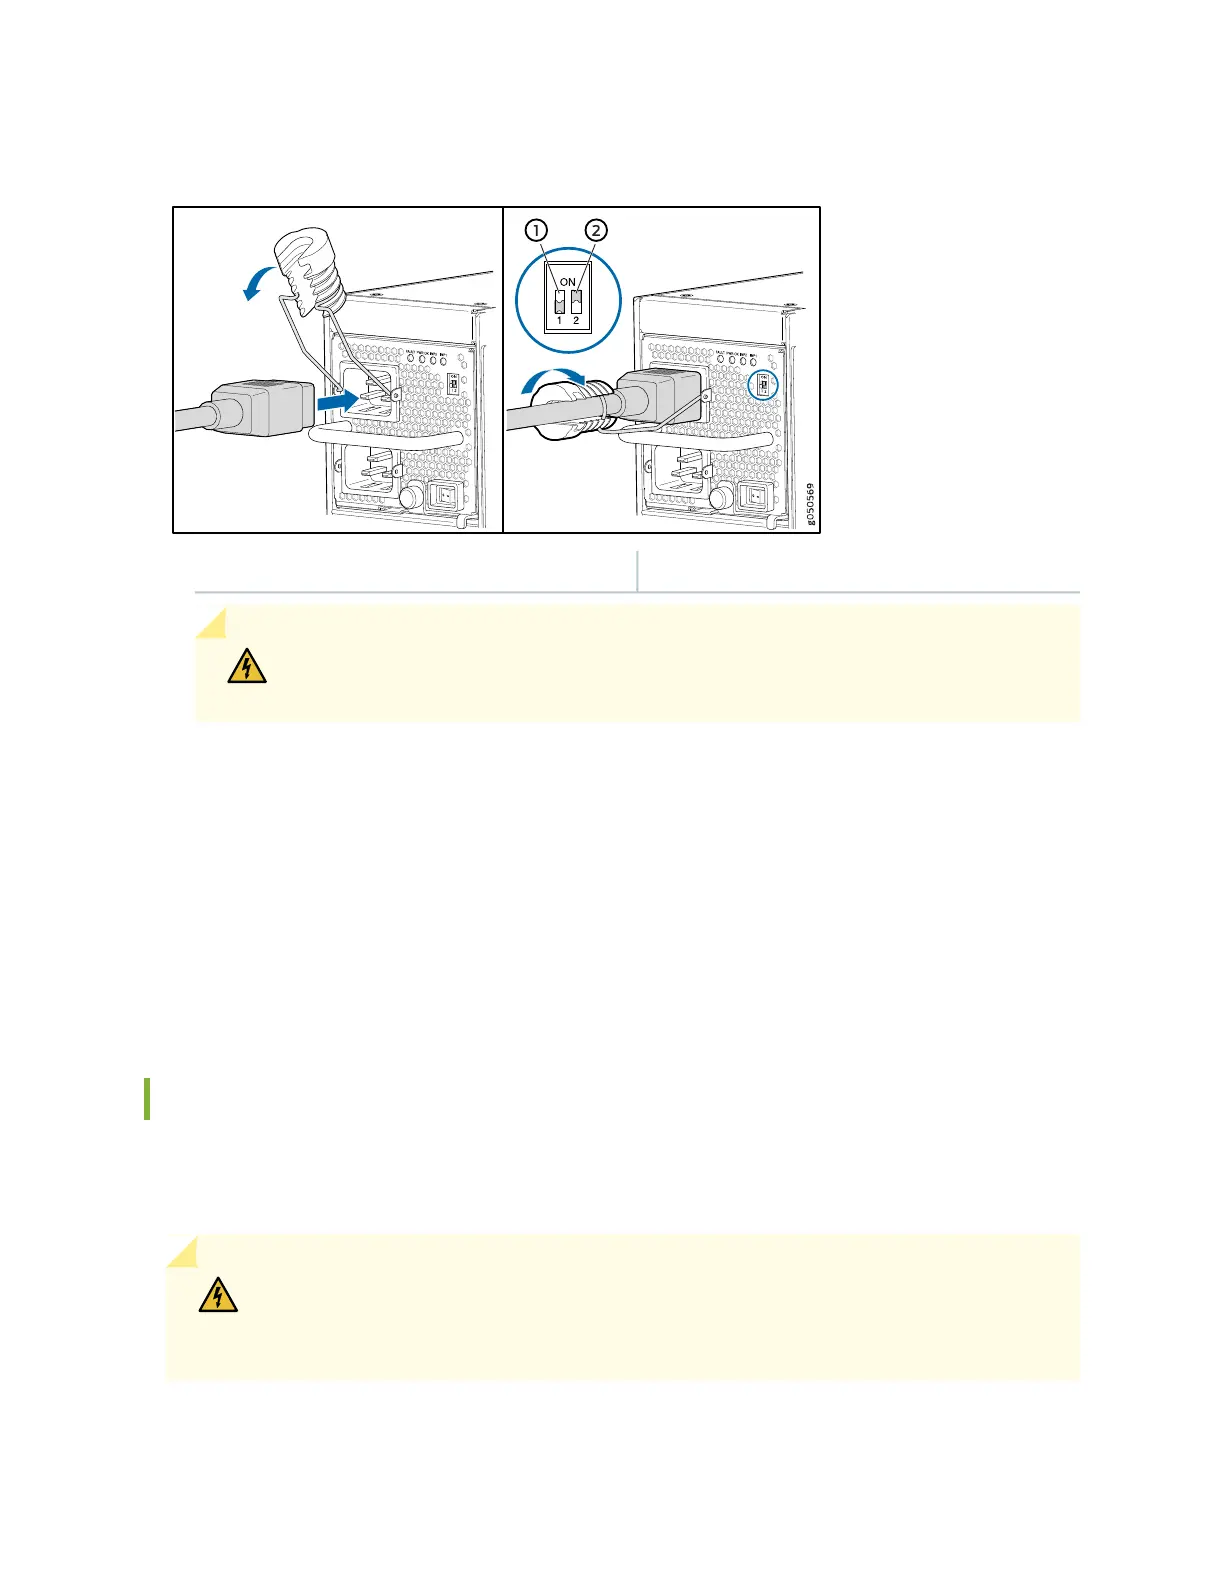
Figure 76: Power Cord and Retainer Clip
2—1— Enable switch for INP2Enable switch for INP1
WARNING: Ensure that the power cords do not block access to router components
or drape where people can trip on them.
17. If the AC power source outlets have a power switch, set them to the on (|) position.
18. Move the enable switches for input 1 and input 2 to the ON position.
19. Verify that the INP1 and INP2 LEDs on the power supply faceplate are lit and are on steadily.
20. Press the power switch to the on (|) position.
How to Remove a JNP10K-PWR-AC2 Power Supply
The JNP10K-PWR-AC2 power supply in an MX10016 chassis is a hot-removable and hot-insertable
field-replaceable unit (FRU). You remove all power supplies from the rear of the chassis.
WARNING: Protect yourself from severe burns by wearing heat-protective gloves when
removing a working JNP10K-PWR-AC2 power supply from the chassis. These power
supplies can reach 158°F (70°C ).
179