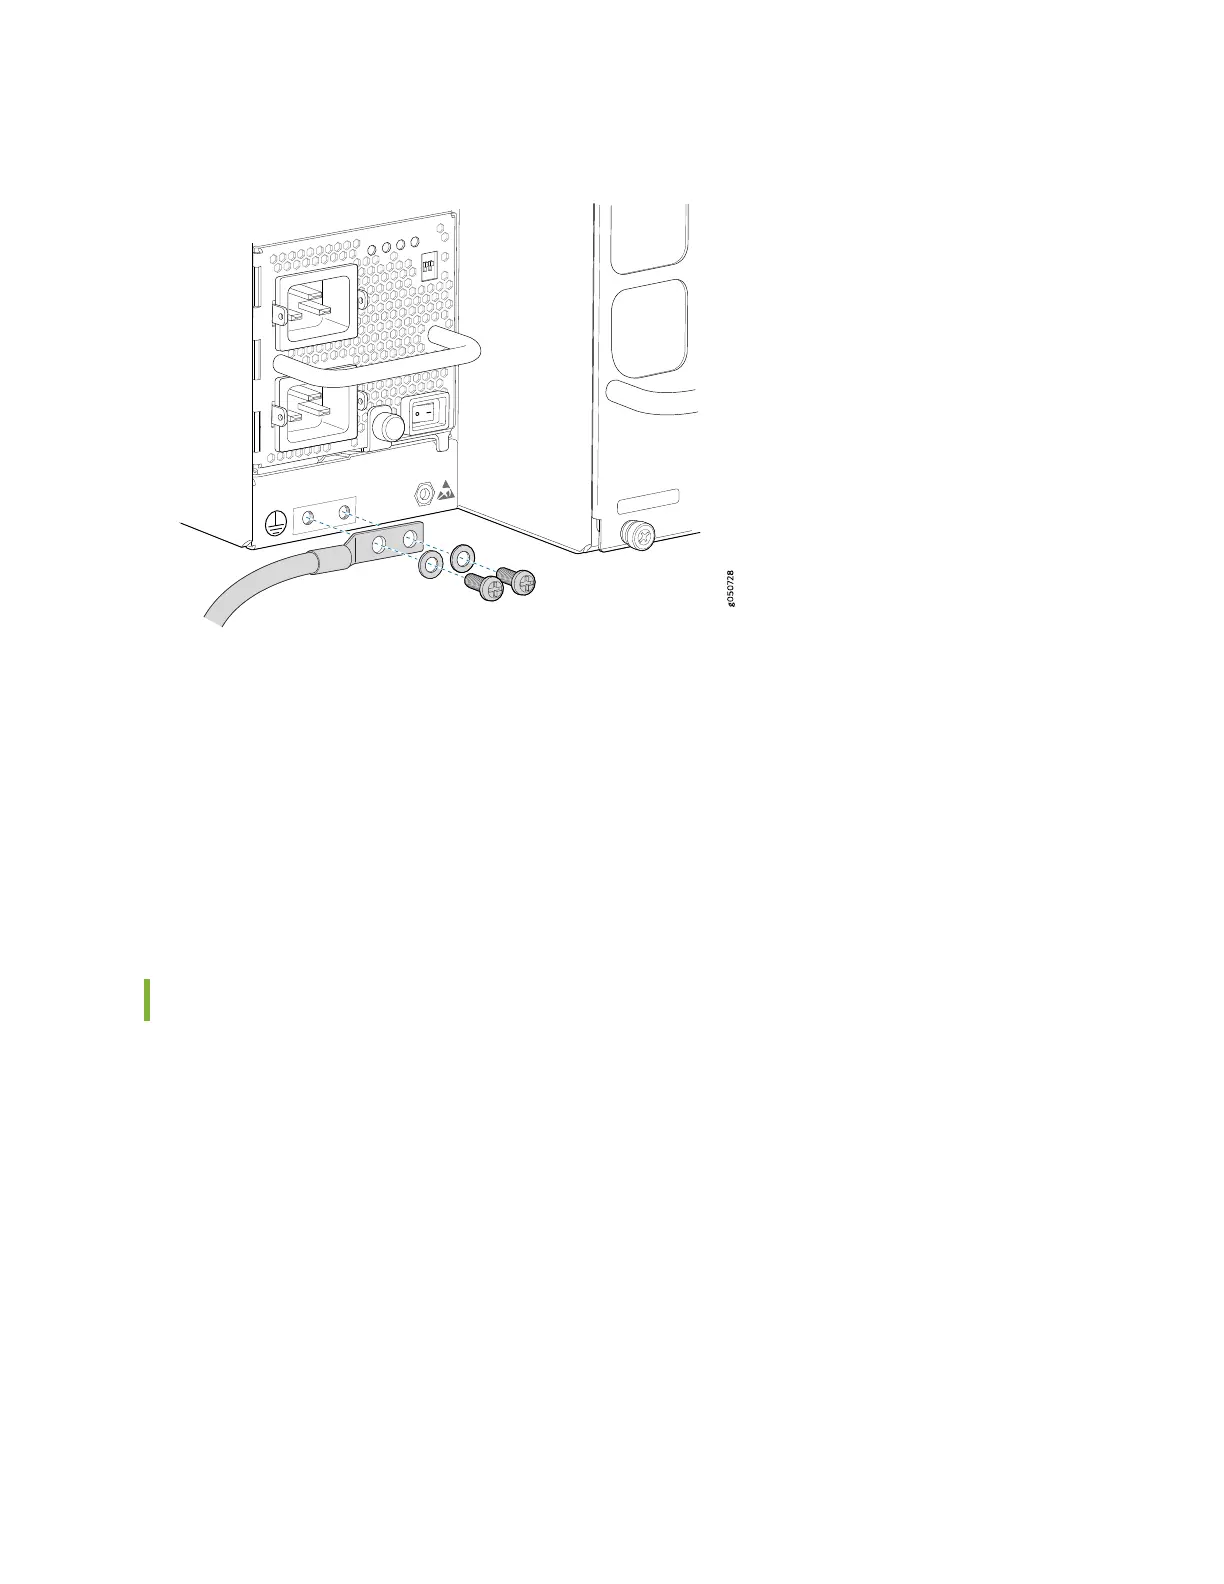
Figure 54: Connecting a Grounding Cable to an MX10016
6. Place the two screws over the grounding lug and grounding cable.
7. Tighten the two 10-32 screws using a Phillips screwdriver applying torque between of 30.1 in.-lb (3.4
N-m) and 42.04 in.-lb (4.75 N-m).
8. Dress the grounding cable and ensure that it does not touch or block access to other device components
and that it does not drape where people could trip over it.
Connecting AC Power to an MX10016
After you ground the chassis, connect the power supplies, and supply power to the chassis, the system
initiates the power-on sequence. Although this sequence can start incrementally with a single power
supply, we recommend that you power on an MX10016 router with at least three power supplies.
Before you begin connecting power to the router, be sure you understand how to prevent ESD damage
(see “Prevention of Electrostatic Discharge Damage” on page 303).
To connect AC power to an MX10016 chassis:
1. Connect the chassis to earth ground (see “Connecting an MX10016 to Earth Ground” on page 146).
148