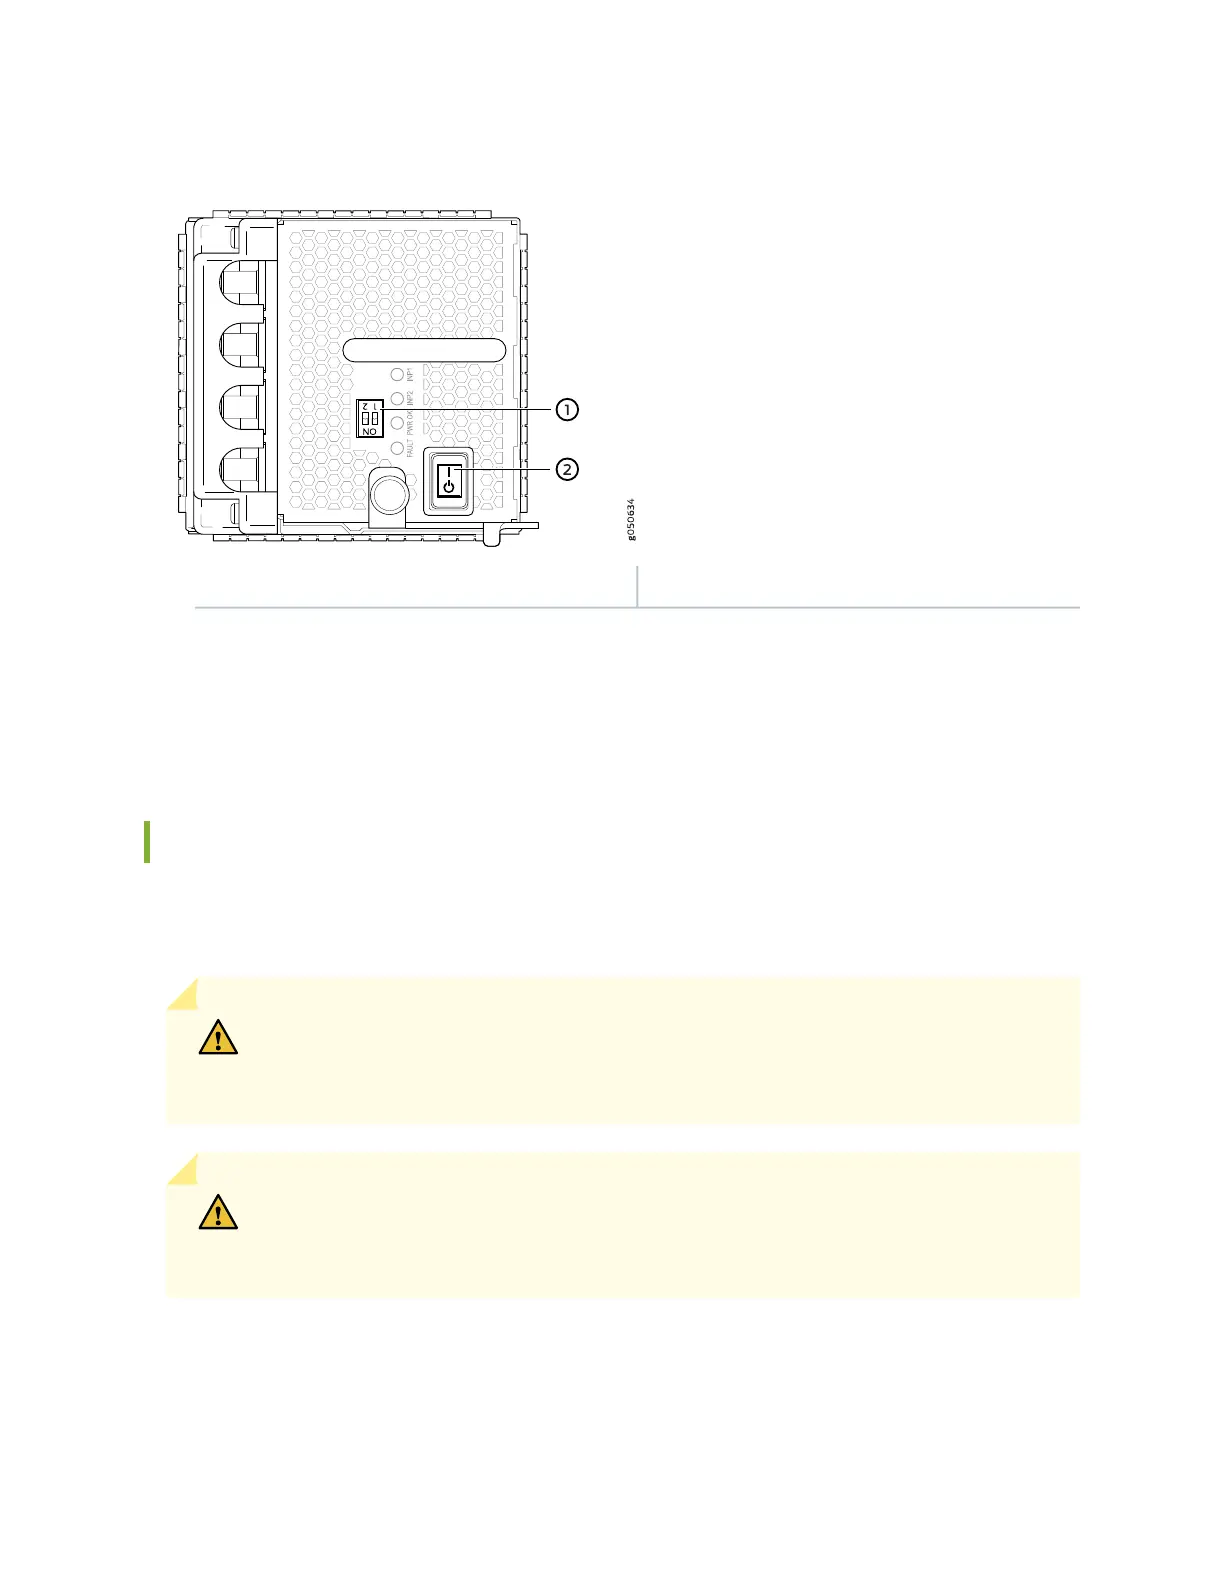
Figure 90: Setting the Enable Switches for the Power Source
2—1— Enable switch for source input 2Enable switch for source input 1
19. Verify that the input 1 and input 2 LEDs on the power supply faceplate are lit and are on steadily.
20. Set the power switch on the power supply to the on (|) position.
How to Remove a JNP10K-PWR-DC2 Power Supply
The JNP10K-PWR-DC2 power supply in an MX10000 chassis is a hot-removable and hot-insertable
field-replaceable unit (FRU). You remove power supplies from the rear of the chassis.
CAUTION: A working JNP10K-PWR-DC2 power supply can reach temperatures of 158°F
(70°C); In order to avoid injury, do not touch a running power supply with your bare
hands.
CAUTION: Before you remove a power supply, ensure that you have power supplies
sufficient to power the router left in the chassis. See“MX10016 Power Planning” on
page 96 and “Power Requirements for MX10016 Components” on page 97.
Before you remove a DC power supply from the router:
197