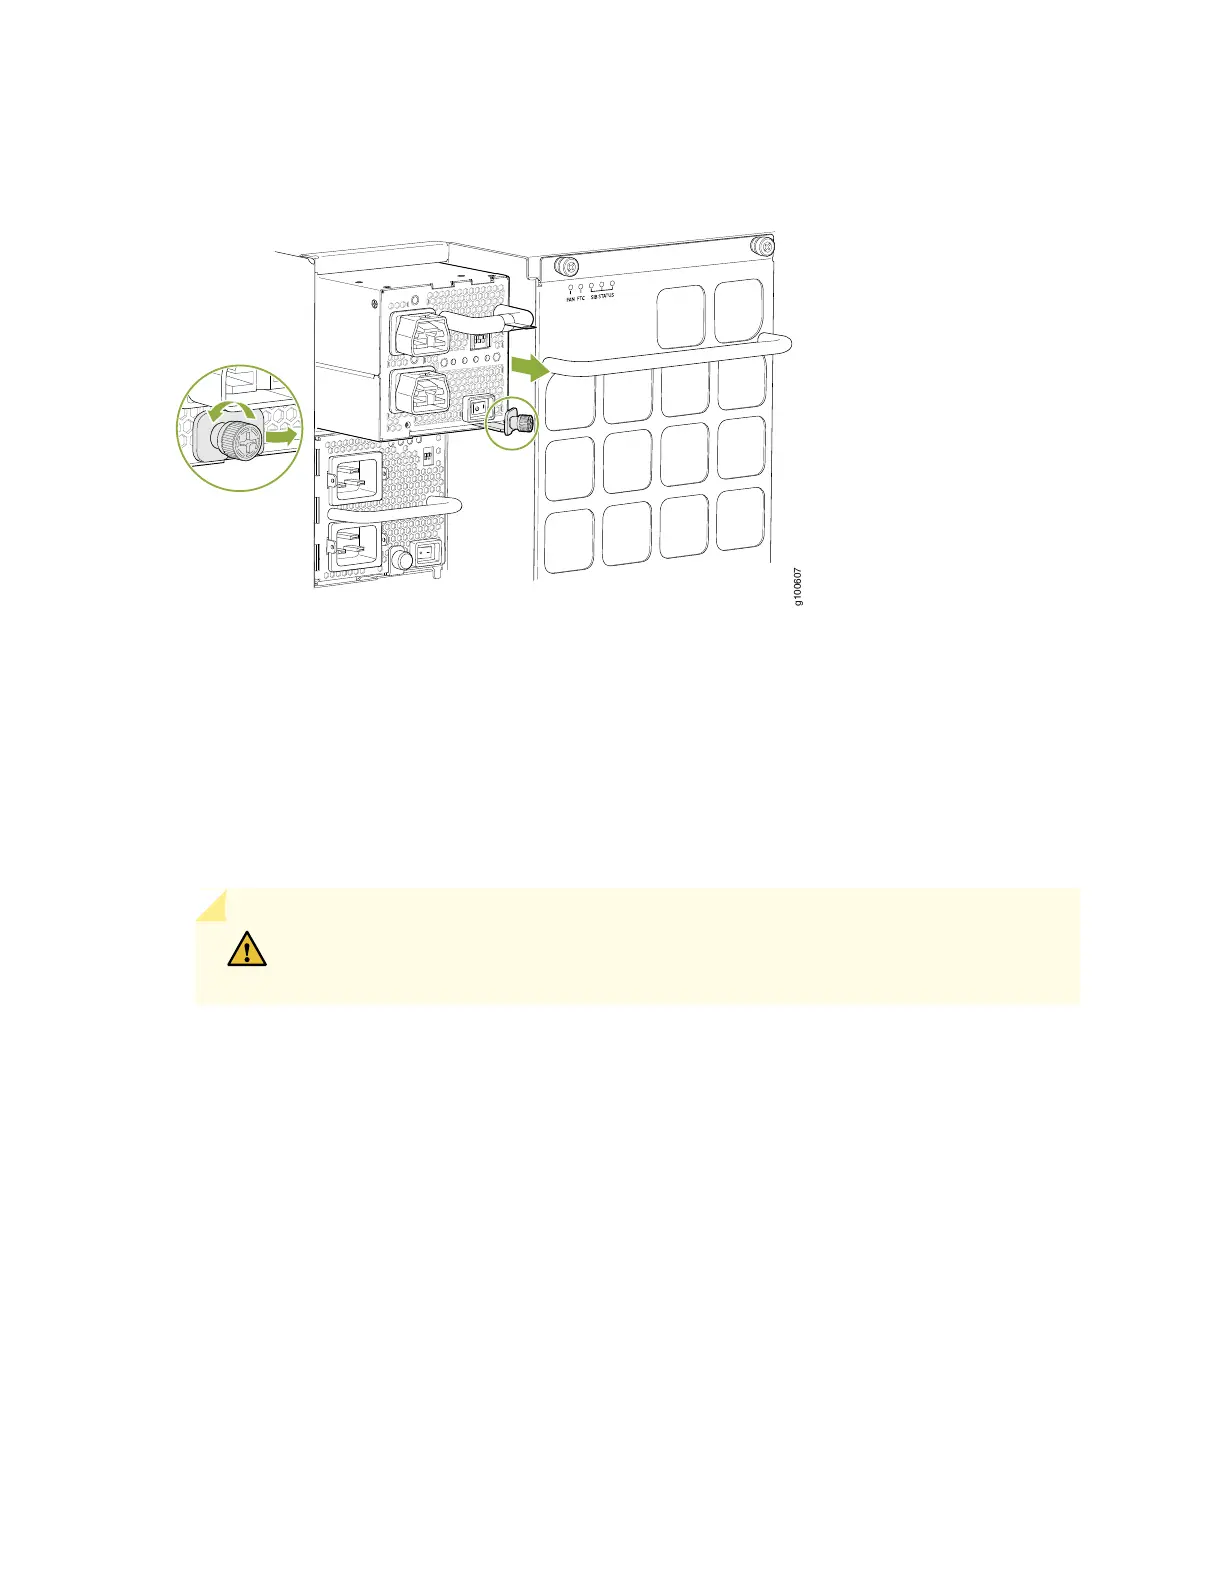
Figure 78: Removing a JNP10K-PWR-AC2 from an MX10016 Chassis
6. Rotate the captive screw away from the faceplate of the power supply to release the latch.
7. Put on your heat protective gloves before removing the power supply from the chassis.
8. Taking care not to touch the power supply output connections, pins, leads, or solder connections, place
one hand under the power supply to support it. Grasp the power supply handle with your other hand
and pull the power supply completely out of the chassis.
CAUTION: Do not bump the output connections. If the connection hits a solid object,
it could damage the power supply.
9. Place the JNP10K-PWR-on an antistatic surface to completely cool before placing the power supply
in an antistatic bag for storage.
10. If you are not replacing the power supply, install the cover panel over the slot by inserting your thumb
and forefinger into the finger holes, squeezing and pulling the cover out of the slot. Do not run the
chassis without a power supply or cover panel in place.
182