Appendix C
APPENDIX C: INSTALLATION OF
H
ARDWARE OPTIONS
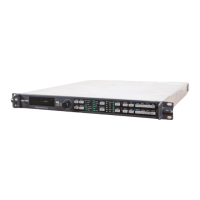
If you have purchased hardware option boards (such as the Audio Synchronizer
Module, Animated Logo Option or the DV I/O Module) separately from the DPS-
475/575, you will need to install them. The following instructions guide you through
installing these options safely and correctly.
Depending on which upgrade option you have purchased, you may be required to
enter an unlock code to enable the new option. See the Enable Extra Options setting
in Chapter 12, “Menus: System Config” for details. The Audio Module, DV I/O
Option, and Animated Logo Option DO NOT require an unlock code.
Precautions
WARNING: Static Electricity!
Static electricity from your body can damage your hardware option boards or the
DPS-475/575. Even though you may not notice it, static electricity is being generated
every time you move. Usually, it is too small to cause a spark, but it can still cause
damage to sensitive electronic components.
• To prevent this damage, you should handle the option board carefully.
• Do not take the option board out of its protective bag until you are ready to
install it.
• Do not carry the board around unless it is in its protective bag.
• Avoid wearing wool or polyester clothing while installing the option. These
fabrics generate more static electricity than cotton garments.
• Before touching the option board, you should discharge any static electricity
from your body by first touching the grounded metal chassis of the DPS-475/575
(the unit must be plugged in to be grounded).
IMPORTANT NOTE
If you have a unit that has the Audio Synchronizer Module
installed, you must remove the Audio board temporarily to install
the DV I/O Option board. See the instructions later in this
appendix for the correct procedures for removing and re-installing
the Audio Synchronizer Module, before proceeding.
195