Appendix D
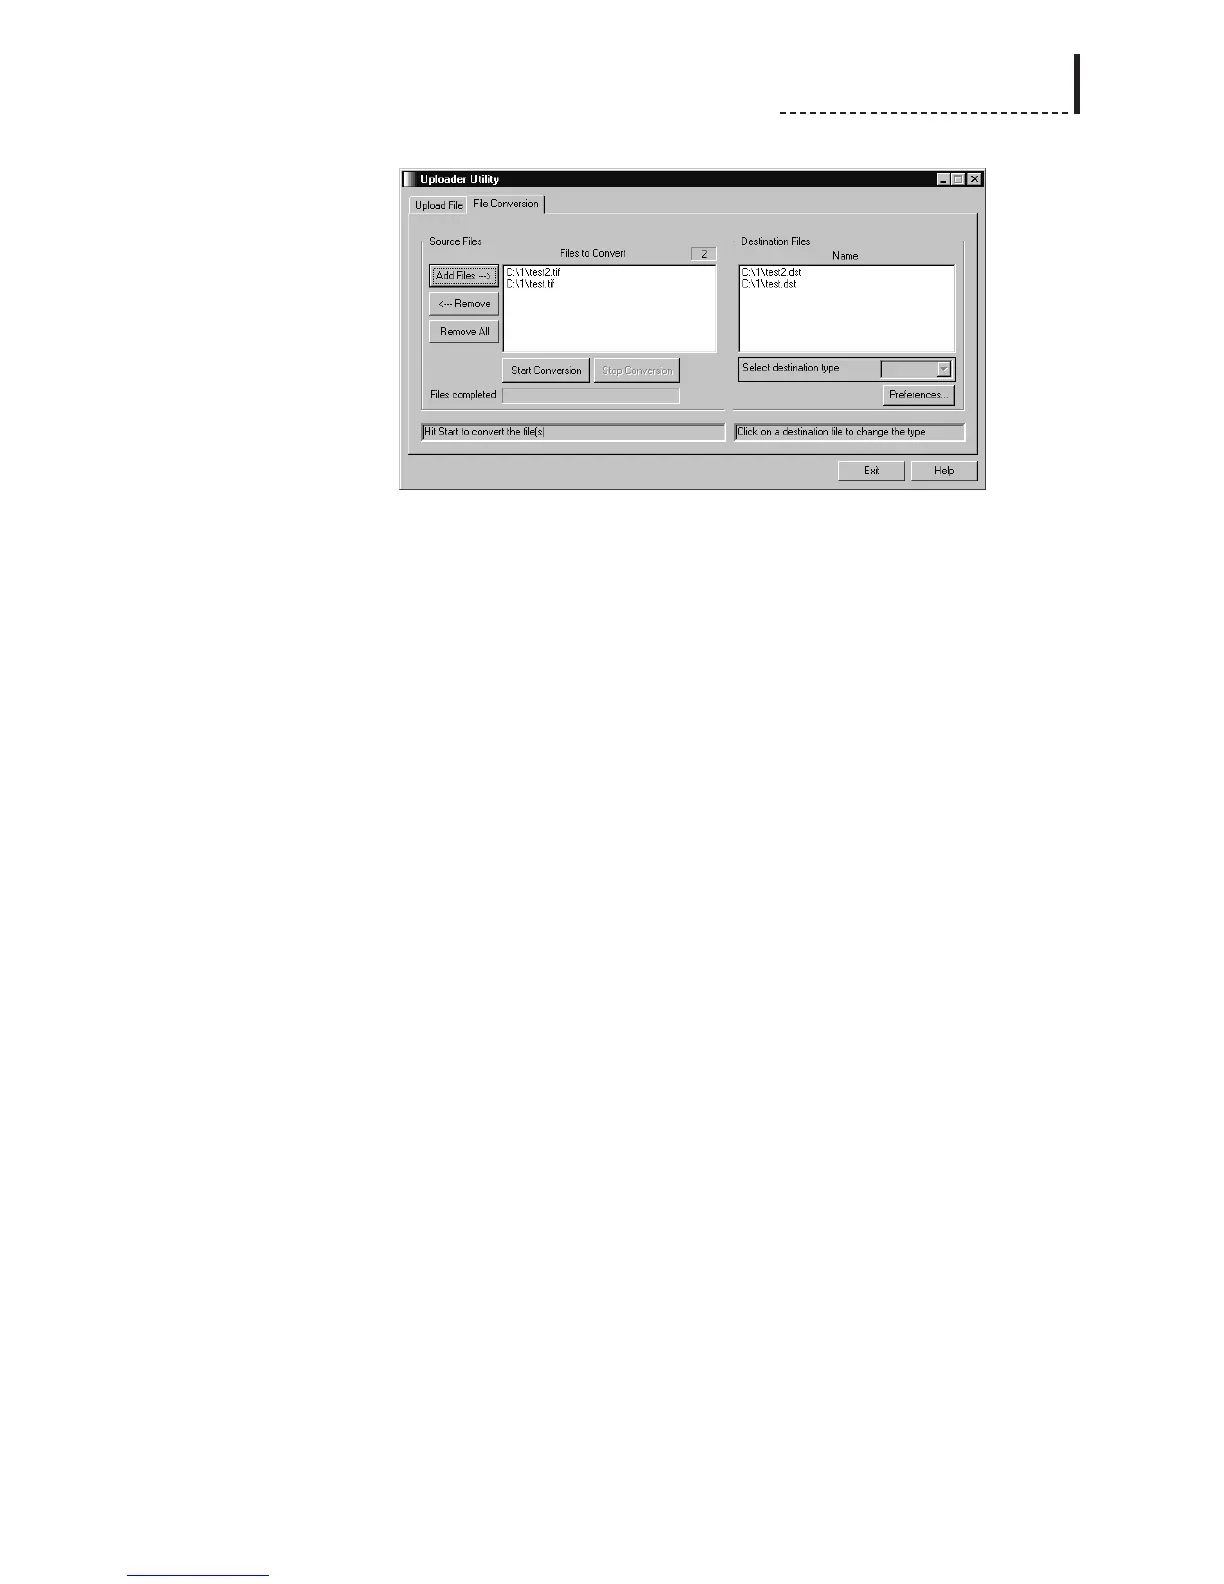
To convert between file formats, first build a list of files to be converted by using the
following buttons:
Add Files Clicking this button brings up a standard Windows file
requester, for you to select which files you wish to convert.
Use the Files of Type pull-down list to choose between
browsing for standard Windows file formats, and DPS
image files. Select the files you wish to add to the list, and
click Open. You can use the Add Files button multiple times,
to add files from multiple distinct locations to the list.
Remember that when converting a sequence of frames
into an animation file, add only the first source frame to the
conversion list.
Remove Clicking on a file in the list of files to be converted, then
clicking the Remove button will delete it from the list.
Remove All Clicking this button clears the list of files to be converted.
By default, image files are converted to .dst files for use with the keyer. This default
can be changed in the Preferences window. To change the destination file type of an
individual file, click on that file in the Destination Files window; the Select
Destination Type drop-down box will become active, and you can choose which
output file format you want.
When converting from DPS .dst or .dts image files back into standard Windows file
formats, the default output file format is .bmp. This default can be changed (to .dts
test signals) in the Preferences window. To change the destination file type of an
individual file, click on that file in the Destination Files window; the Select
Destination Type drop-down box will become active, and you can choose which
output file format you want.
If there are more files in the conversion lists than will fit in the window, a scroll bar
will appear, allowing you to scroll through the list. Note that scrolling the Source
Files window does NOT automatically scroll the Destination Files window with it;
simply click on one of the files, and the other window will jump to the corresponding
file.
Once all of your desired files have been added to the conversion list, click the Start
Conversion button to begin processing. Converted files are saved into the same
directory as the source images.
During the conversion process, you may click the Stop Conversion button to abort the
process after the current file has completed.
205