A video of this procedure is available at YouTube: https://www.youtube.com/playlist?list=PLYV5R7hVcs-
DrpxDWLMfgtXO4O6BVYTim
.
Procedure
Step 1. Remove the top cover. See “Remove the top cover” on page 212.
Step 2. Remove any parts and disconnect any cables that might impede your access to the CMOS battery.
Step 3. Locate the CMOS battery. See
“System-board-assembly connectors” on page 33.
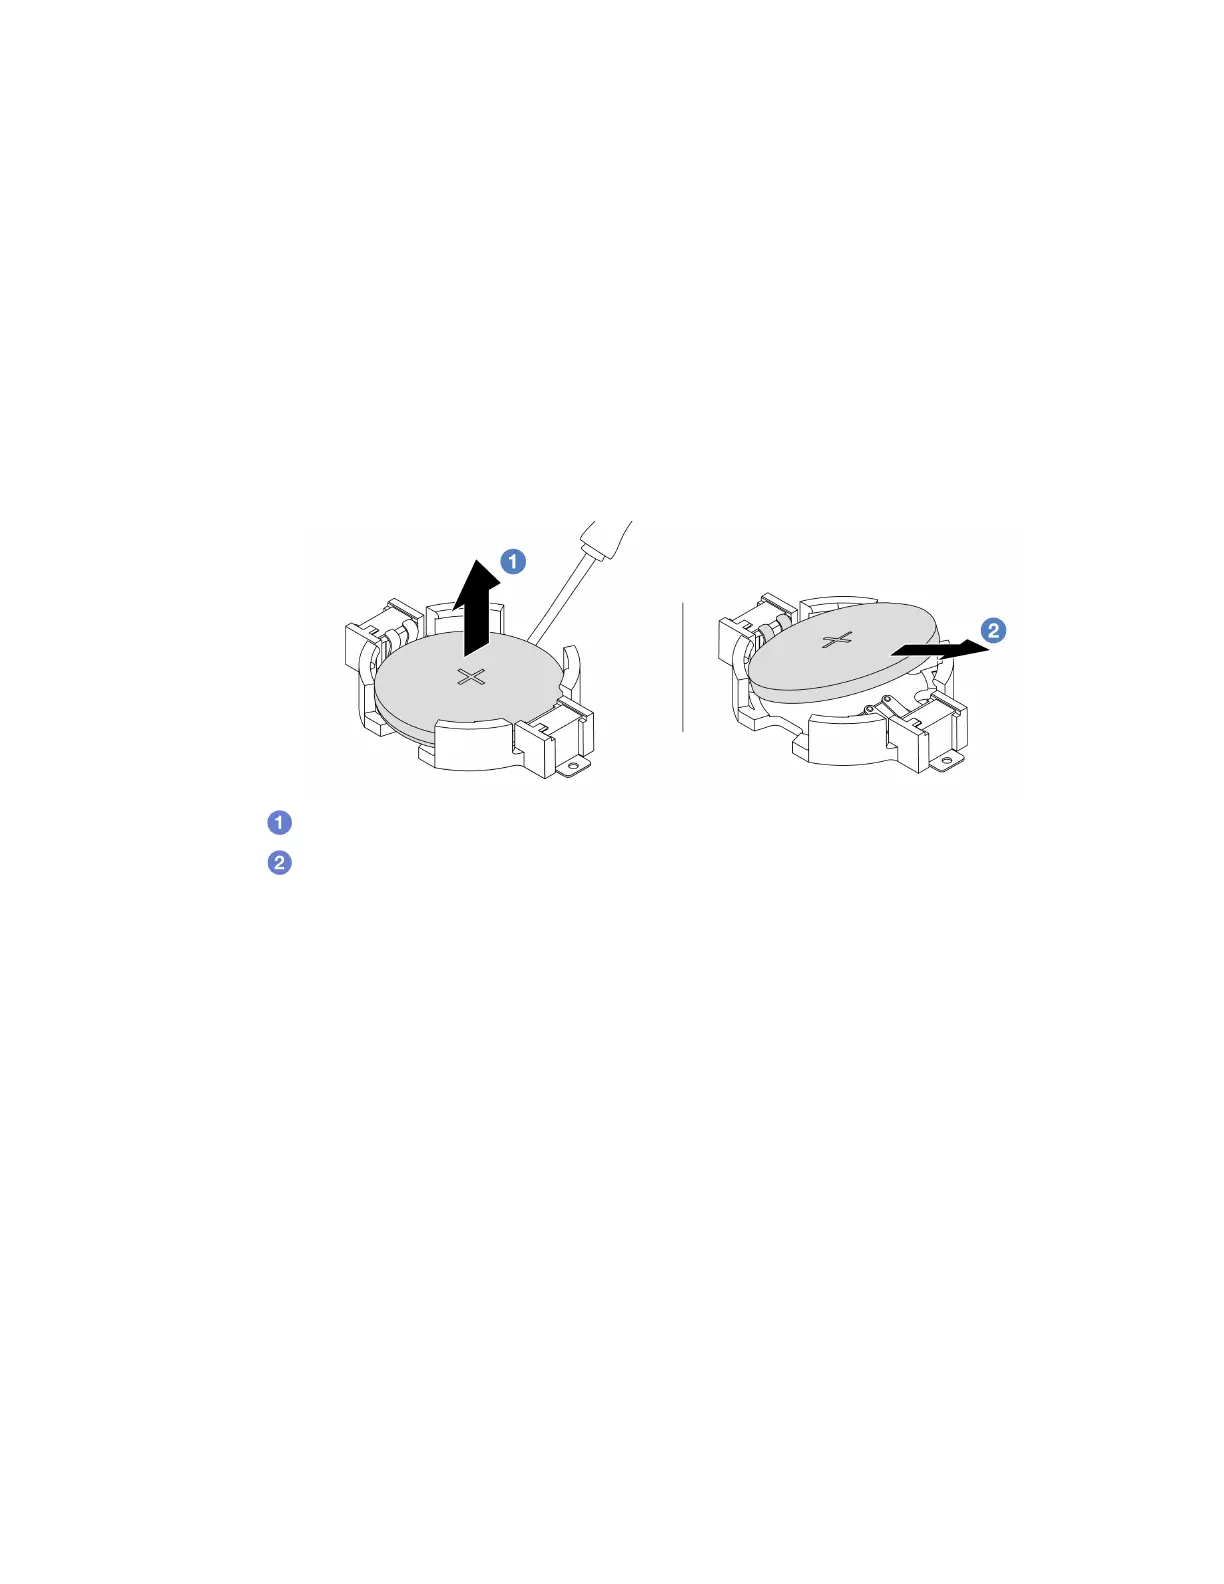
Step 4. Open the battery clip as shown and carefully take the CMOS battery out of the socket.
Attention:
• Failing to remove the CMOS battery properly might damage the socket on the system board.
Any damage to the socket might require replacing the system board.
• Do not tilt or push the CMOS battery by using excessive force.
1. Pry the CMOS battery from the socket with a flat-blade screwdriver.
2.
Remove the CMOS battery.
Figure 32. CMOS battery removal
After you finish
1. Install a new one. See “Install the CMOS battery” on page 73.
2. Dispose of the CMOS battery as required by local ordinances or regulations.
Install the CMOS battery
Use this information to install the CMOS battery.
About this task
The following tips describe information that you must consider when installing the CMOS battery.
• Lenovo has designed this product with your safety in mind. The lithium CMOS battery must be handled
correctly to avoid possible danger. If you replace the CMOS battery, you must adhere to local ordinances
or regulations for battery disposal.
• If you replace the original lithium battery with a heavy-metal battery or a battery with heavy-metal
components, be aware of the following environmental consideration. Batteries and accumulators that
contain heavy metals must not be disposed of with normal domestic waste. They will be taken back free
of charge by the manufacturer, distributor, or representative, to be recycled or disposed of in a proper
manner.
Chapter 5. Hardware replacement procedures 73

 Loading...


