EasyManuals Logo

Lexmark CS725R Service Manual

Lexmark CS725R
493 pages
To Next Page IconTo Next Page
To Previous Page IconTo Previous Page
Page #345 background imageLoading...
Page #345 background image
11 Remove the screw (G), and then remove the guide (H).
12 Remove the clip (J), and then remove the bushing.
13 On the left side of the printer, remove the three screws (K), and then remove the plate (L) from inside the
LVPS cage.
CAUTION—SHOCK HAZARD: To avoid the risk of electrical shock, make sure to replace the plate.
5028
Repair information
345
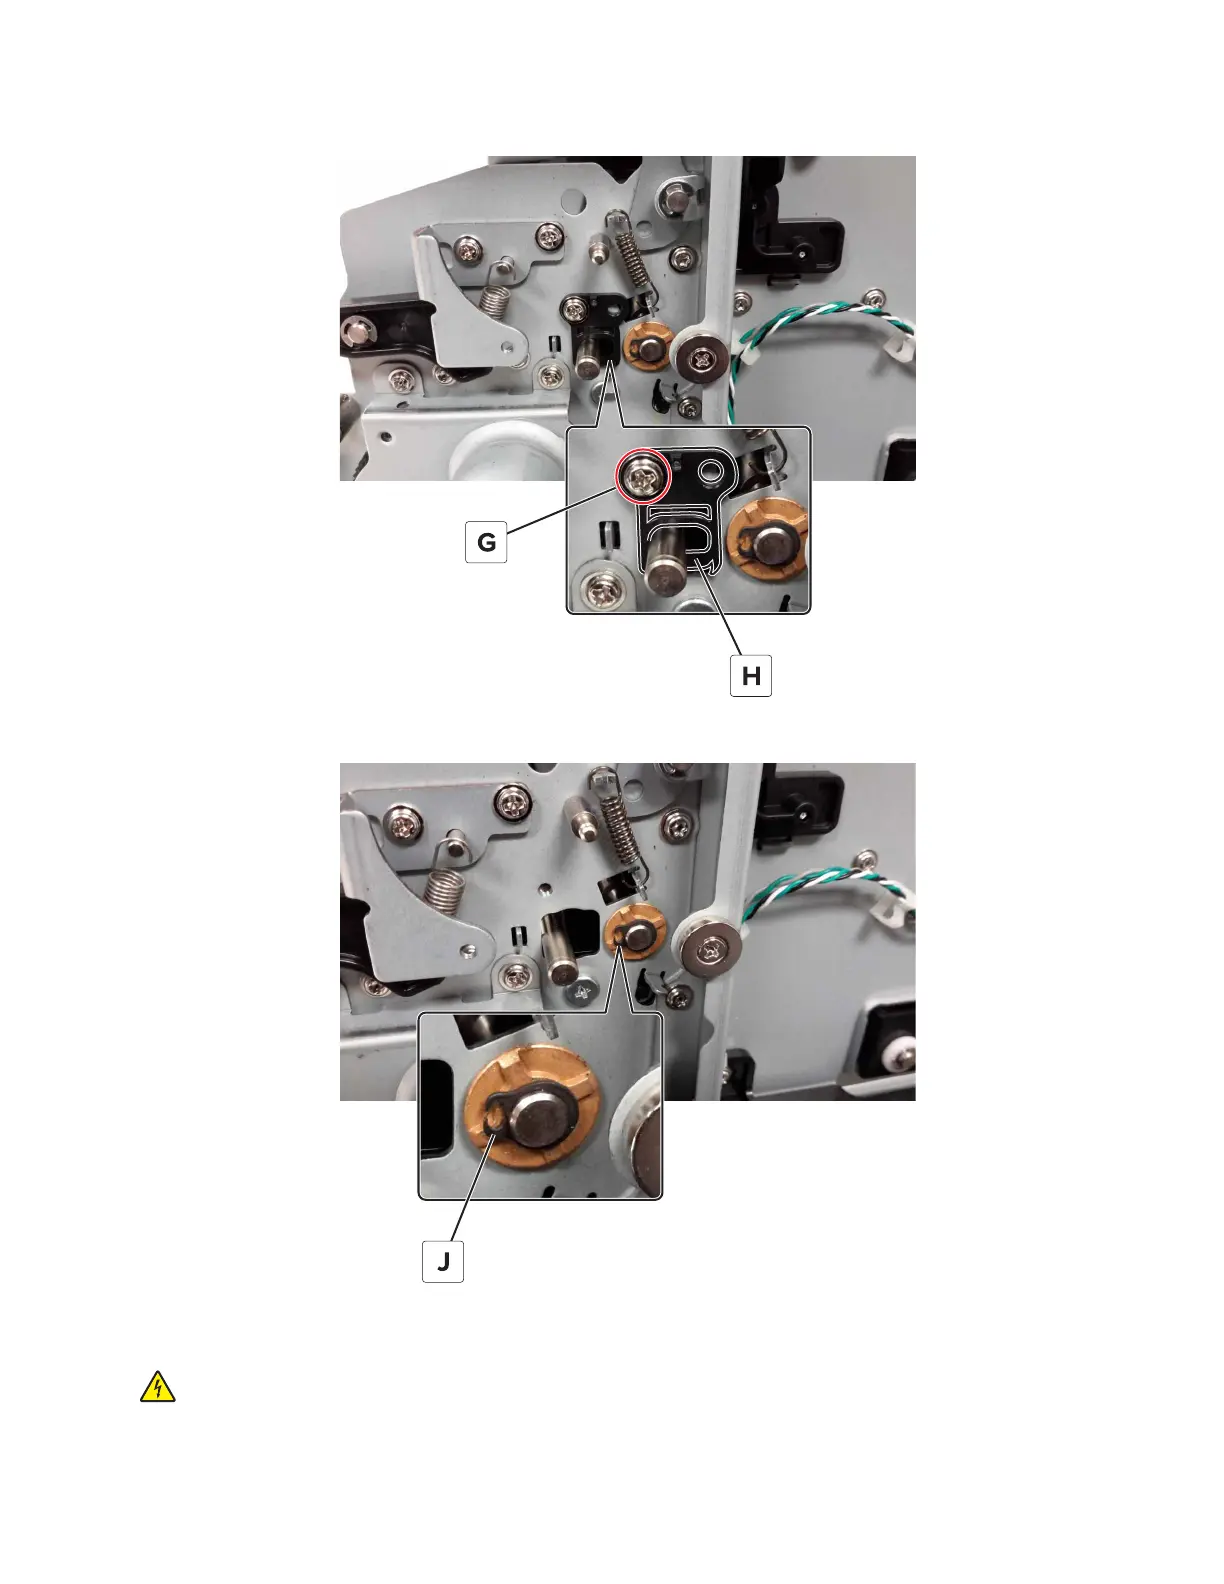
Table of Contents

Other manuals for Lexmark CS725R

Questions and Answers:

Question and Answer IconNeed help?

Do you have a question about the Lexmark CS725R and is the answer not in the manual?

Lexmark CS725R Specifications

General IconGeneral
BrandLexmark
ModelCS725R
CategoryPrinter
LanguageEnglish

Related product manuals