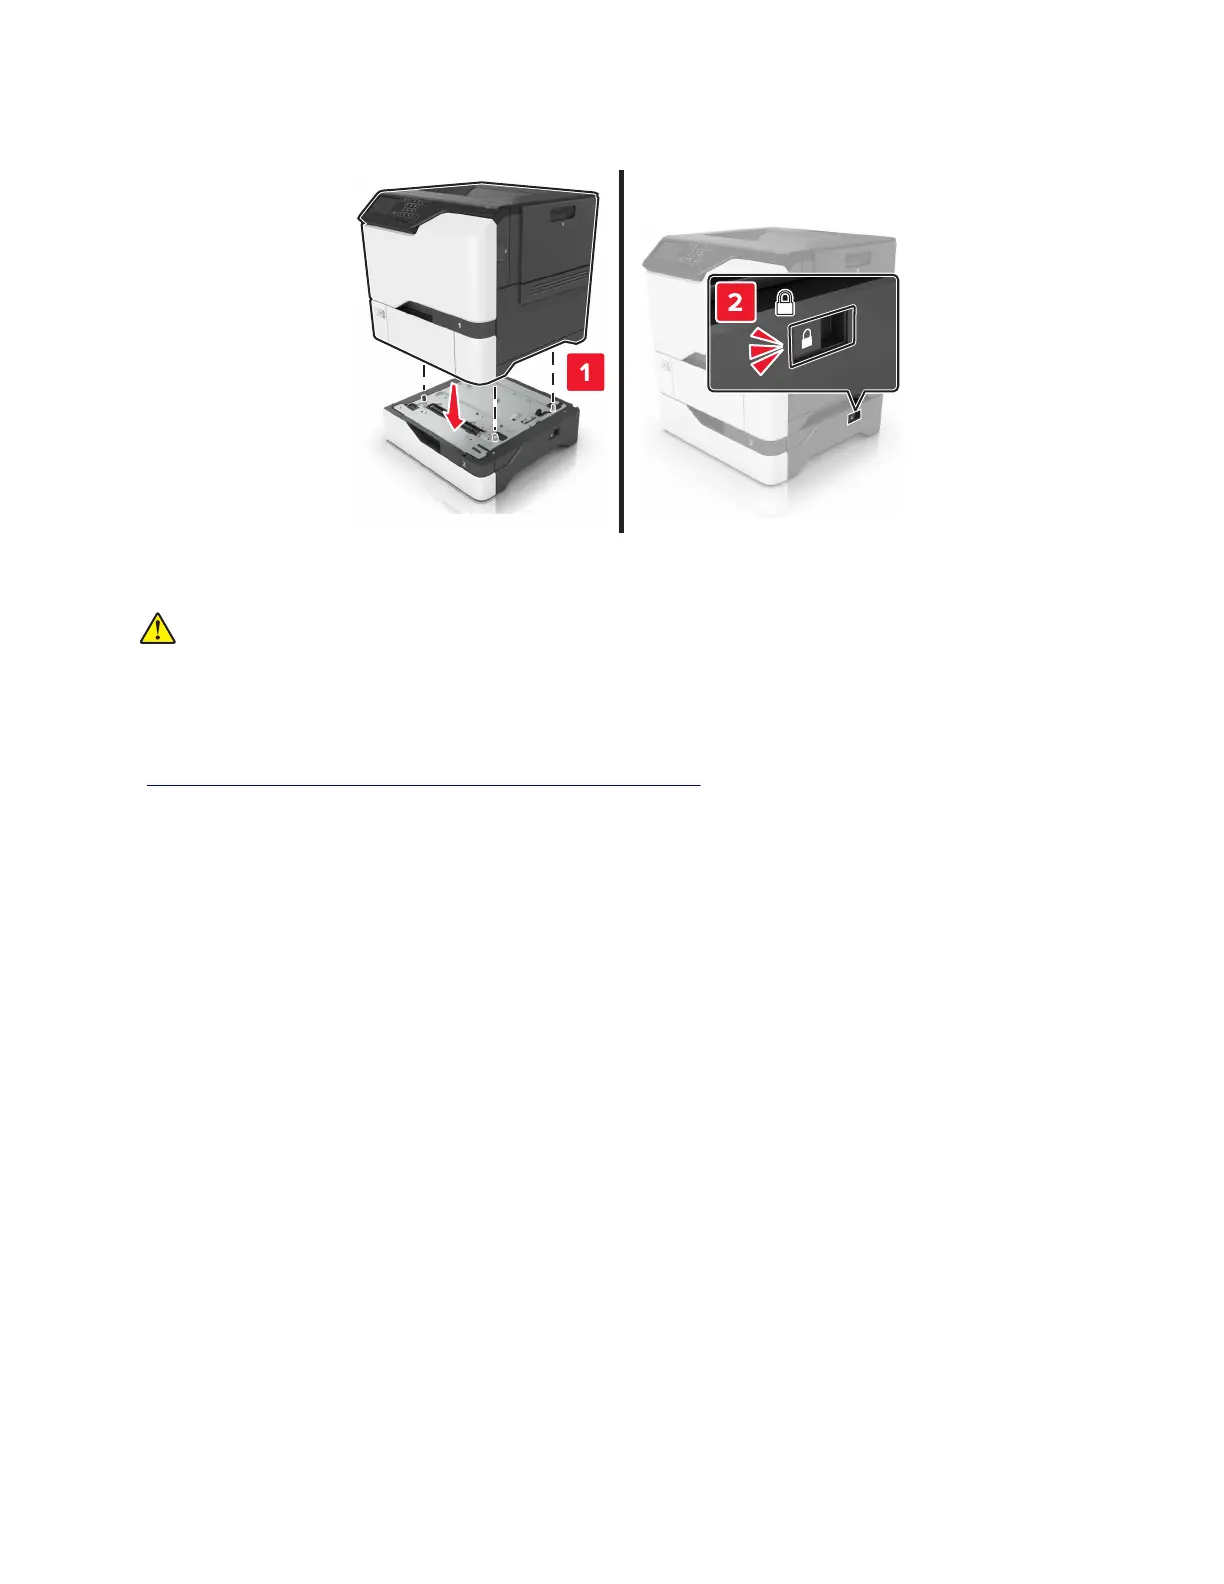
4 Align the printer with the optional tray, and then lower the printer until it clicks into place.
5 Connect the power cord to the printer, and then to the electrical outlet.
CAUTION—POTENTIAL INJURY: To avoid the risk of fire or electrical shock, connect the power cord
to an appropriately rated and properly grounded electrical outlet that is near the product and easily
accessible.
6 Turn on the printer.
If necessary, manually add the tray in the print driver to make it available for print jobs. For more information,
see
“Adding available options in the print driver” on page 450.
Install the printer and hardware options in the following order:
• Optional 550‑sheet tray
• Printer
Adding available options in the print driver
For Windows users
1 Open the printers folder.
2 Select the printer you want to update, and then do either of the following:
• For Windows 7 or later, select Printer properties.
• For earlier versions, select Properties.
3 Navigate to the Configuration tab, and then select Update Now ‑ Ask Printer.
4 Apply the changes.
For Macintosh users
1 From System Preferences in the Apple menu, navigate to your printer, and then select Options & Supplies.
2 Navigate to the list of hardware options, and then add any installed options.
5028
Appendix B: Options and features
450

 Loading...