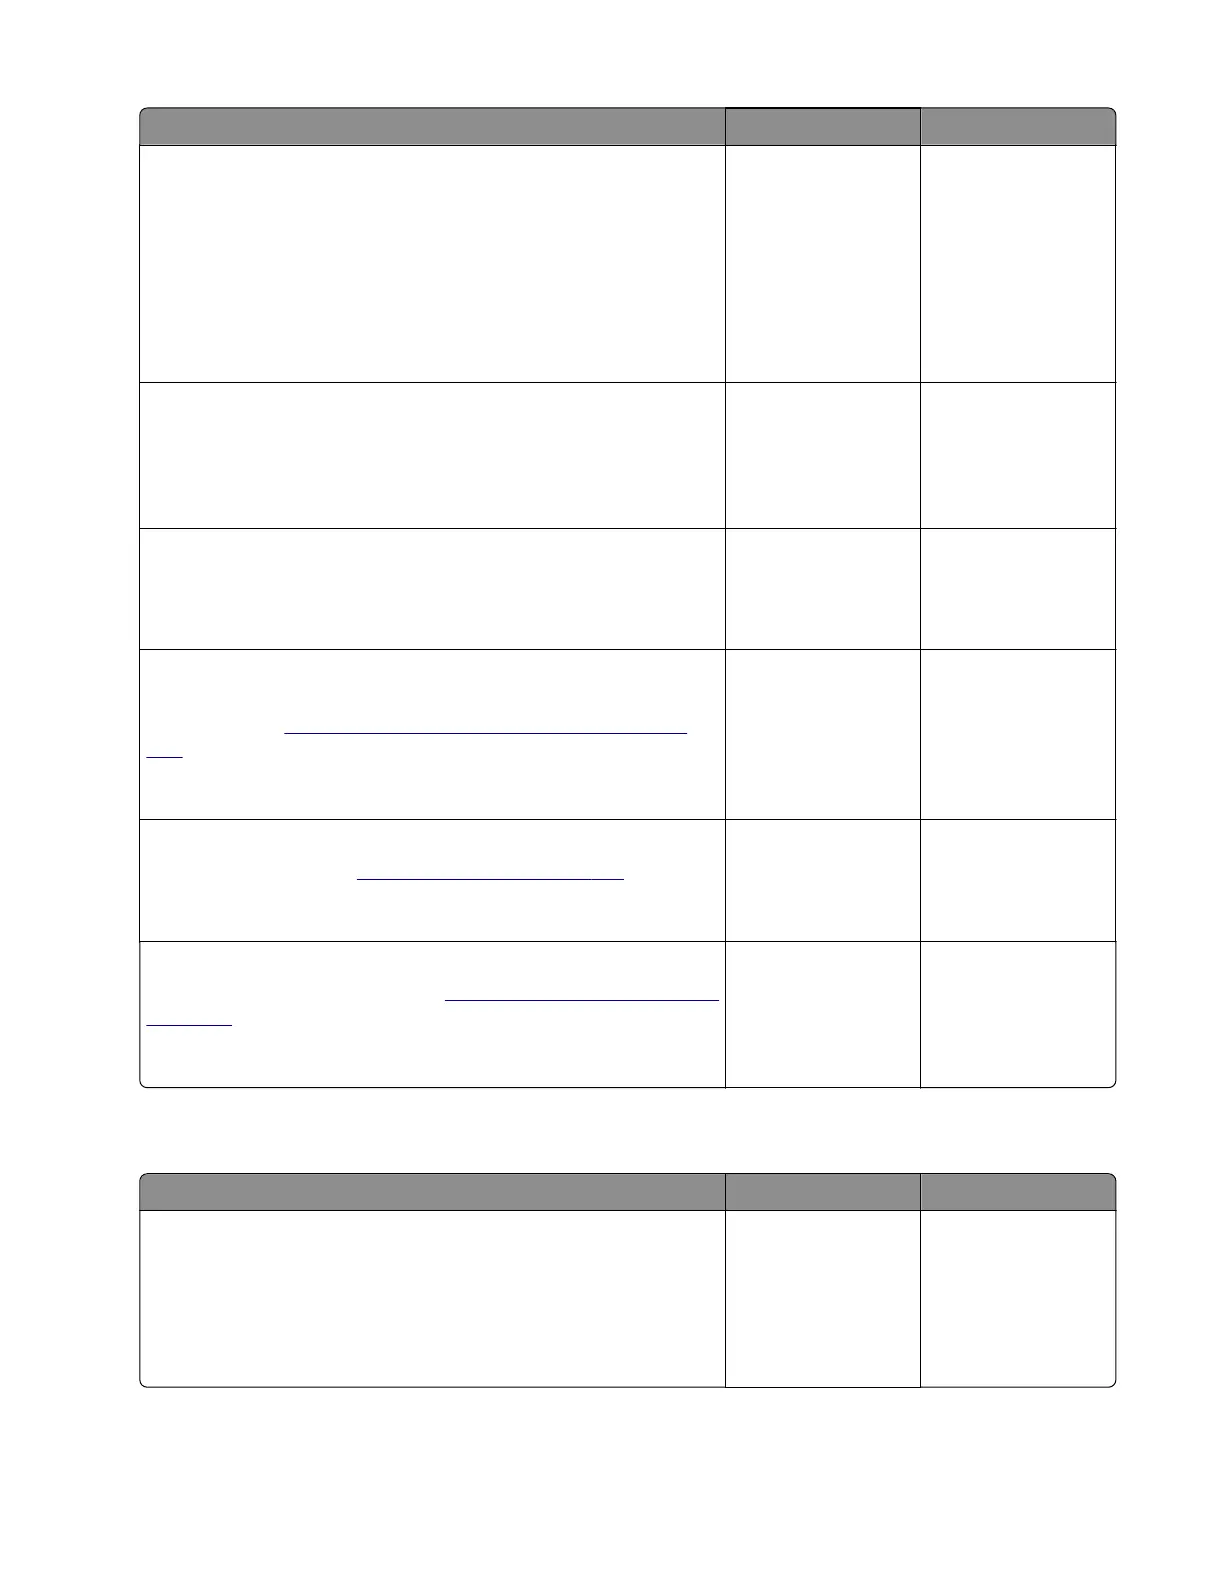
Action Yes No
Step 2
a Reseat all the developer units in the imaging kit.
b Enter the Diagnostics menu, and then navigate to:
Advanced Print Quality Samples > Advanced Print Quality
Samples
c Check the test page.
Does the problem remain?
Go to step 3. The problem is
solved.
Step 3
Check the HVPS cable for proper connection and damage, and
replace if necessary.
Does the problem remain?
Go to step 4. The problem is
solved.
Step 4
Replace the imaging kit.
Does the problem remain?
Go to step 5. The problem is
solved.
Step 5
Check the toner cartridge contacts for damage, and replace if
necessary. See
“Toner cartridge contacts removal” on page
328.
Does the problem remain?
Go to step 6. The problem is
solved.
Step 6
Replace the HVPS. See
“HVPS removal” on page 319.
Does the problem remain?
Go to step 7. The problem is
solved.
Step 7
Replace the controller board. See
“Controller board removal” on
page 357.
Does the problem remain?
Contact the next
level of support.
The problem is
solved.
Uneven print density check
Action Yes No
Step 1
a From the home screen, touch Settings > Device > Preferences.
b Check if the paper type and size settings match the paper type
and size set on the tray.
Do the settings match?
Go to step 3. Go to step 2.
5028
Diagnostic information
54

 Loading...