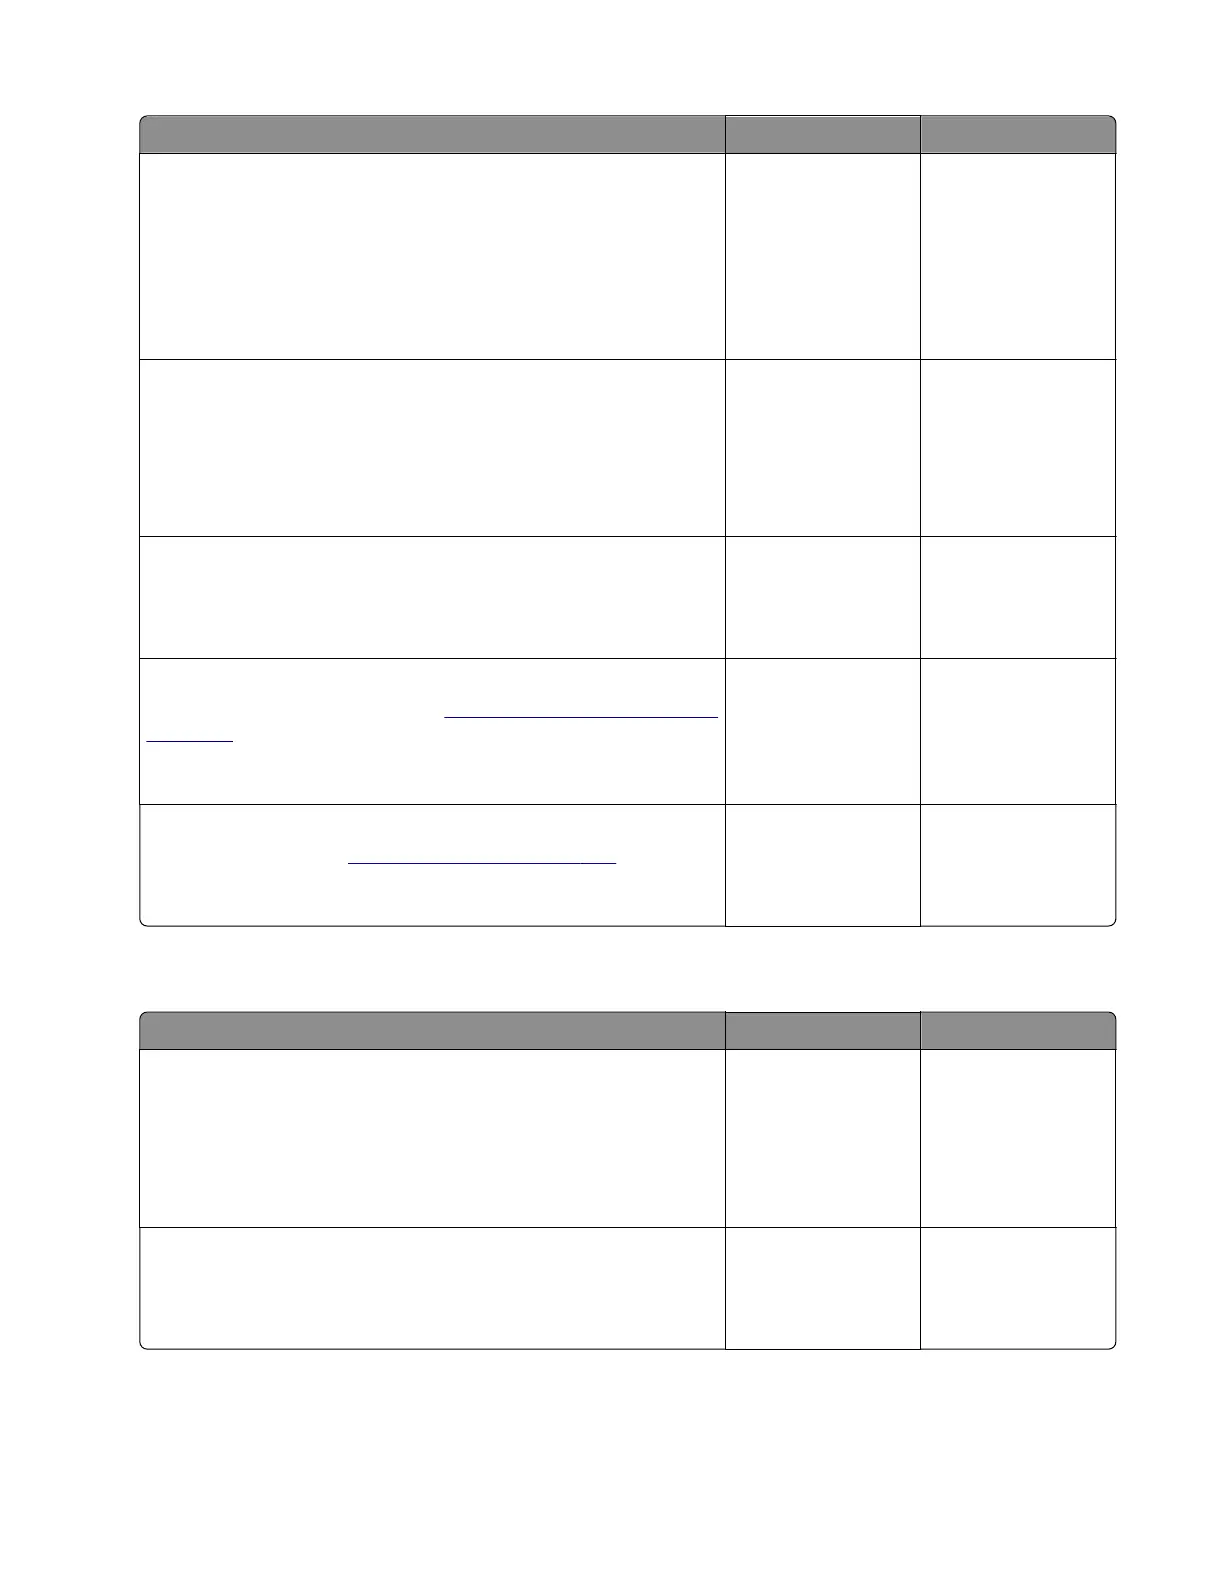
Action Yes No
Step 1
a Enter the Diagnostics menu, and then navigate to:
Advanced Print Quality Samples > Advanced Print Quality
Samples
b Check the test page.
Is only one color producing the defect?
Go to step 2. Go to step 4.
Step 2
• If the aected color is cyan, magenta, or yellow, then replace
the developer unit of the aected color.
• If the aected color is black, then replace the imaging unit.
Does the problem remain?
Go to step 3. The problem is
solved.
Step 3
Replace the photoconductor unit.
Does the problem remain?
Go to step 4. The problem is
solved.
Step 4
Replace the transfer module. See
“Transfer module removal” on
page 334.
Does the problem remain?
Go to step 5. The problem is
solved.
Step 5
Replace the fuser. See
“Fuser removal” on page 333.
Does the problem remain?
Contact the next
level of support.
The problem is
solved.
Image void scan direction check
Action Yes No
Step 1
Load paper from a fresh package.
Note: Paper may absorb moisture due to high humidity. Store
paper in its original wrapper until it is ready to be used.
Does the problem remain?
Go to step 2. The problem is
solved.
Step 2
Reseat the imaging kit, and then perform a print job.
Does the problem remain?
Go to step 3. The problem is
solved.
5028
Diagnostic information
49

 Loading...