The User Interface
133
This is achieved by selecting the Service Options screen, selecting the USB stick option from
the Capture drop down list and then tapping on the Capture button.
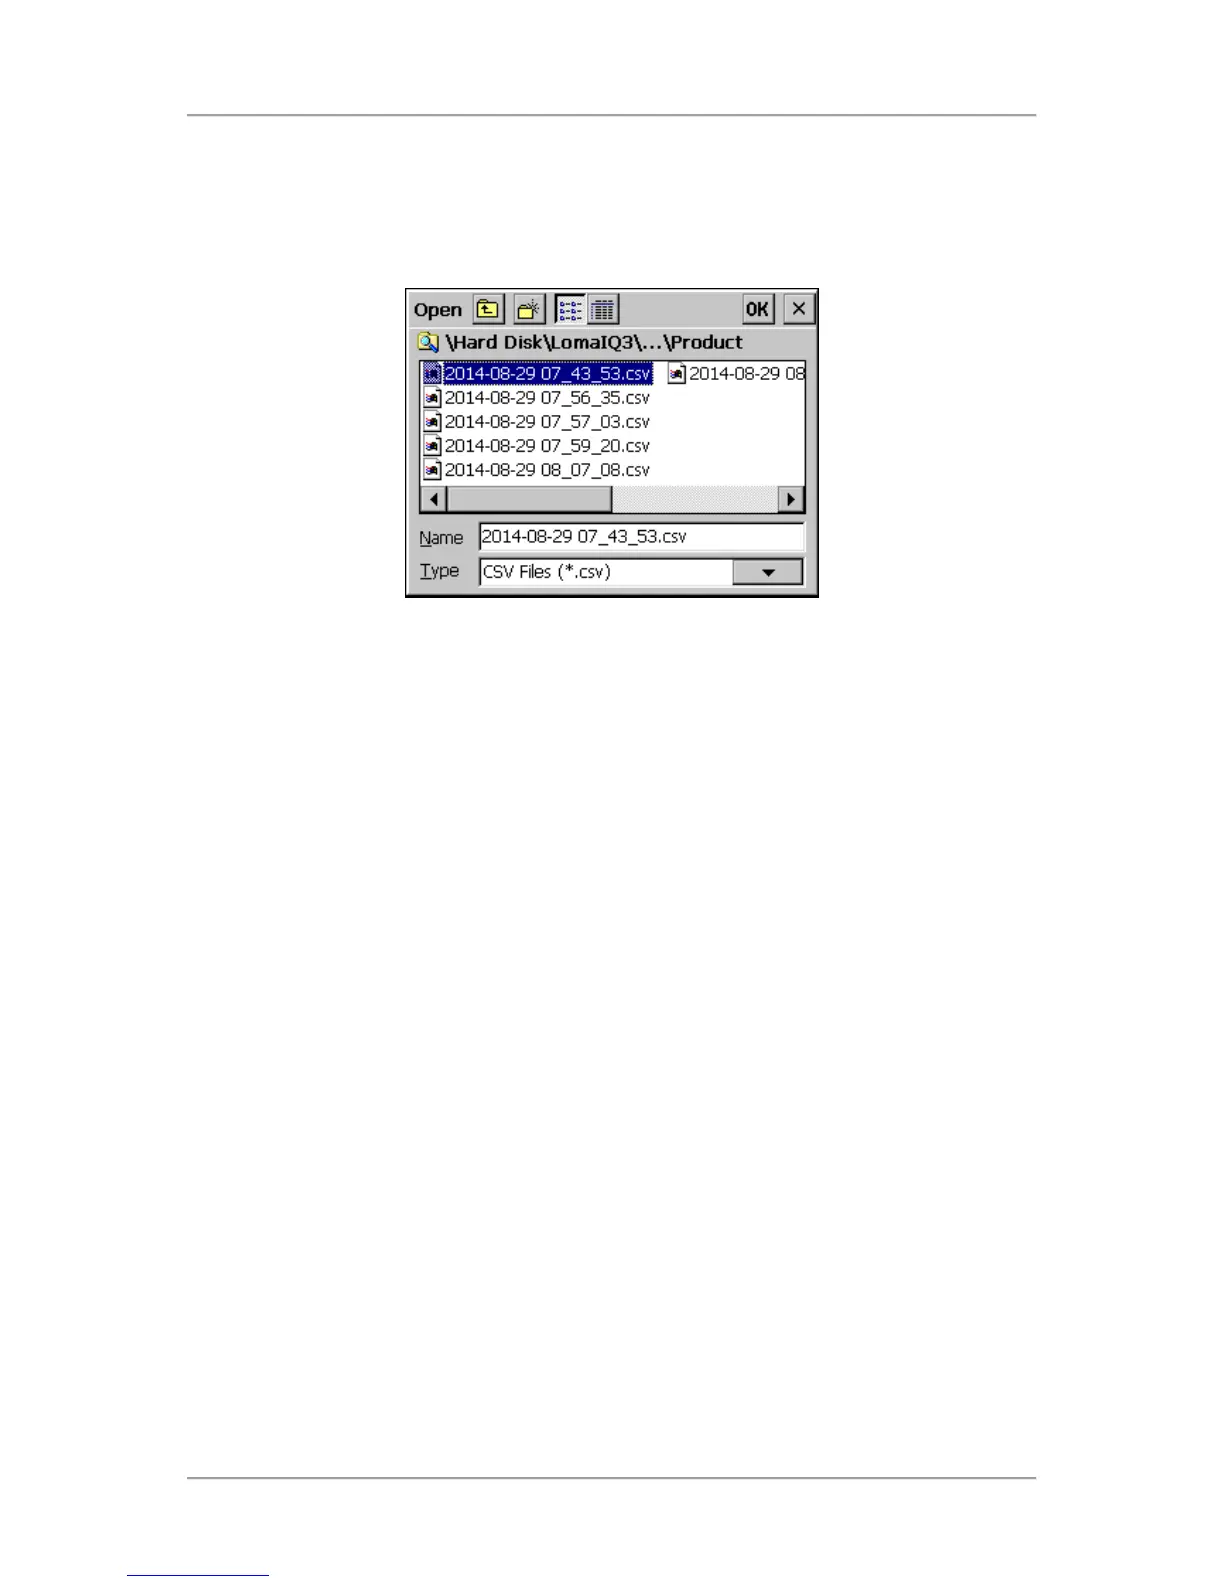
A standard file browser dialog is displayed. Double-tap on the ‘LomaIQ3’, ‘Diagnostics’ and
‘Product’ folders in turn to display the available data files. Then tap on the required file to select
it and tap on the OK button to close the dialog and load the data from the selected file.
The data will initially be displayed in the P,Q v T screen but other screens can be selected as
normal to display the data using the Screen Selection drop down list at the bottom of the
screen.
Tapping on the Capture button will open the standard file browser dialog again for you to select
a different saved file to use.
To go back to using raw data from the detector head rather than from a saved file, select the
Service Options screen, select the Metal Detector option from the Capture drop down list and
then tap on the Capture button to start a new data capture process. Once the process has
completed the new data will be displayed.
■
Screen Selection
A drop down list is included to provide access to the seven screens described below.
■
Phase angle
This field displays the maximum and minimum phase angle values captured.
■
Pmax
This field displays the maximum P channel signal value captured.
■
Qmax
This field displays the maximum Q channel signal value captured.
■
Capture / Stop
This button is used to start and stop a data capture process to obtain raw data from the detector
head. The button legend toggles between ‘Capture’, which indicates that the process has not
been started and ‘Stop’, which indicates that the process has been started.
The data capture process consists of passing a sample product pack through the detector head
at the same time as the Capture button is selected. The captured data set will consist of
approximately 200 data points, so the time scale used will depend on the belt speed.