3-36
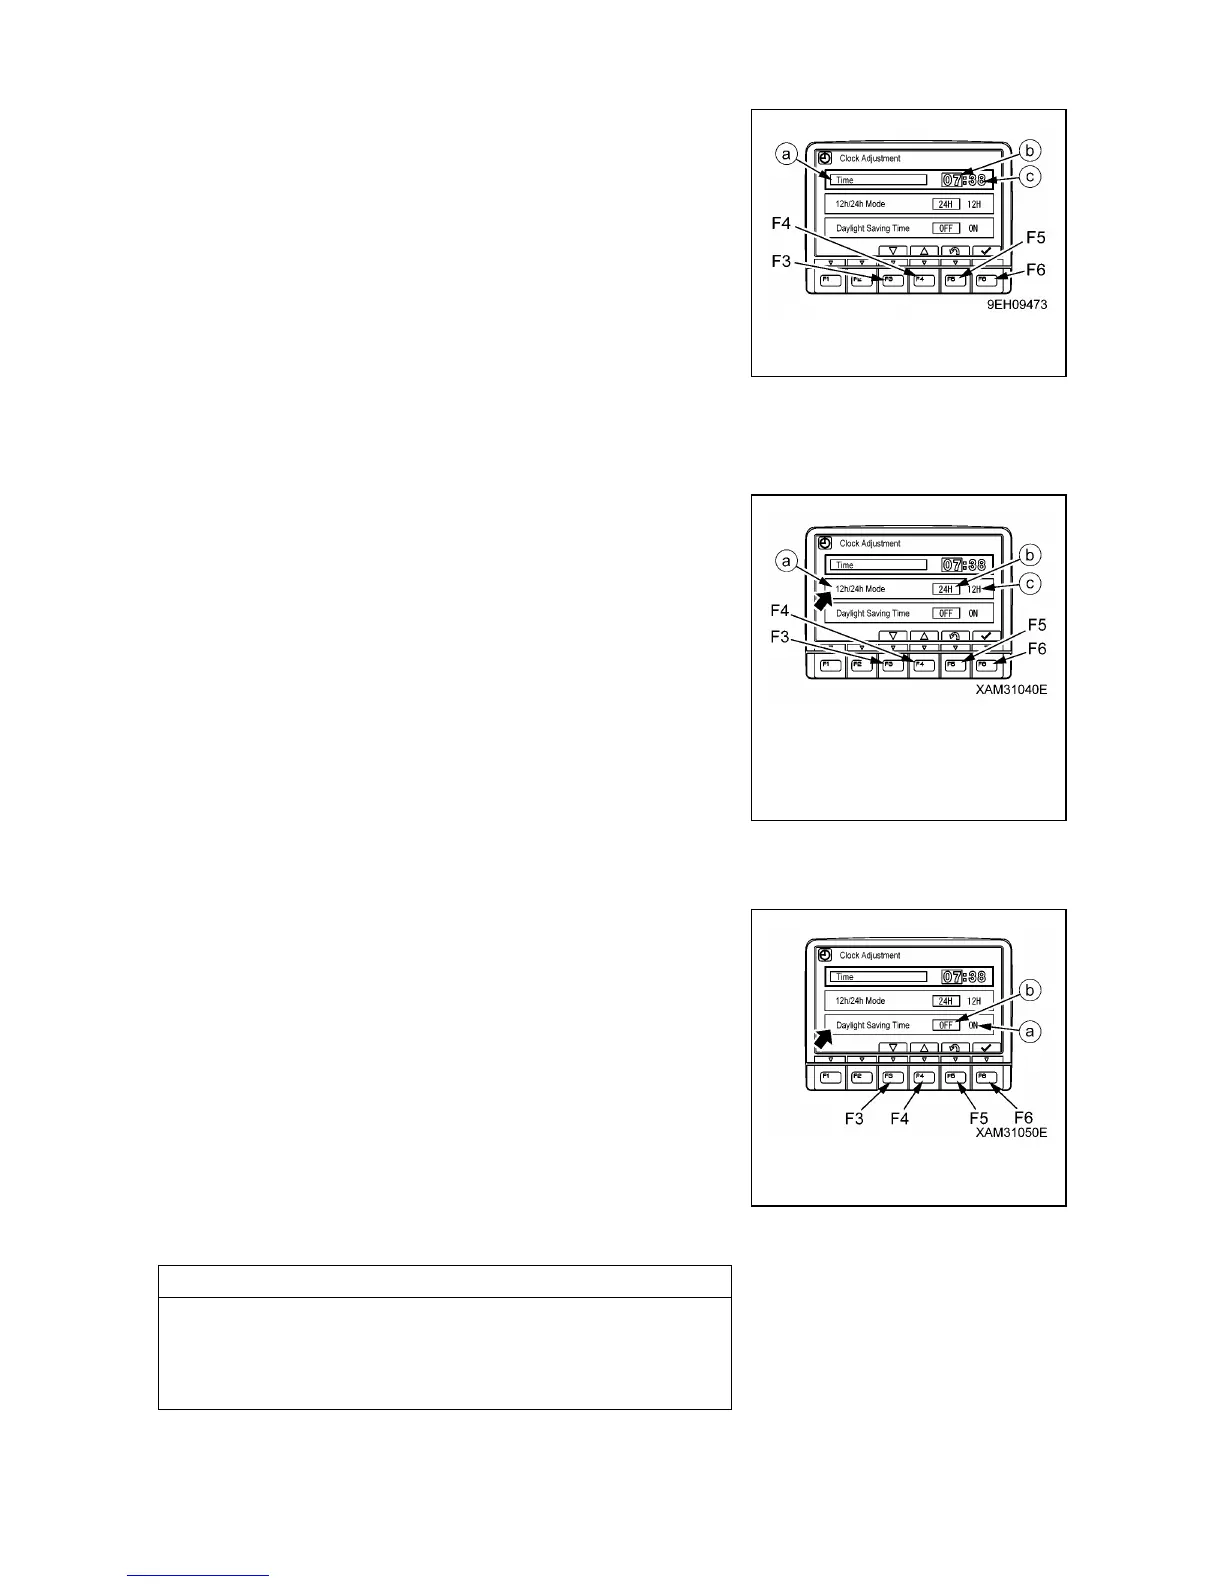
(3) When minute display (c) is highlighted in orange, operate the
switches as follows to adjust minute display (c).
(4) If it is not necessary to change the minute setting, press
switch (F6). If the time has been changed, always press
switch (F6).
• Switch (F3): Time advances 1 minute.
• Switch (F4): Time goes back 1 minute.
• Switch (F5): Cancels change and returns to user menu
screen.
• Switch (F6): Accepts change and goes to setting for 12/24
hour display mode minutes.
[12/24h Mode]
Choose either a 12-hour display (am/pm) or a 24-our display.
(1) If “12h/24h Mode” (a) is not highlighted in yellow, press
switch (F6) to highlight “12h/24h Mode” (a) in yellow.
(2) Change the “12h/24h Mode” with the switches as follows.
The selected display mode (b) or (c) is highlighted in green.
• Switch (F3): Moves 1 item to left.
• Switch (F4): Moves 1 item to right.
• Switch (F5): Cancels change and returns to user menu
screen.
• Switch (F6): Accepts change and goes to setting for
“Daylight Saving Time” minutes.
If the setting has been changed, always press switch (F6).
[Daylight Saving Time (Summer time)]
(1) If “Daylight Saving Time” is turned ON (a), the clock display
becomes 1 hour earlier. If “Daylight Saving Time” is turned
OFF (b), the clock display returns to the set time.
The selected display mode is highlighted in green.
(2) Change the “Daylight Saving Time” with the switches as
follows.
• Switch (F3): Moves 1 item to left.
• Switch (F4): Moves 1 item to right.
• Switch (F5): Cancels change and returns to user menu
screen.
• Switch (F6): Accepts change and goes to setting for “Time”
If the setting has been changed, always press switch (F6).
 Loading...


